Hi All, dont you just love the Nutanix Synchronous data replication? So we can achieve a RPO0 (Zero) configuration and even do Cluster to Cluster Live migration. Now with the Nutanix Files 5.2 release we can do this even with Nutanix Files. (Release Notes) In this blogpost I will write down how to configure this. In my lab I´m running 2 clusters (AOS 7.3.0.7) each connected to the same Prism Central (version 7.3.0.6). I’ve deployed Nutanix Files 5.2 on 1 cluster (Cluster1) via Prism Central. (So it is managed via Prism Central). All steps below are done in Prism Central.
First me must make sure there is a storage container with the same name as where the current Nutanix Files stores his data. In my case it is: NTNX_files_ctr. Make this storage container also on the other cluster with the same settings:

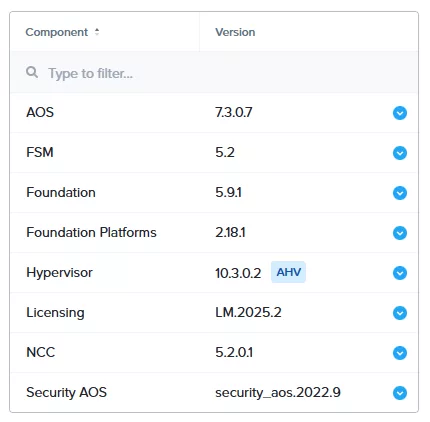
The next preparation step is to run LCM and make sure both clusters (and Prism Central) are running the same FSM version. In my case 5.2
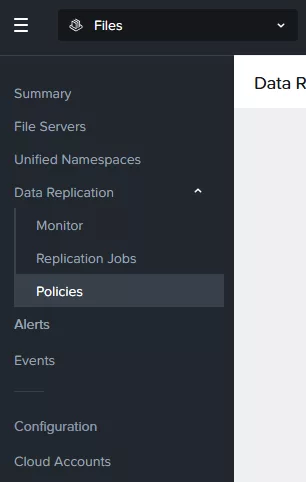
Now it is time to configure the Synchronous replication. In the Files dashboard navigate to: Data Replication –> Policies.
Click on: New Replication Policy. The following screen appears:
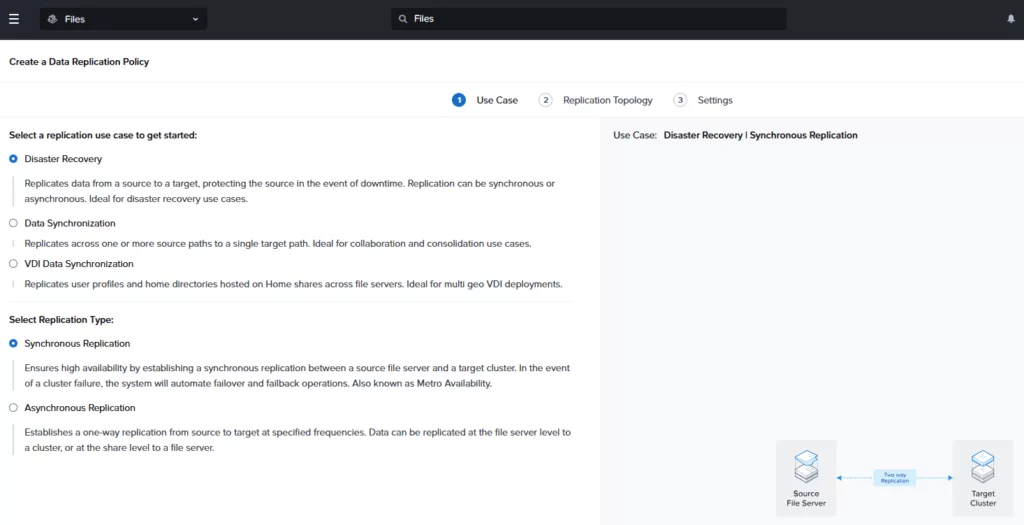
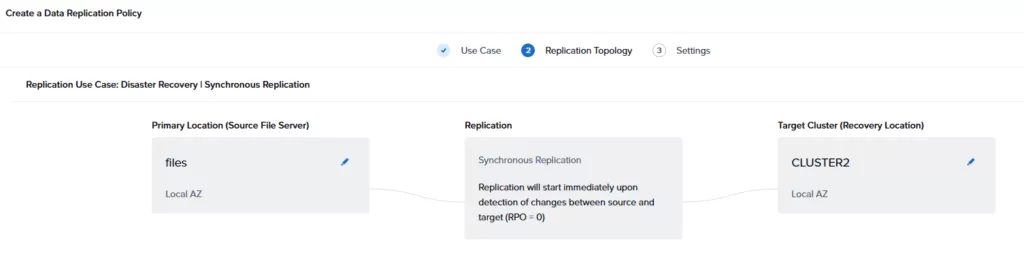
As you can see I selected Disaster Recovery and on the second selection I chose Synchronous Replication. And the bottom right we click on Next.
In the following screen we need to select the Nutanix Files clusters (in my case the files cluster is named “files”) on the left and on the right we select the target Nutanix cluster. As we are doing synchronous replication we dont select a target files cluster but we select the target Nutanix cluster. And click Next at the bottom right.
Now it is time to name the policy (and description) and map the networks. Network mappings will let the failover place the virtual machines (Nutanix Files VMs) in the correct network on the other cluster.

When the policy is created you will see that it is in the process of syncing. In my case it is the initial full sync to the other cluster.

And when all is in sync you should see a green label with Synced in it 😉

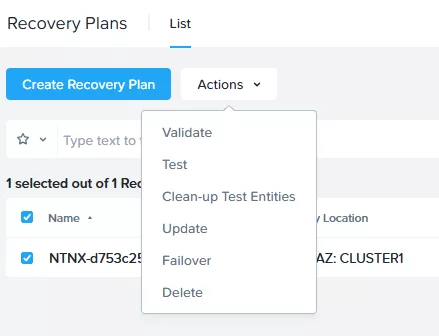
When the Replication Policy was created it automatically created a Recovery Plan (find it in Prism Central –> Infrastructure –> Data Protection –> Recovery Plans) which has the correct settings to do the failover. We can do a validation, test and failover. The same as we know for the normal Recovery Plans. In my case I will do the failover (Planned – Live) to see if it keeps on running. I have a powershell running which creates random files on the share. While it is doing its magics I will do the failover. Select the Recovery plan and select from the actions menu –> Failover.
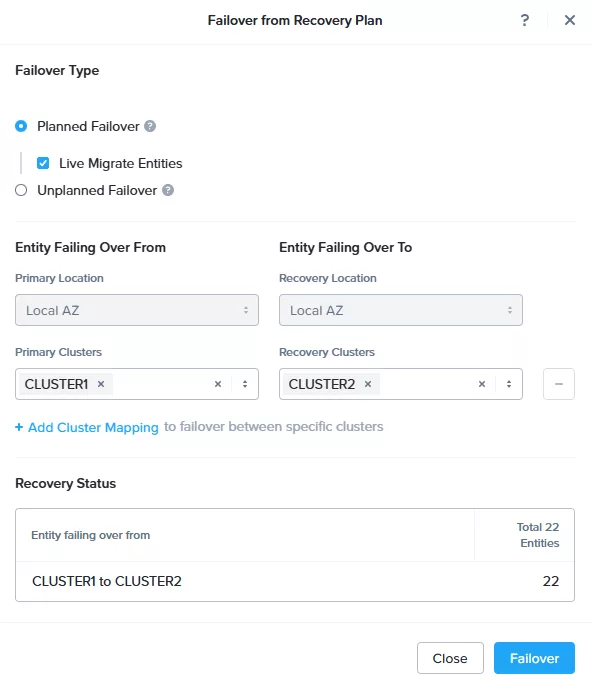
I dont want any downtime so I select “Live Migrate Entities”. Select the correct primary and recovery clusters and click: Failover.
The cluster will do its magics and the volume group attached to the FSVMs (File Server Virtual Machines) will be migrated to the other cluster and when that is done the FSVMs will go to the other cluster. You can see that behaviour configured in the Recovery Plan:
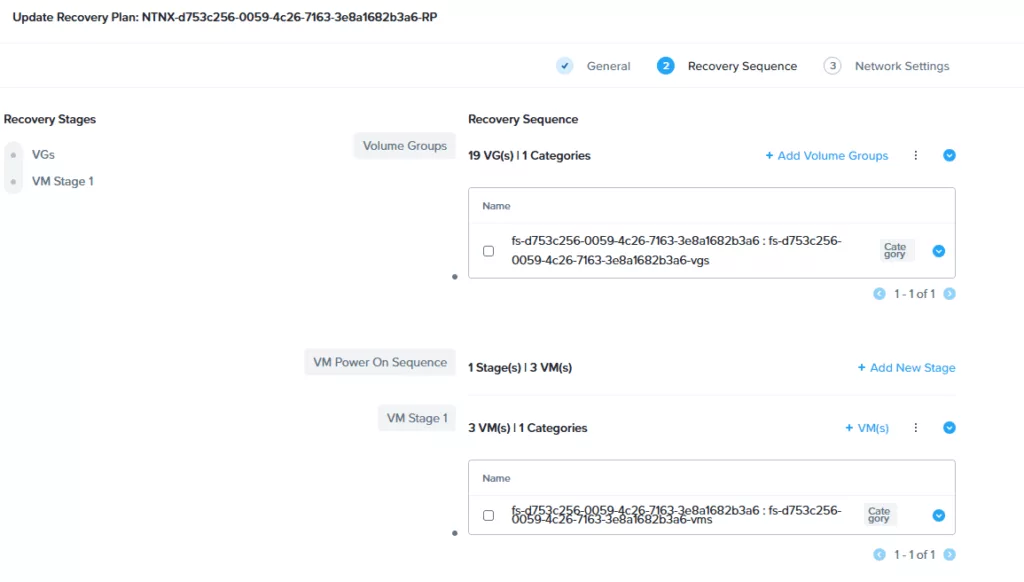
It will use a created category as you can see. If we look at the category it will look like this:
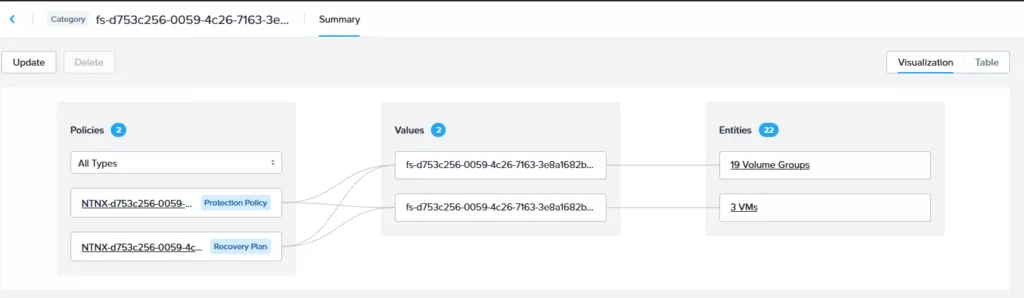
The three FSVMs and all volume groups are tagged with the correct category and those 2 categories are in the Recovery Plan.
There is only 1 downside. You need NUS licenses for each cluster. So if you have an 8TB NUS license on 1 cluster you need the same amount of NUS licenses on the other cluster. Which means for 8TB data you need 16TB license.
Discover more from Jeroen Tielen
Subscribe to get the latest posts sent to your email.