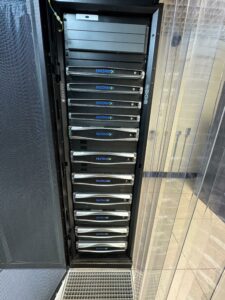
As you probably know I have one of the coolest Nutanix labs in the world 😉 (Including 4 nodes with Nvidia GPU). Look at those babies:
And they are for rent as wel, more info here: https://www.tielenconsultancy.nl/nutanix-cluster-rental/
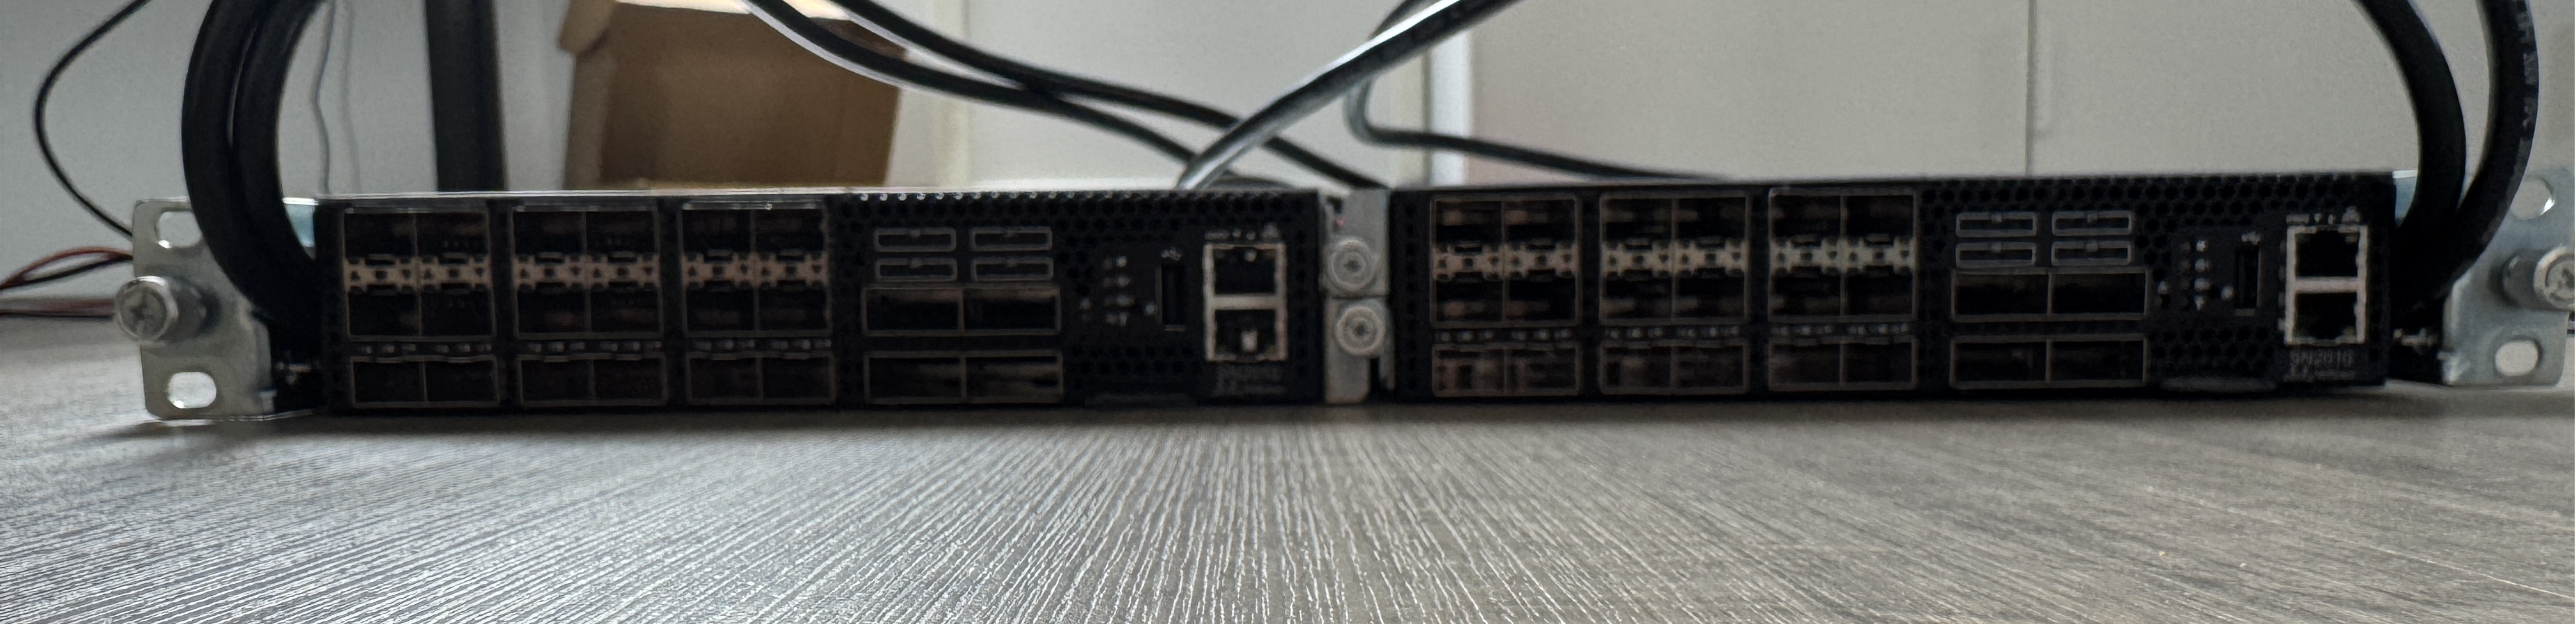
This week I got myself a lovely set of two (2) Mellanox SN2010 switches, to replace my Mikrotik SFP+ switch and the Cisco Nexus 9300. Specially the Cisco is a power sucker and the Mellanox boxes will use approximately 53 Watt on idle. So it is a no-brainer to swap the switches for these 2. This will give me plenty of switching power (1.7Tbps per switch) and so my Nutanix lab is not over subscribed anymore on switching power and uses less power 😉 But it was not a matter of just replacing the switches and pour me a beer 😉 Hereby (just for reference for myself) the steps getting them up and running.
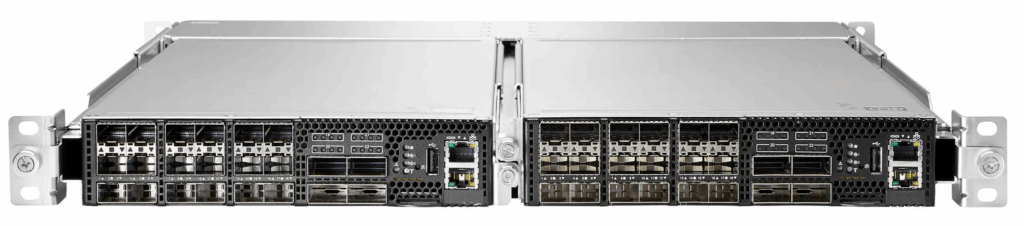
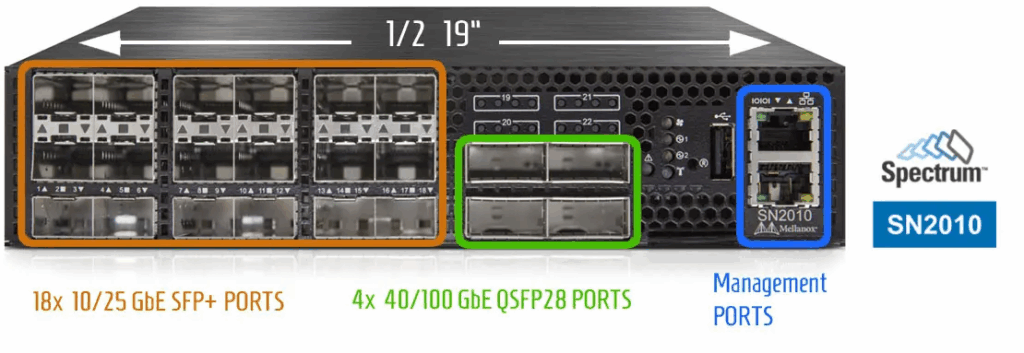
Two switches in 1U 19″ rack mount and awesome specs:
Factory reset:
First of all factory reset the switches to start all over. This was easy. Powerup the switches (wait a couple of minutes) and hold the reset button at the front of the switches for 15 seconds. Release the button and the switch will reboot.
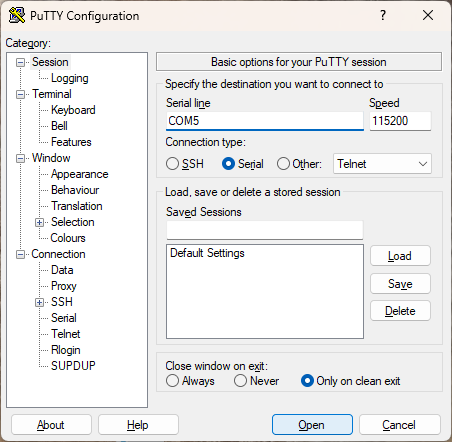
Connect, via serial connection, to the switch:
Now the switch will ask some question which I will cover later (after disk replacement) 😉 Hereby the steps to get the web interface up and running (because the web interface is so much easier then cli)
- enable
- configure terminal
- password age expiration 0 no
- web https ssl
- secure-cookie enable web http enable
- exit
- write memory
Upgrade
When logging into the web interface you can chose to upgrade the software (Mellanox/Nvidia Switches are running Onyx). After the software was upgraded I was in this boot loop:
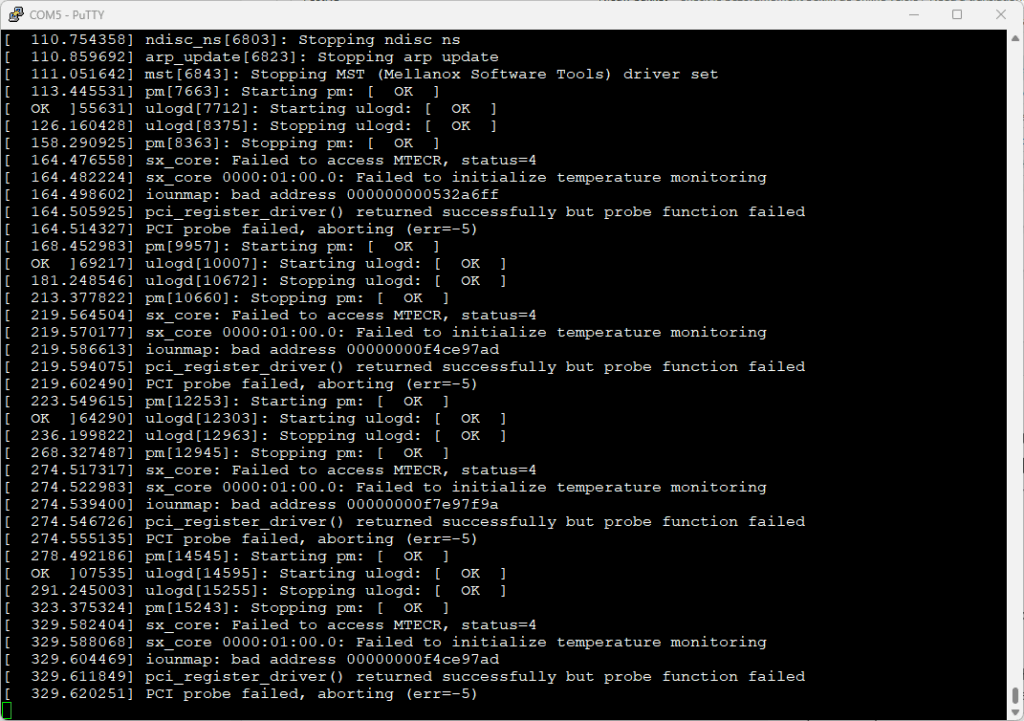
Broken Disk:
The error in the screenshot above pointed me that the disk was broken 🙁
So I ordered two new M.2 disks. The model is a M2-2242 (for reverence).

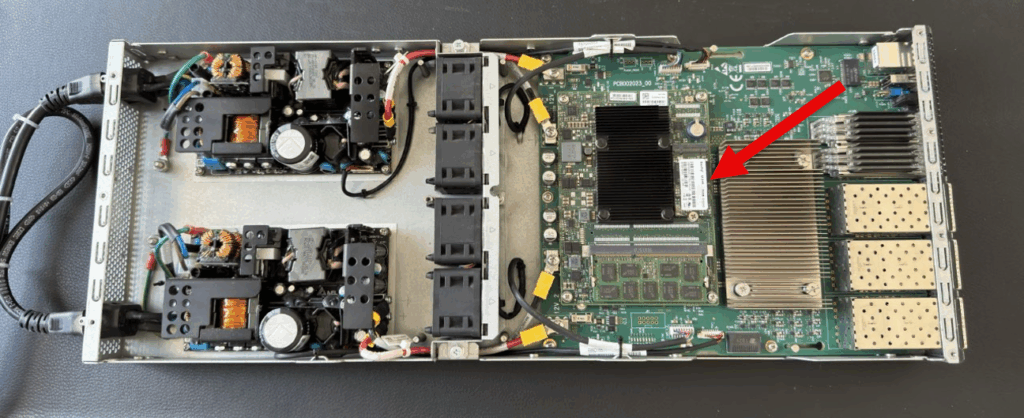
Replace the broken disk with the new one.
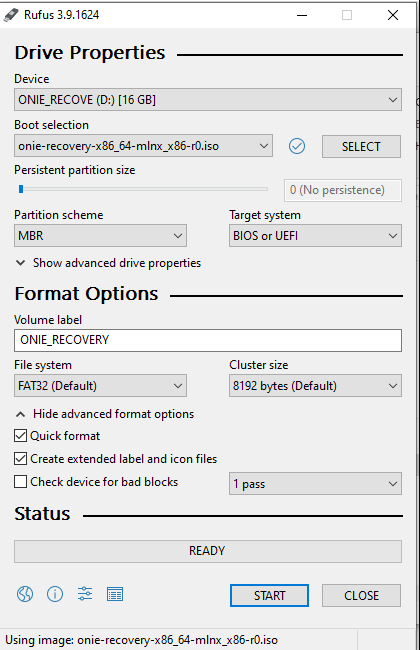
Prepare USB stick:
Before we can use the new disk we must intall ONIE (Open Network Install Environment) on it. Download the ONIE installer file (can be found in this forum thread: https://forums.servethehome.com/index.php?threads/mellanox-switches-tips-tricks.39394/)
Make sure you use Rufus 3.9.1624 (Because of the grub version in the onie-recovery iso)
Install ONIE:
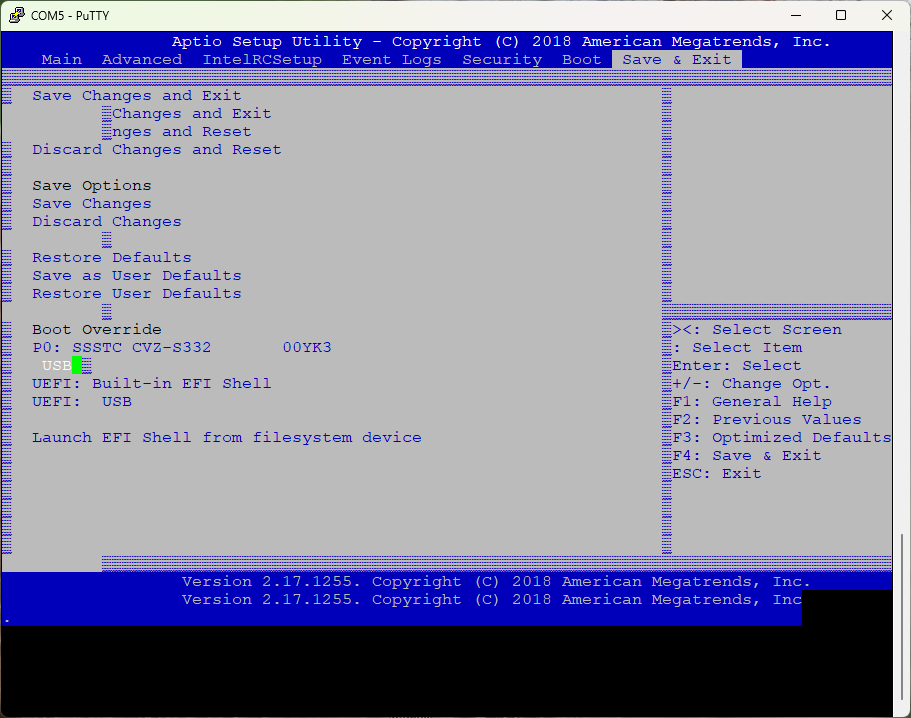
When the USB drive is placed boot the switch and press CTRL-B to enter the BIOS:
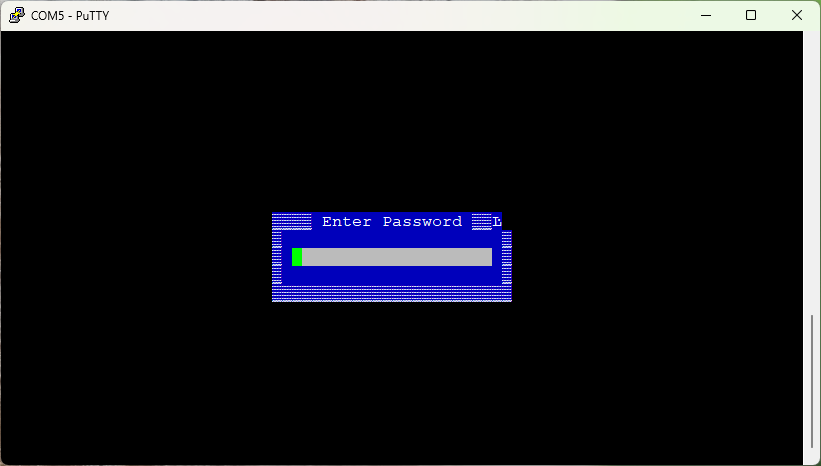
Default password to enter BIOS is admin. Go to the boot page and change the boot method from DUAL to Legacy.
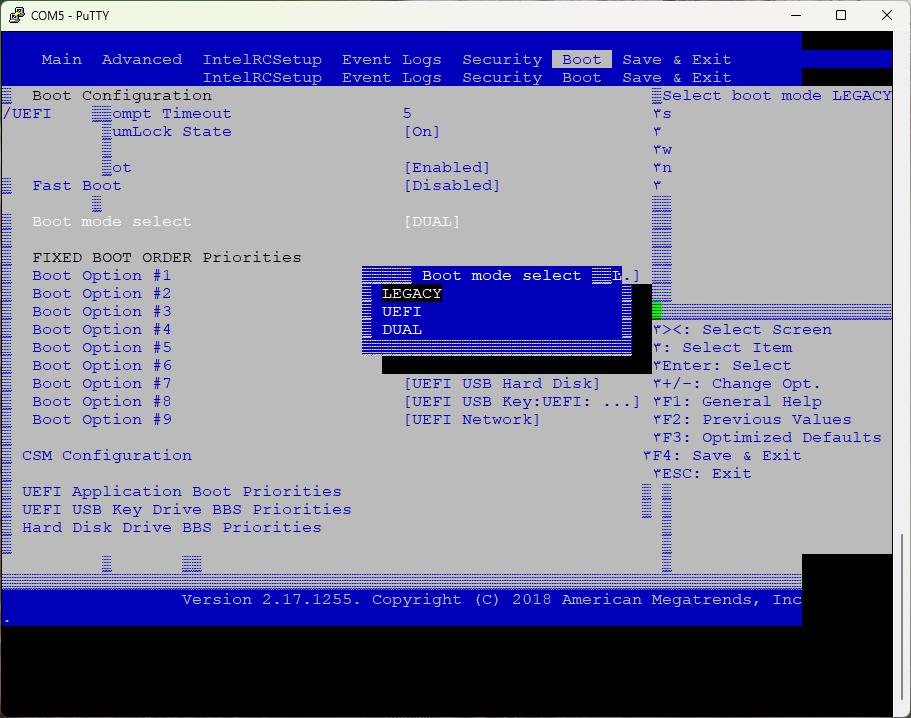
Go to Save & Exit and chose the USB drive (don’t select UEFI USB if it is still present)
Now the switch will boot from the USB drive and you need to choose Embed ONIE.
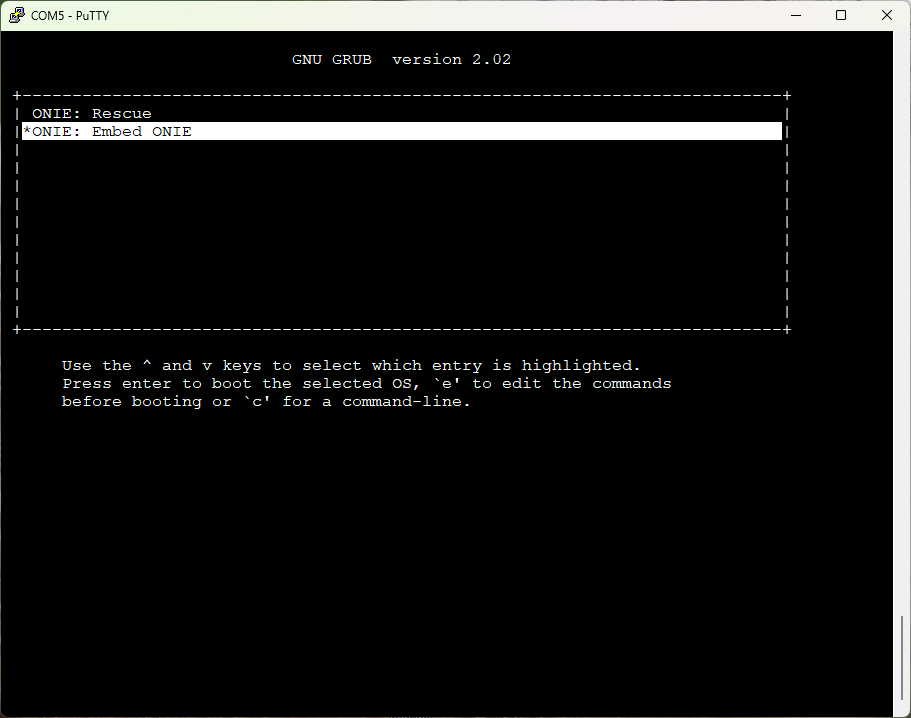
This will install the ONIE environment on the switch. After the installation is done reboot the switch (remove the USB drive) and choose ONIE: Install OS
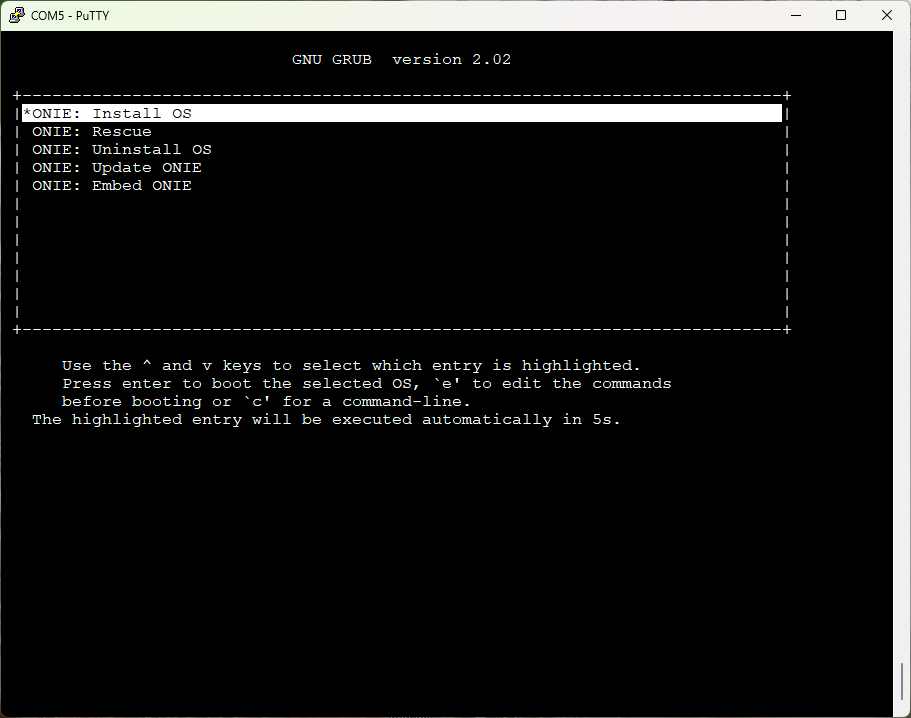
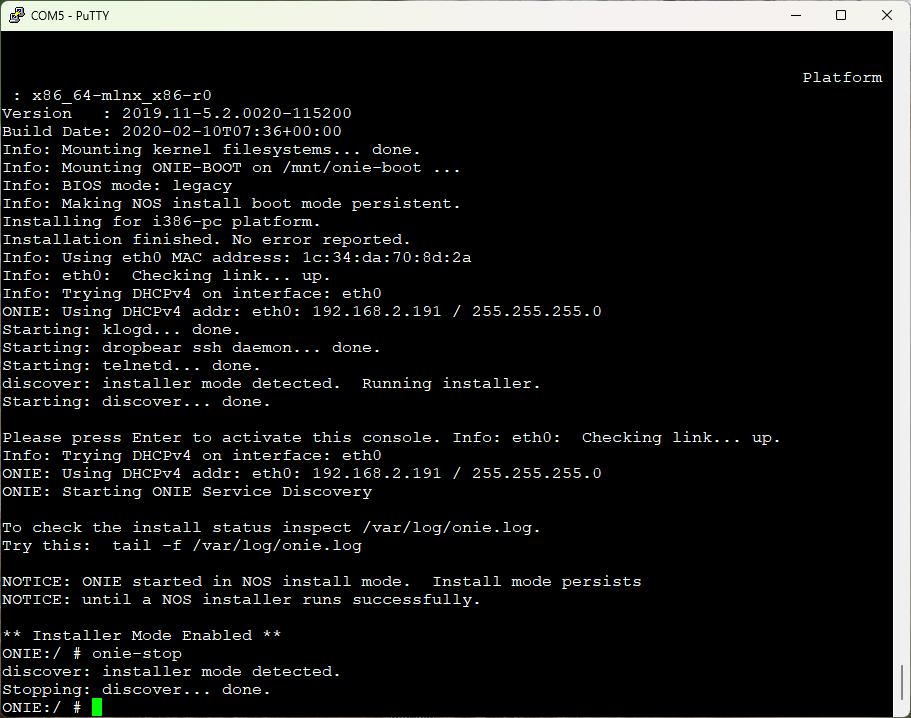
ONIE is powerfull and you can install the software with lots of different methods. I’m just using the easy method by uploading the file and install it from local drive. When ONIE is booted it will show you the ip-address of the switch. (Yes, for easier installation a DHCP server is conveniënt) Make a note of it and stop the installer mode with the command: onie-stop
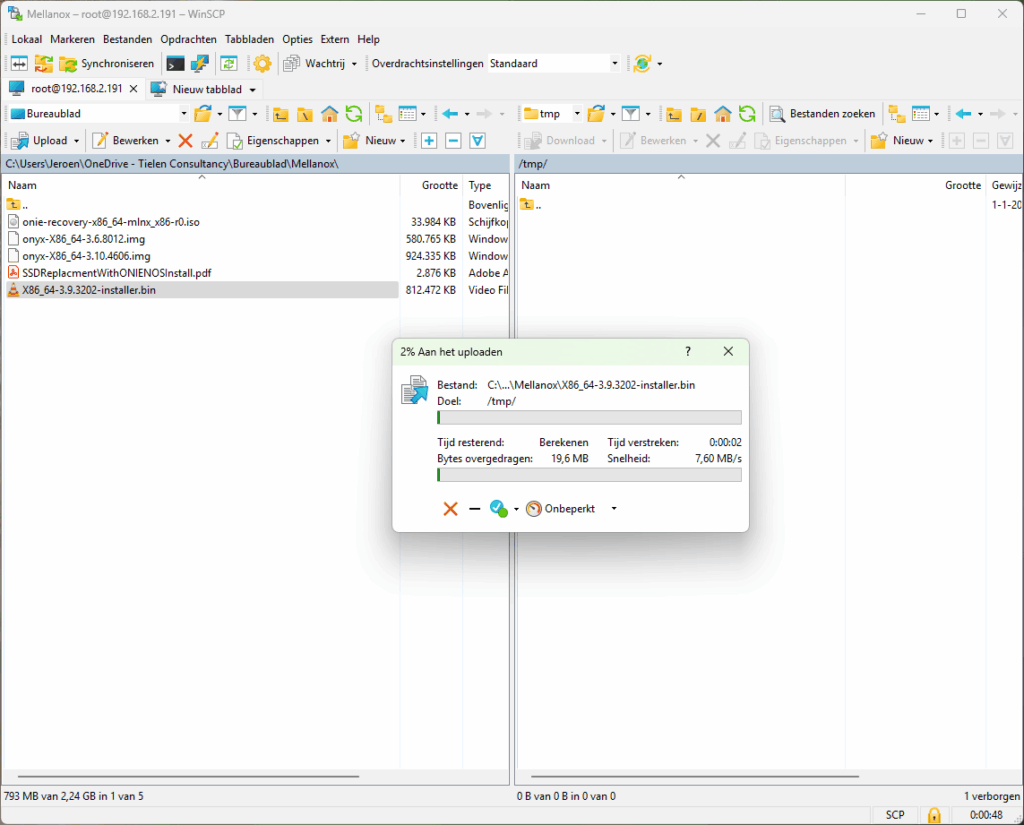
Upload the Onyx installer file via WinSCP to /tmp. The login is root and the password is blank (blank as in “no password”)
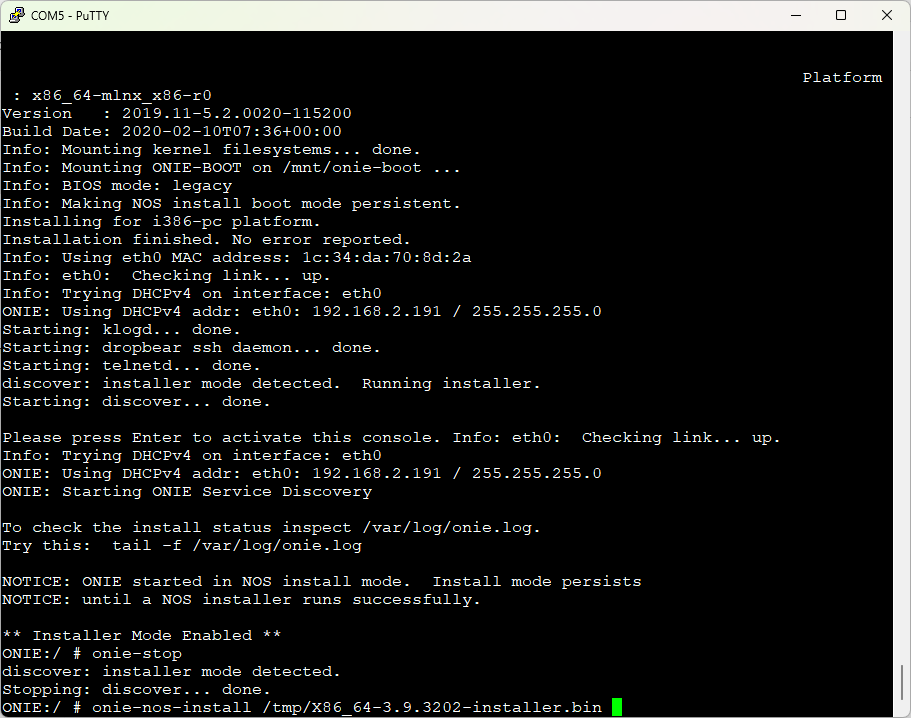
When the file is uploaded jump back the the console and type: onie-nos-install /tmp/X86_64-3.9.3202-installer.bin
Wait until completely finished and reboot the switch.
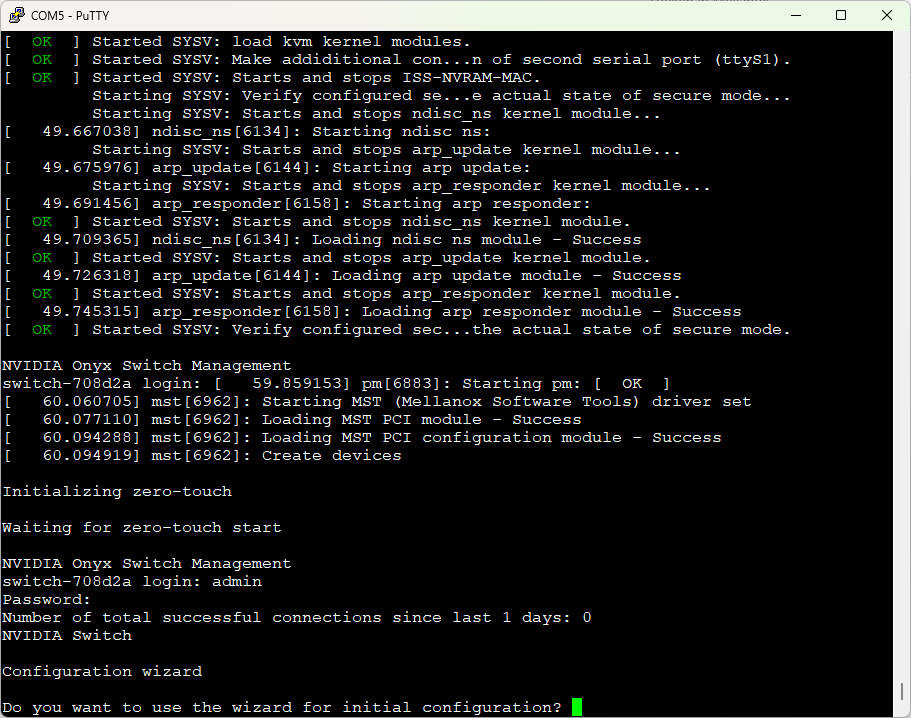
Now we can configure the switch with an initial configuration. Just fill-in everything:
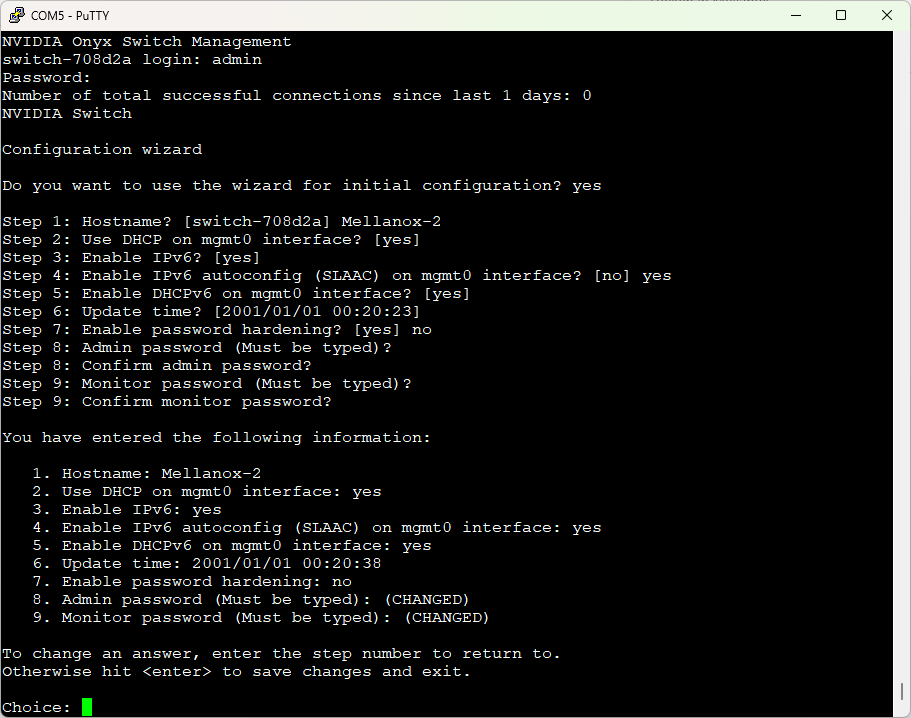
Hit enter to apply the config. And go to the web interface:
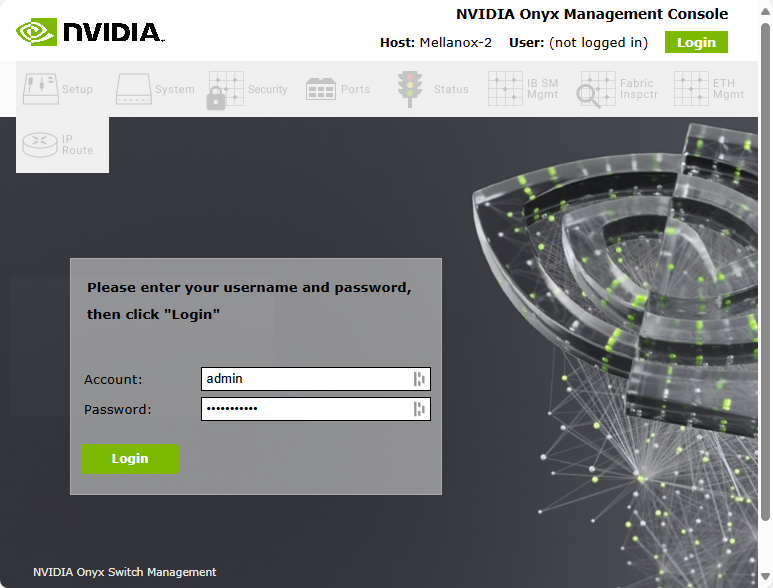
Login and upgrade this beauty to the latest and greatest (for my model) 3.10.4606 version.
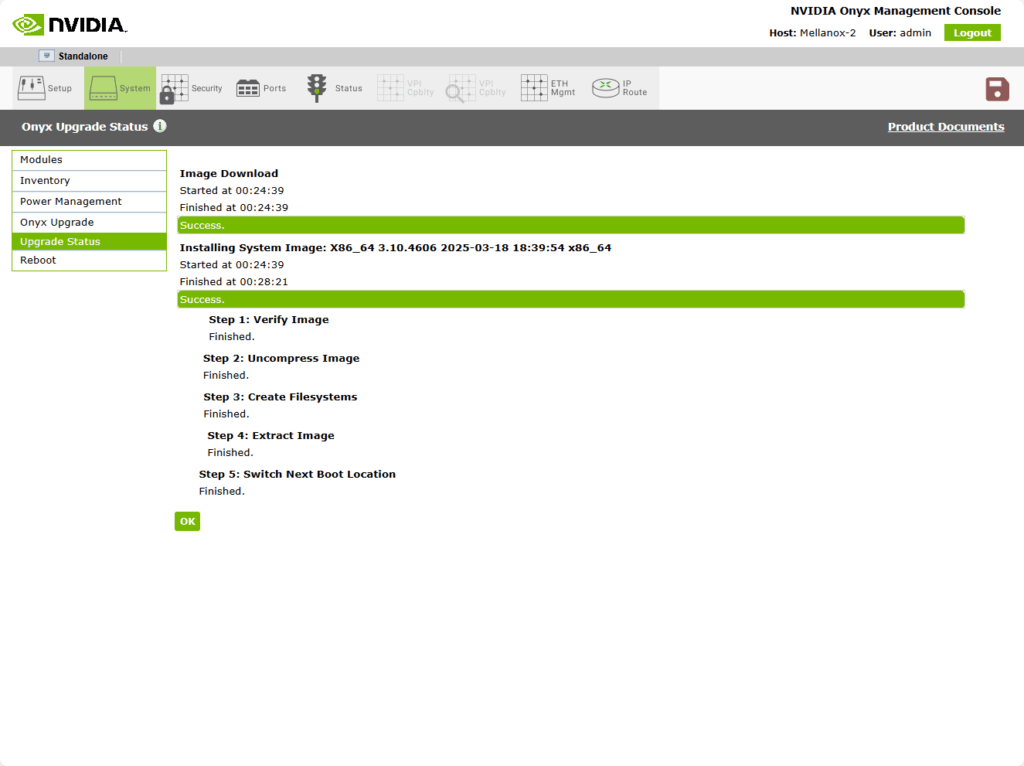
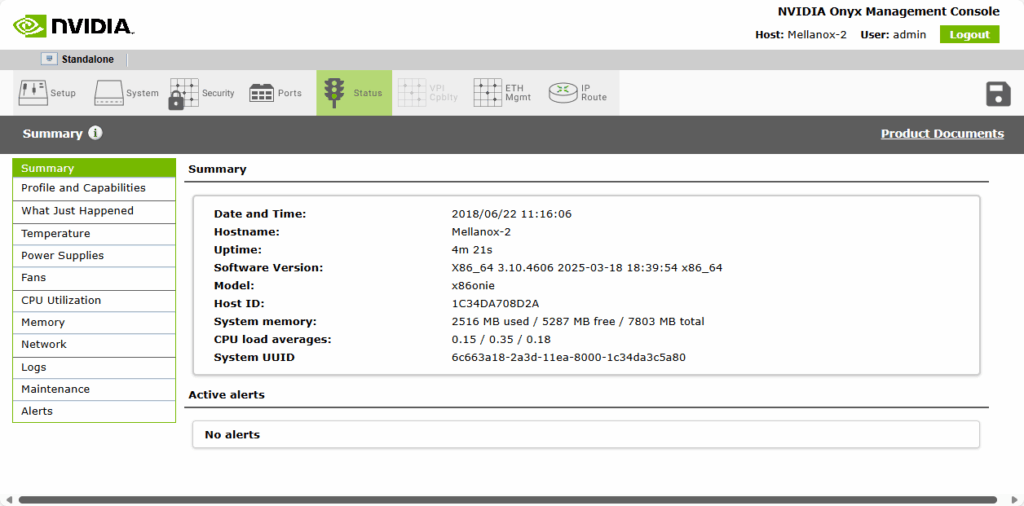
Reboot the switch to boot into the new version.
Now I need to configure them and throw them into the car and mount them in the datacenter.
Look at those beauties:


Could you please provide the appropriate download link for obtaining the latest firmware package?
Thank you for your assistance.
You can find all files in this topic: https://forums.servethehome.com/index.php?threads/mellanox-switches-tips-tricks.39394/