In this post I will describe how-to add an extra data disk to a single node Nutanix Community Edition (CE) cluster. Before we start I want to point out that more then 4 disks is not within the requirements for CE. See: https://portal.nutanix.com/page/documents/details?targetId=Nutanix-Community-Edition-Getting-Started-v2_1:top-sysreqs-ce-r.html (Boot drive is not counted within those 4 drives). And CE is not for production workloads.
Some pointers:
After reboot the added drive is gone again 😉 And you cluster is broken.
This is not for nvme drives.
Added SSD’s can be seen as HDD, update you hcl.json
It is easier to just reinstall the CE node/cluster 😉
Oké lets start. My CE installation is currently having the following layout:
- 200GB Disk for CVM;
- 500GB Disk for Data.
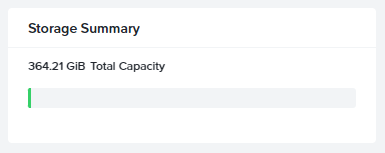
Resulting in:
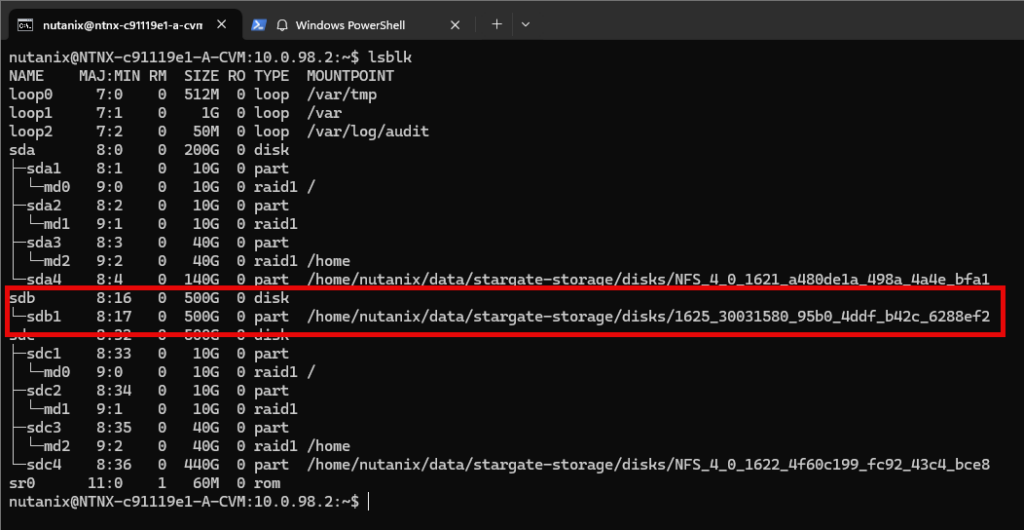
On normal production clusters, you will just plugin the extra disks and the storage pool will automatically extends his capacity. With CE this will not happen automatically. So I need to stop the cluster, shutdown the cvm, shutdown the node, add the disk and startup the node again. When the node is booted login to the CVM and shutdown the CVM again (sudo shutdown -h now). Now login to AHV with the root account and check if the new disk is shown. Run command: lsblk
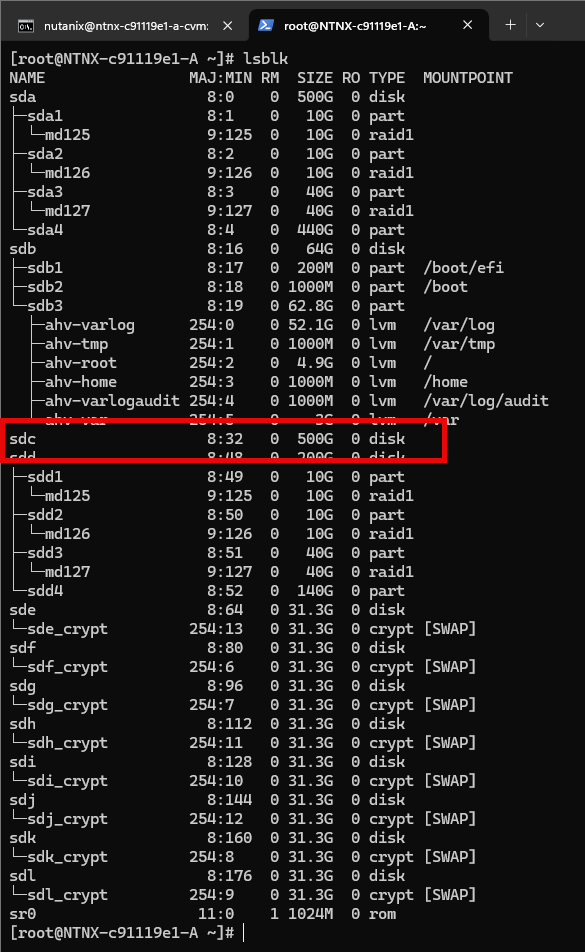
Make a note of the disk name. In my case it is “sdc”
Now we must get the id-name of the disk. Run: ls -al /dev/disk/by-id/
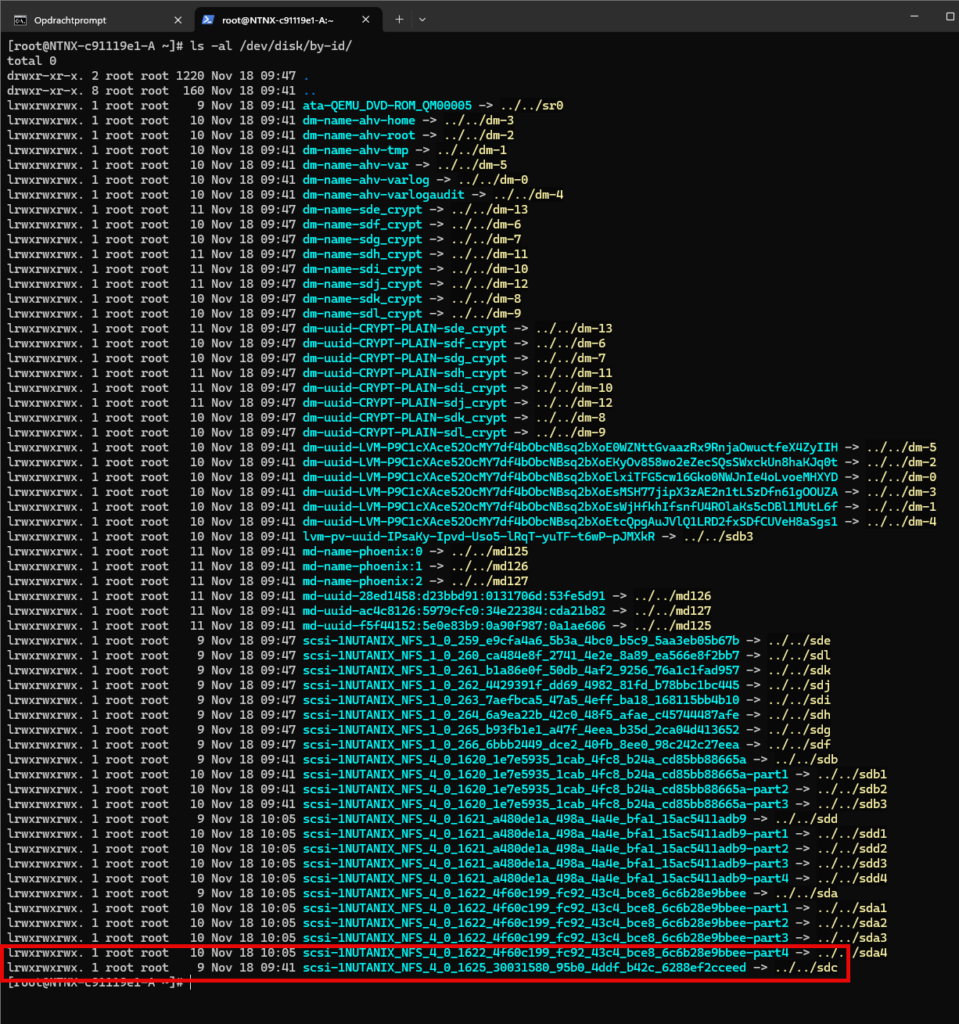
Make a not of the id, in my case: scsi-1NUTANIX_NFS_4_0_1625_30031580_95b0_4ddf_b42c_6288ef2cceed
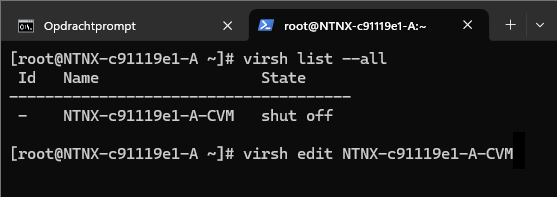
We need to add the disk to the CVM. Run: virsh list –all and make a note of the CVM name, in my case: NTNX-c91119e1
Then edit this domain with the command: virsh edit <cvmname>
Now add the disk by adding an extra disk block. The easiest method is copying the already present data disk and past it with the correct information. In my case I copied the block from the already present 500GB data disk. Make sure you change them all correct. As my node is a nested configuration (Running nutanix Ce in nutanix ce 😉 ) I cant use the hdparm -i command. If you are using a hardware node (not nested) then grep the serial number via: hdparm -i /dev/<disk-name>
The editor is vi, so all command are vi based. Do a quick google search if you want to know how the vi editor works.
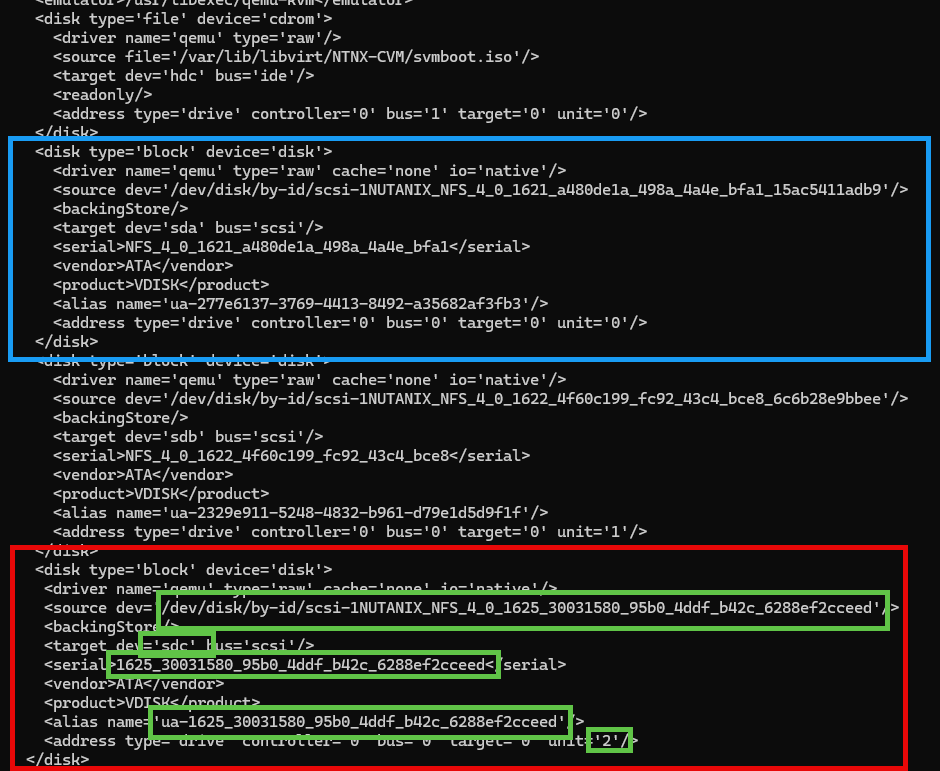
When the config is saved start the CVM: virsh start <cvmname>
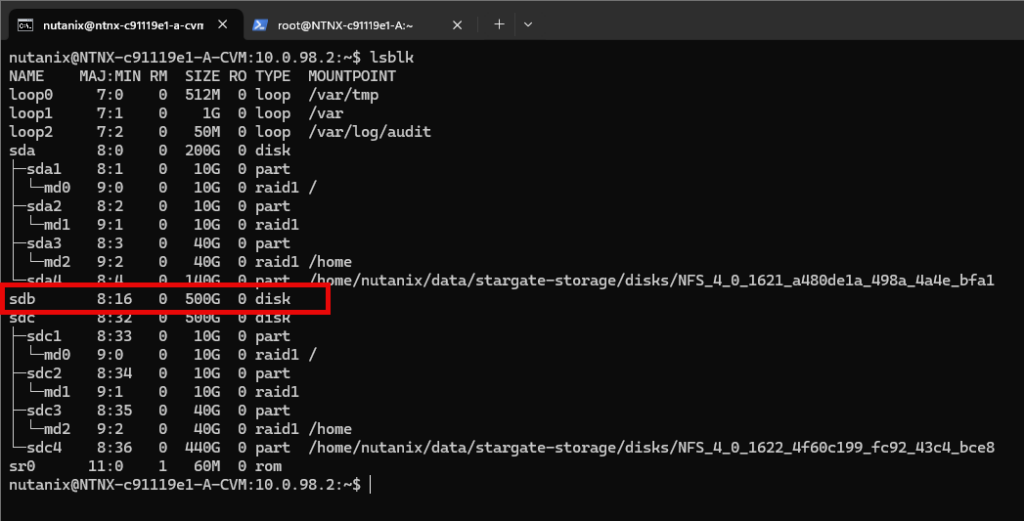
Make sure you dont start the cluster. Run lsblk to see the disk name the new disk has in the CVM. In my case: sdb
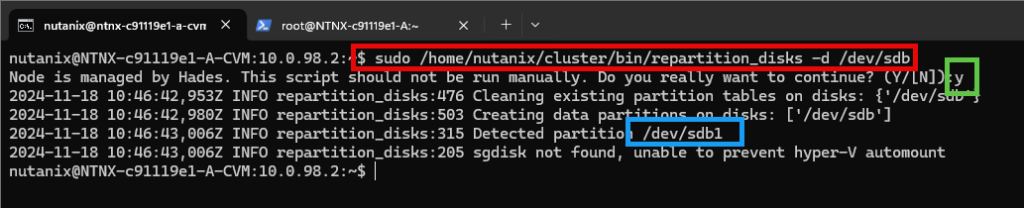
As we can see the new disk is present in the CVM we need to partition and format the new disk. We do this with the following commands:
- sudo /home/nutanix/cluster/bin/repartition_disks -d /dev/<newname>
- sudo /home/nutanix/cluster/bin/clean_disks -p /dev/<name_partition_name>
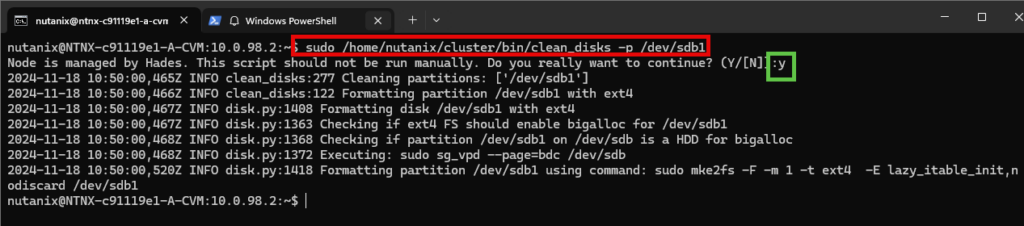
Now you can reboot the CVM (shutdown -r now) or mount the disk manually (sudo /home/nutanix/cluster/bin/mount_disks) Check if the disks are mounted: lsblk
The new disks should have a stargate disk name 😉
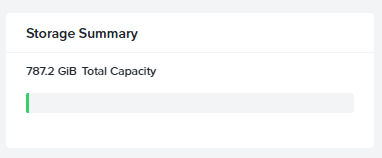
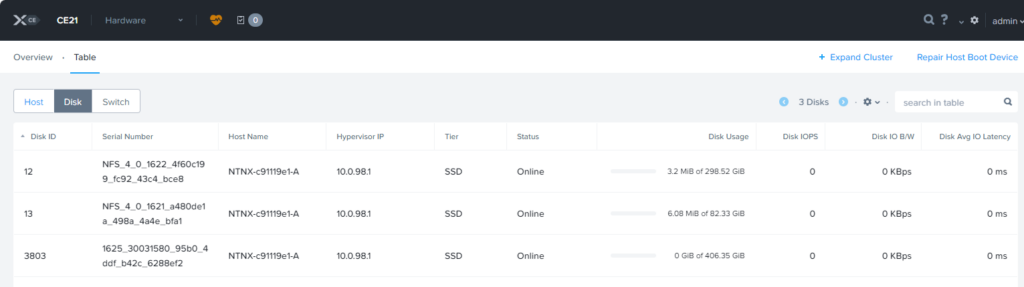
Now start the cluster and the extra disk should be added and the storage pool should be extended.
Discover more from Jeroen Tielen
Subscribe to get the latest posts sent to your email.


Hello,
Thank you for the great article.
All working fine until i am restarting AHV, in this case the virsh edit rollback to the previous setup (my CVM is shutdown before modificaiton)
Any ideas ?
Thank you
Hi,
This is mentioned in the beginning of the blogpost ;). My idea would be reinstalling the node.
Thank you for your quick answer, i have hope that could be changed 4 months ago 🙂
I will reinstall the node and pray that my cluster accept this new another node.
How do you do this in CE 2.1
I get this error
“Multiple Disks are found to be mapped to single disk slot number 1”
https://portal.nutanix.com/page/documents/kbs/details?targetId=kA07V0000004TulSAE
On the yellow quote block in my post it is pretty clear that you need to reinstall the box when you want to add an extra disk. 😉
Thank you for the reply, I did try that and it did not work. It sees 1 of the 2 SSD drives in the installer
After running through the steps above it shows up in the CVM, and then I get the alert.
Your guide helped me get that far at least!
Do you have a screenshot of the installer? Is the ssd seen in the bios? Does (for example) windows see the disk? Is it an nvme?
Hello,
Thanks for the providing this article. I have done this in the past on a single node cluster but was wondering if this could be done on the fly with virsh commands like “virsh attach-disk {vm-name}” . I am currently running a 3 node cluster in VMware as a nested setup. Adding disks is not an issue but would like to add them without shutting down the CVM if possible.
Could this method work using virsh attach-disk?
You can try but after a reboot the node will be broken probably. So better is to create a new node (with the correct amount of disks), add that node to the cluster, remove the other node (with the incorrect amount of disks).