In this blog post I will explain how-to setup an Azure Storage Account with a cool blob storage to use as smart tiering location for cold data which is in Nutanix Files. With smart tiering in Nutanix Files we can, policy based, move data out of the cluster into third party blob storage. So freeing up some resources/space in the cluster.
This will not free up used Nutanix Files licenses as Nutanix Files is still managing the files so still consuming license.
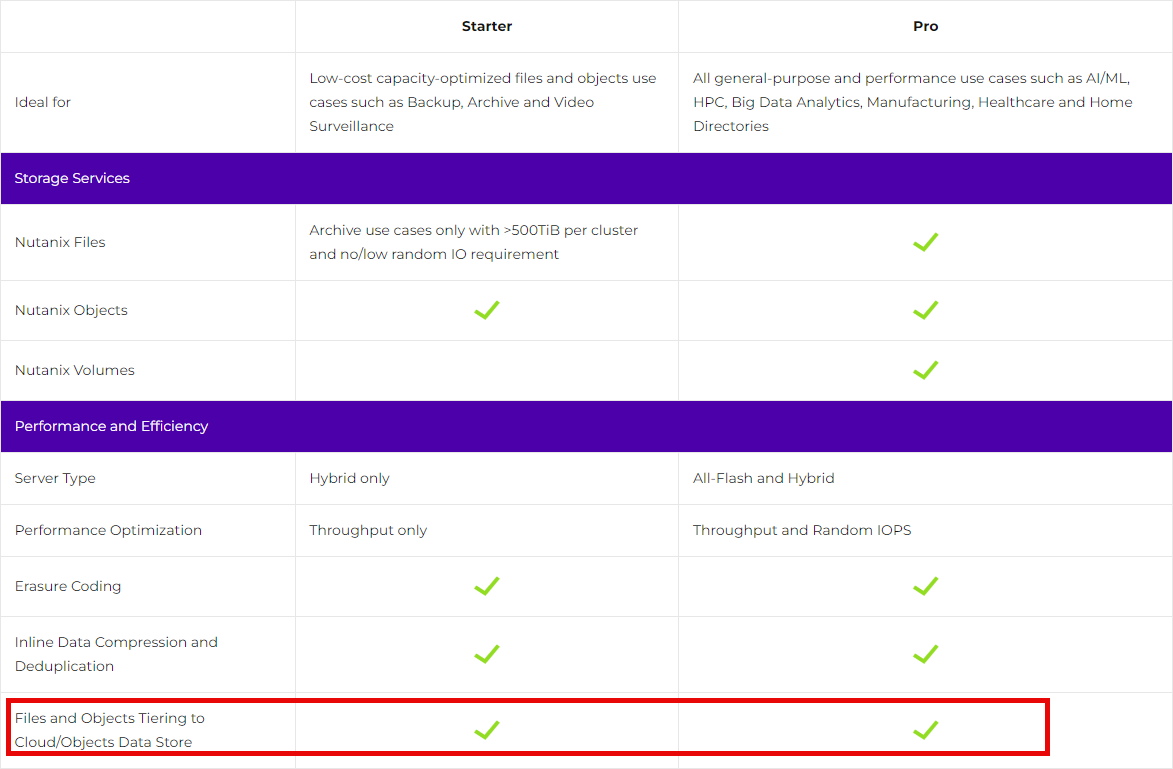
Smart Tiering is available in the starter license of Nutanix Unified Storage:
Some assumptions/information before we continue:
- Nutanix Files is already present in the environment with data in it;
- I’ve got a default setup with 100GB of random data in it;
- I dont have site-to-site vpn from my lab to Azure so I’m accessing the blob via unsecure internet. You should not 😉
- In this blog post I’m going for the easy/cheap setup. In your environment this could be different.
Create Storage Account and Cool Blob Storage
Login on Azure portal and browse to storage accounts. Click on: + Create.

For the basics settings I’m choosing the standard performance and locally-redundancy.
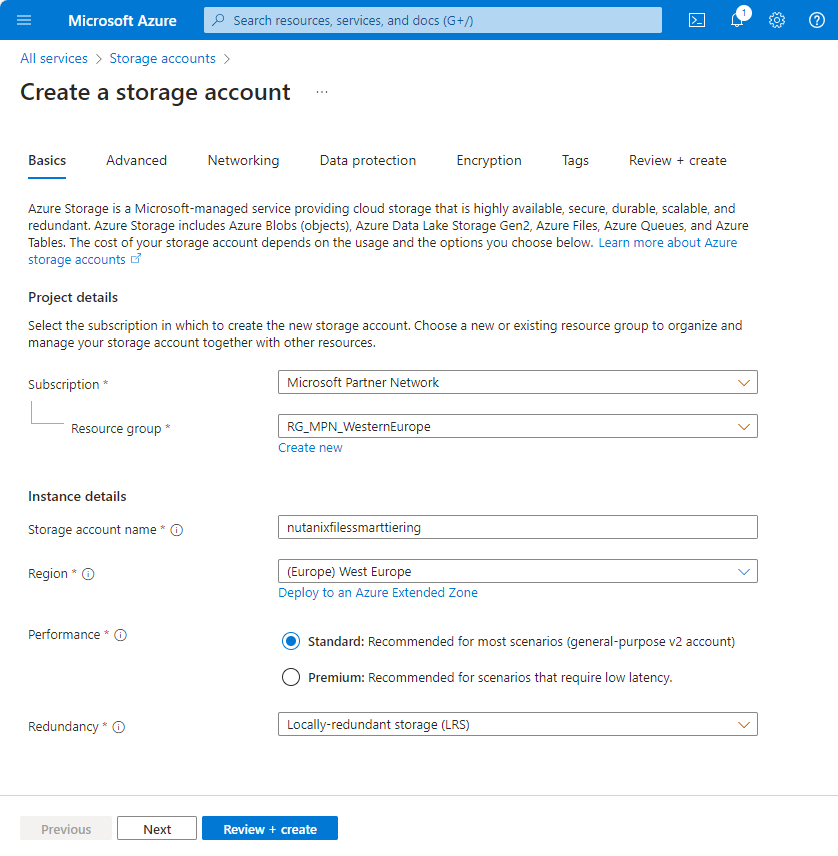
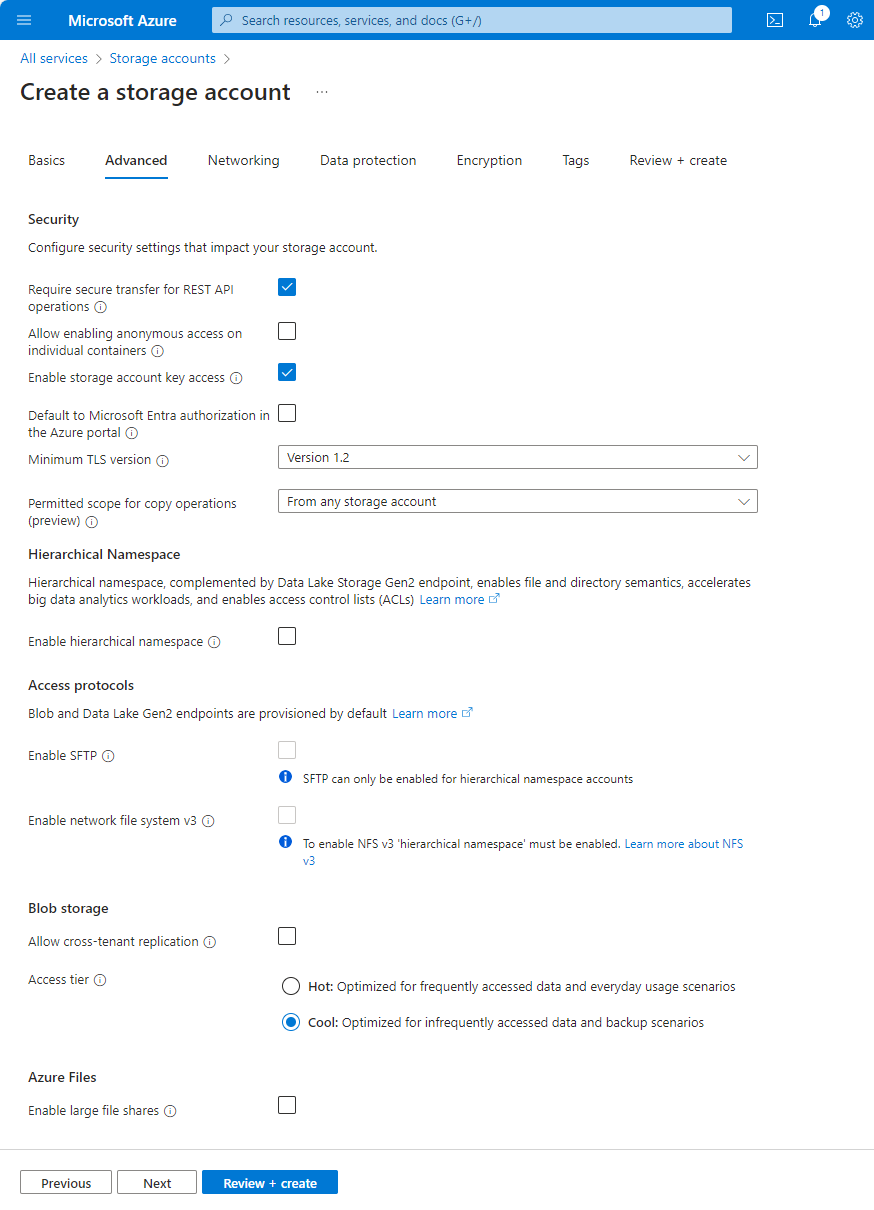
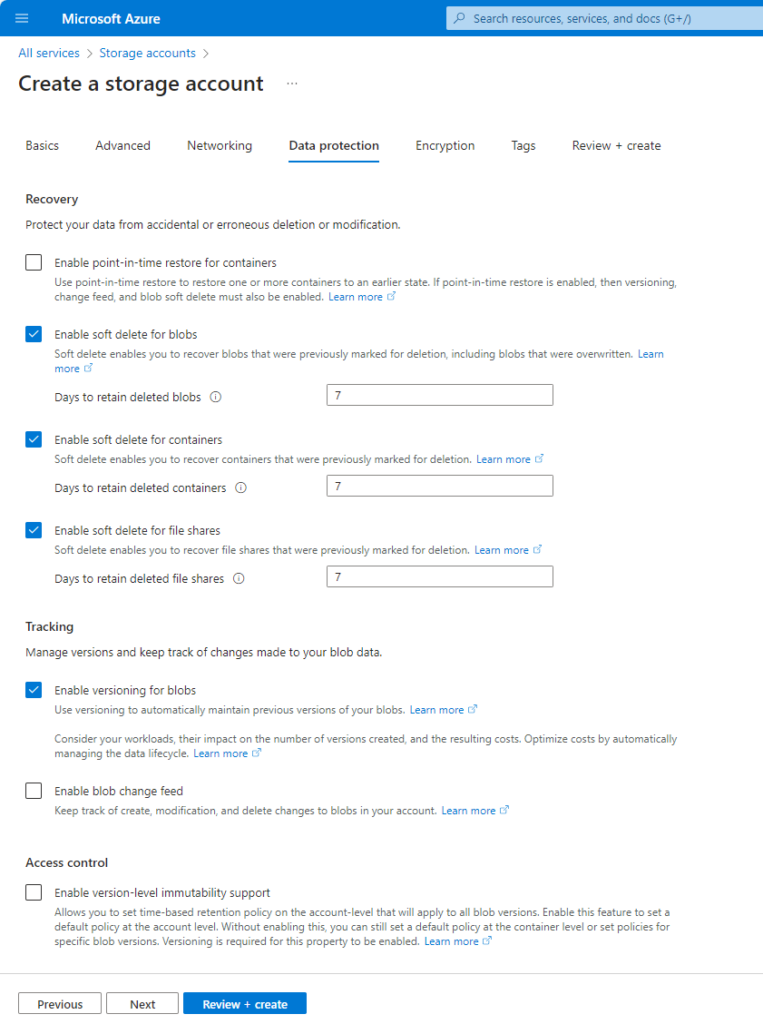
In the next steps I leave everything default (except versioning under data protection) . The screenshots below are just for reference and to show what the default settings where at the time of writing. Advanced Settings:
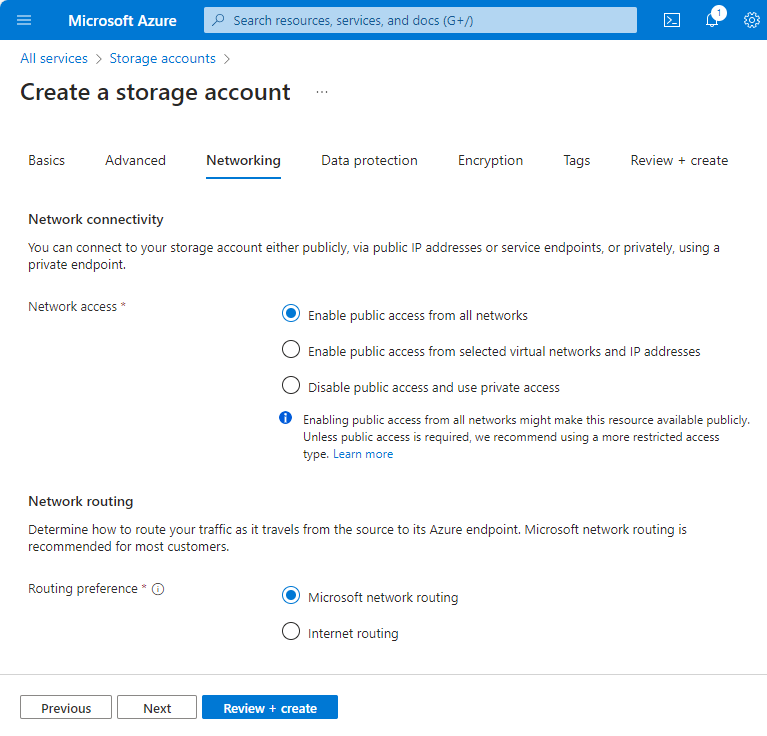
Networking Settings:
In Data Protection Setting check: Enable versioning for blobs:
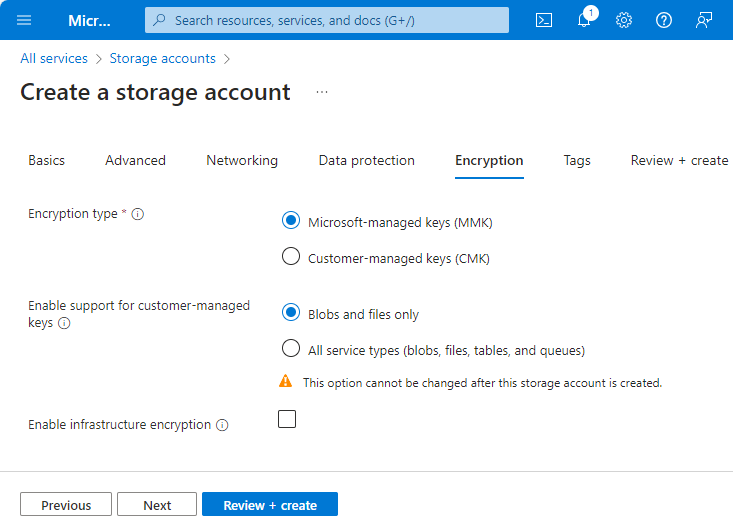
Encryption Settings:
Click on Review + Create and create the storage account.
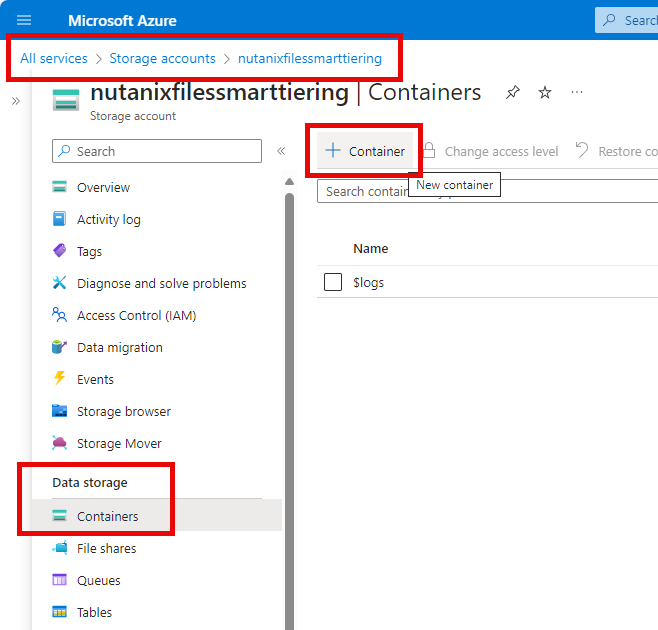
When the storage account is created we need to create a container where the data is placed. Go to Containers in the created storage account and click: + Container
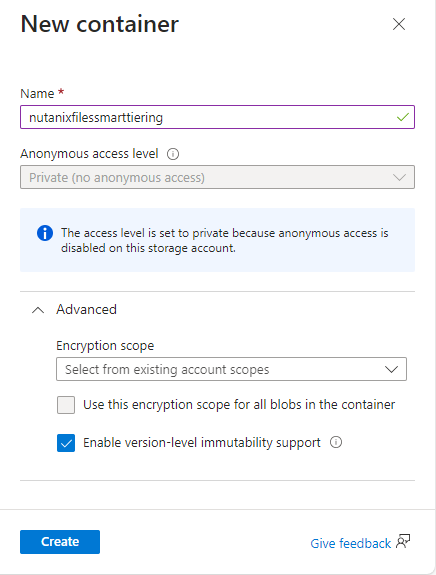
Give the container a name and select: Enable version-level immutability support. Click: Create.
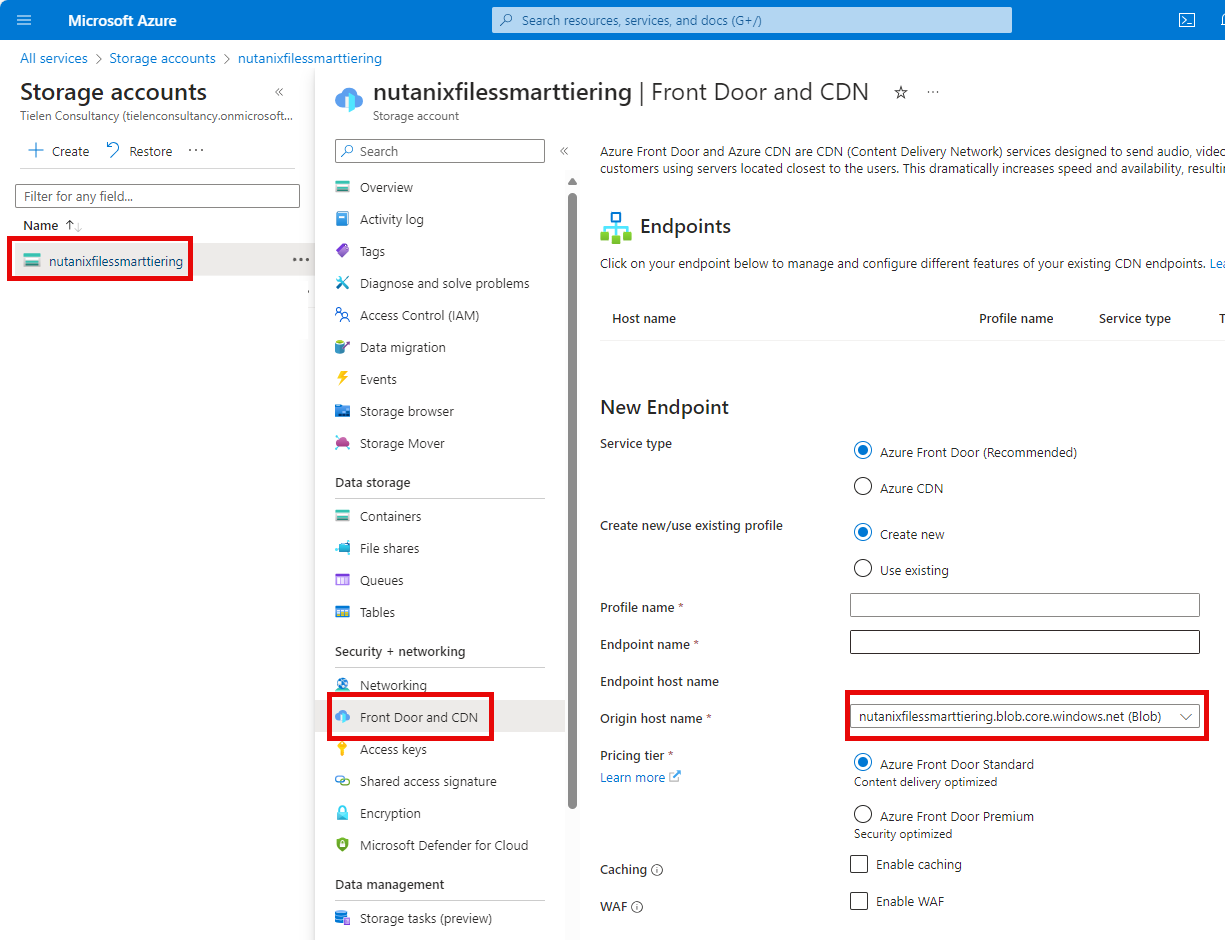
We need to make some notes about connecting to the storage container. In Azure navigate to the storage account –> Front Door and CDN. Make a note of the “Origin host name”. As you can see in the screenshot my name is: nutanixfilesmarttiering.blob.core.windows.net
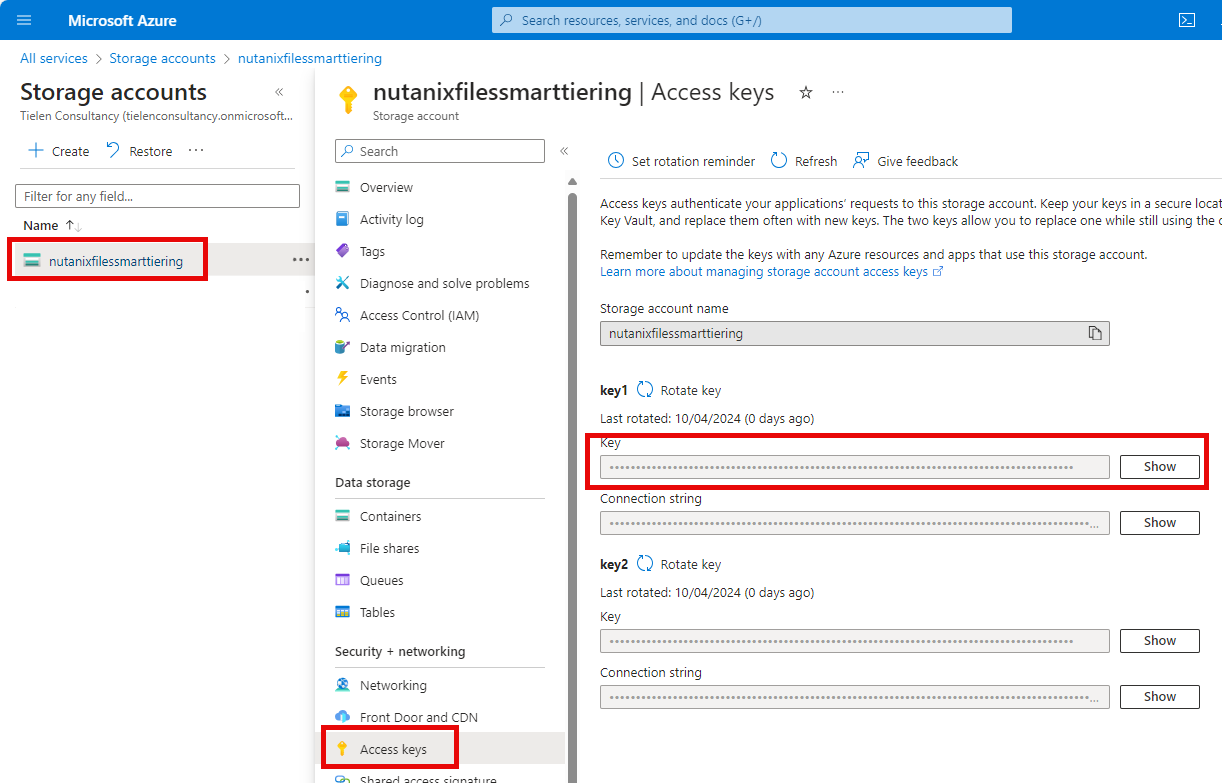
Next copy access key 1 from: Access keys.
Configure Nutanix Files Smart Tiering
As you can see in the screenshot below I have around 100GB of data on a share and Smart Tiering is not configured:

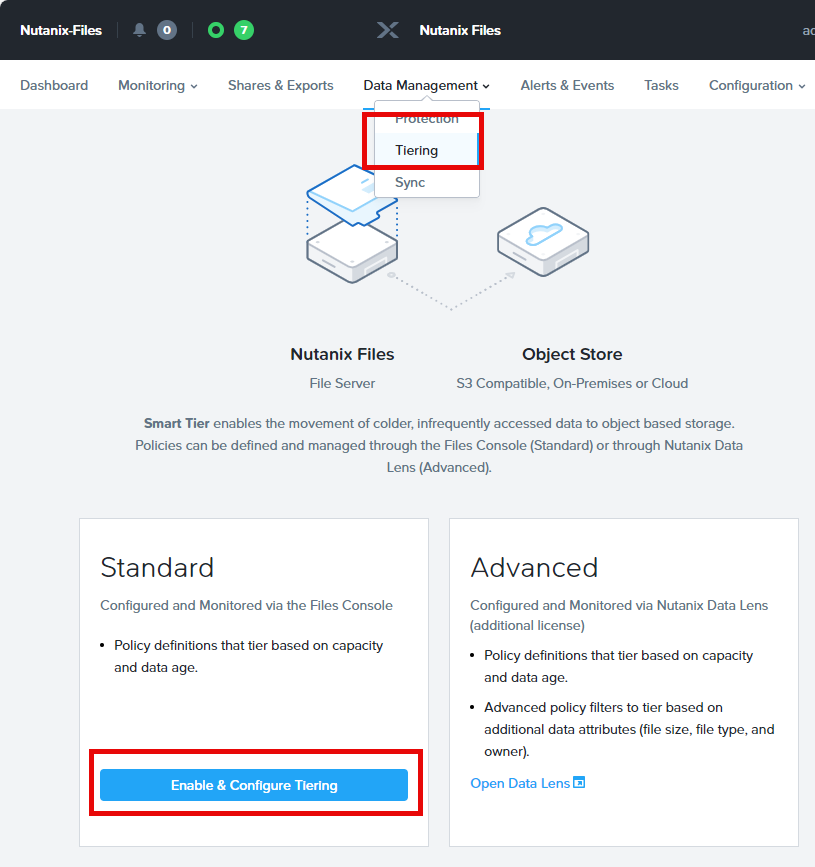
On the menu (Files Console) click: Data Protection –> Tiering. Select: Enable & Configure Tiering.
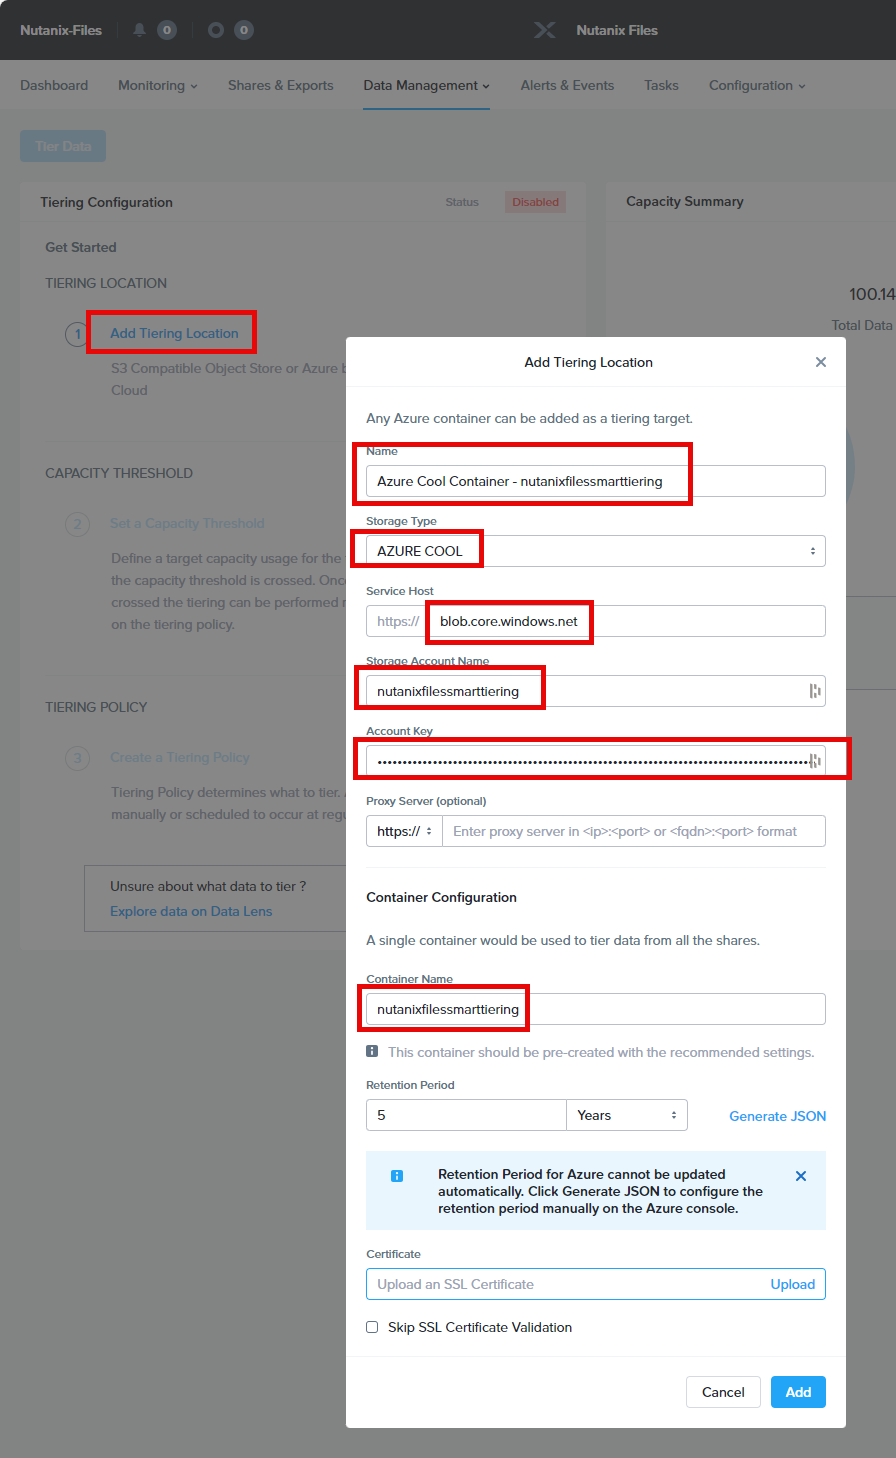
Click on: Add Tiering Location and fill in the fields as shown in the screenshot.
Service host: this is the url (without the leading storage account name) you have made a note from above (Frond door and CDN)
Storage Account Name: This is logical 😉
Account Key: The access key you copied.
Container Name: Again, logical 😉
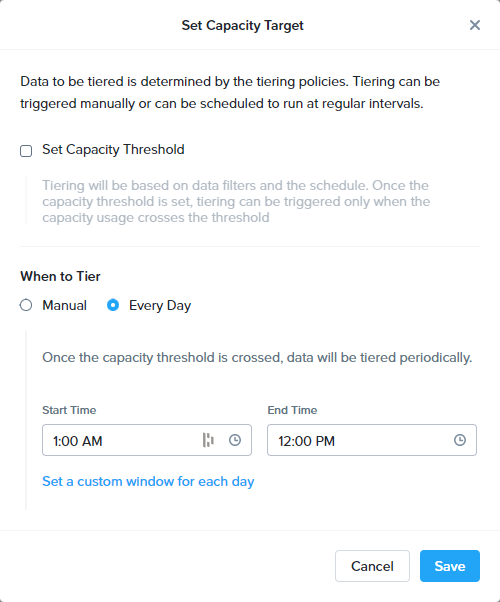
When the tiering location is created we need to specify a threshold when Nutanix Files should tier. In my case always 😉 You can set a percentage to only tier when X amount of data is stored. Then we also need to set when to tier. I set my tiering time at every day between 01:00 AM and 12:00 PM. (You can also set it to manual if you want to do it manually)
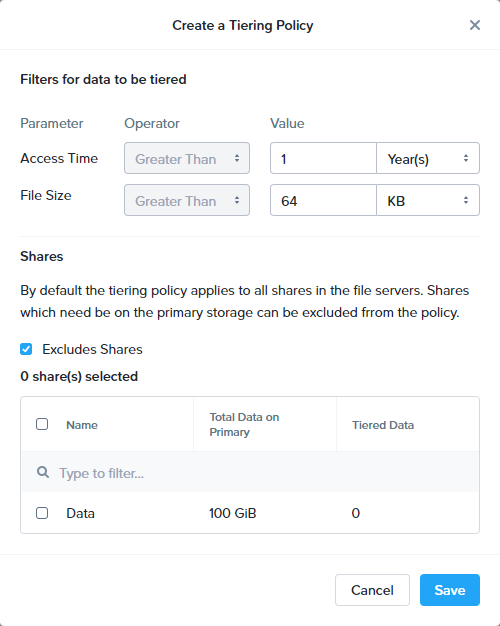
Last step is to set a Tiering Policy. Set this policy to your own requirements. You can also excluded a share from tiering here. Minimum file size is 64KB, all below will no be tiered.
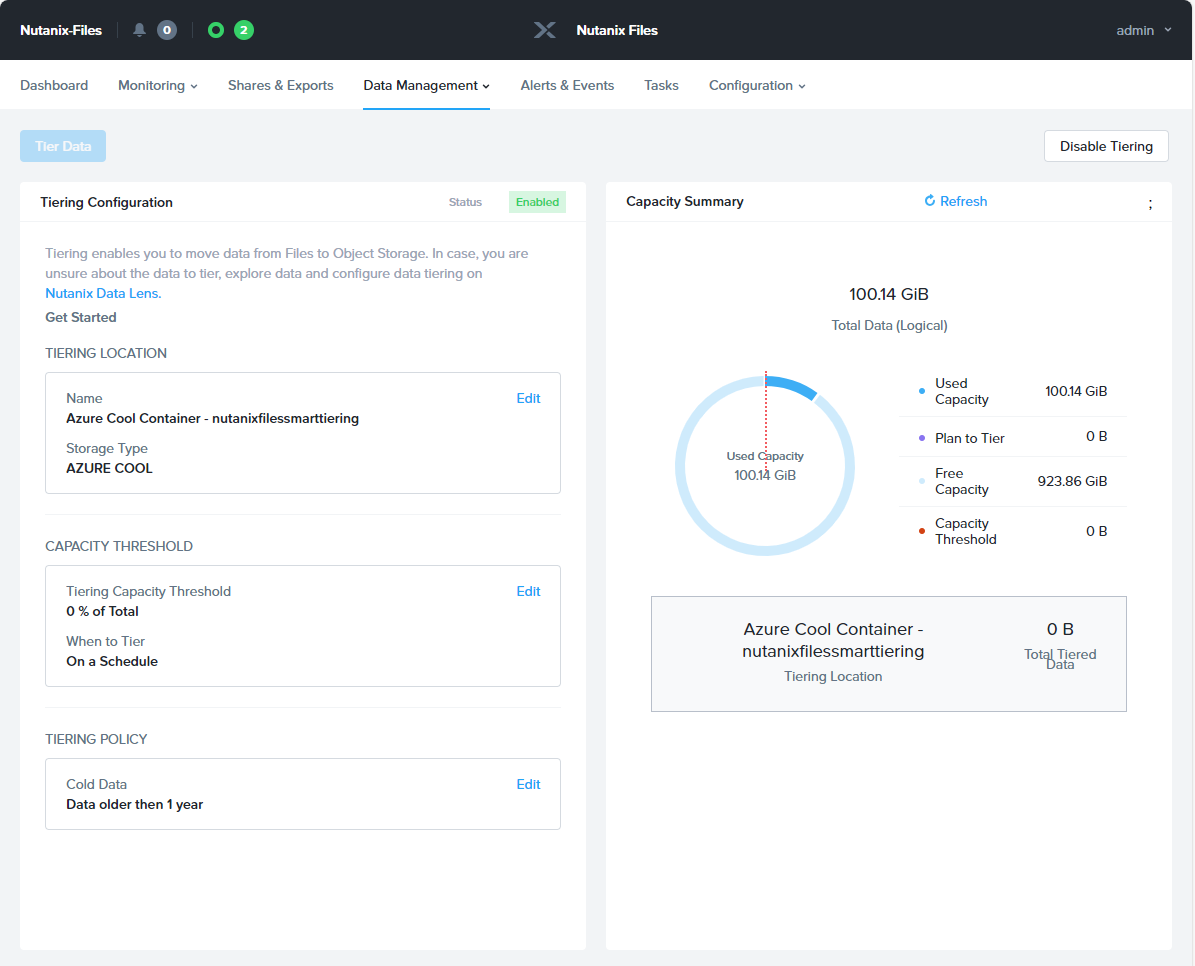
The tiering dashboard will look like this:
Tiering Processing
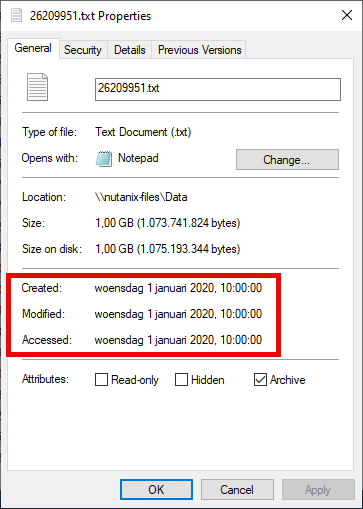
Tiering will look at the last access time of the files. In my case I have 100 files which are each 1GB. All created with a script. They all have the following access time:
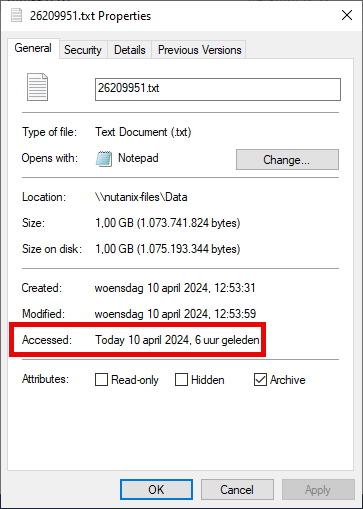
As I don’t want to wait for 1 year (that is what I set in the tiering policy) before tiering kicks in lets change the access time of the files 😉
Hereby a simple powershell script to change the times of files in a directory (You only need access time to be changed but hé, here you have it all 😉 ):
# Change share name to your needs.
$Share = "\\Nutanix-Files\Data"
Get-ChildItem -Recurse -Force $Share | ForEach-Object{$_.CreationTime = ("1 January 2020 10:00:00")}
Get-ChildItem -Recurse -Force $Share | ForEach-Object{$_.LastWriteTime = ("1 January 2020 10:00:00")}
Get-ChildItem -Recurse -Force $Share | ForEach-Object{$_.LastAccessTime = ("1 January 2020 10:00:00")}
Now the times looks like this (also make a note of the “Size on disk”):
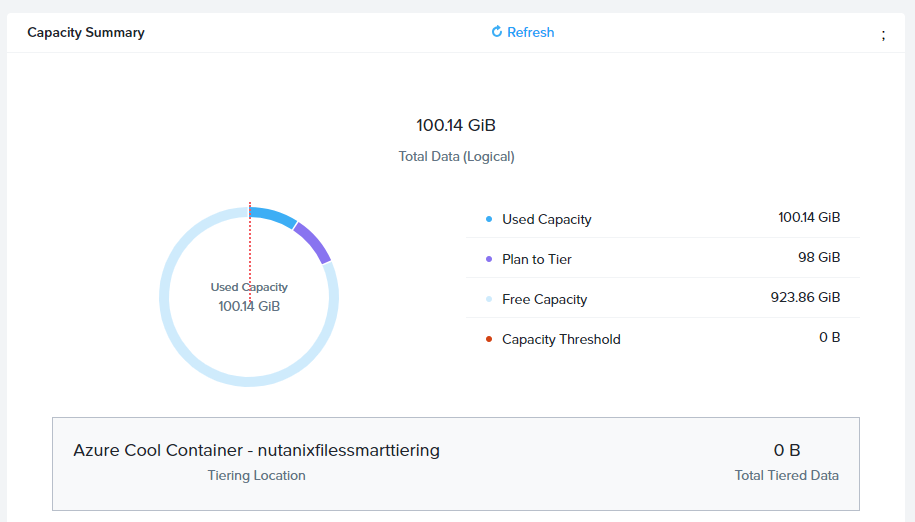
Now click on “refresh” on the Capacity Summery widget and wait. The “Plan to Tier” will change from 0B to something (In my case around 100GB). And this data will be uploaded to the storage container in Azure.
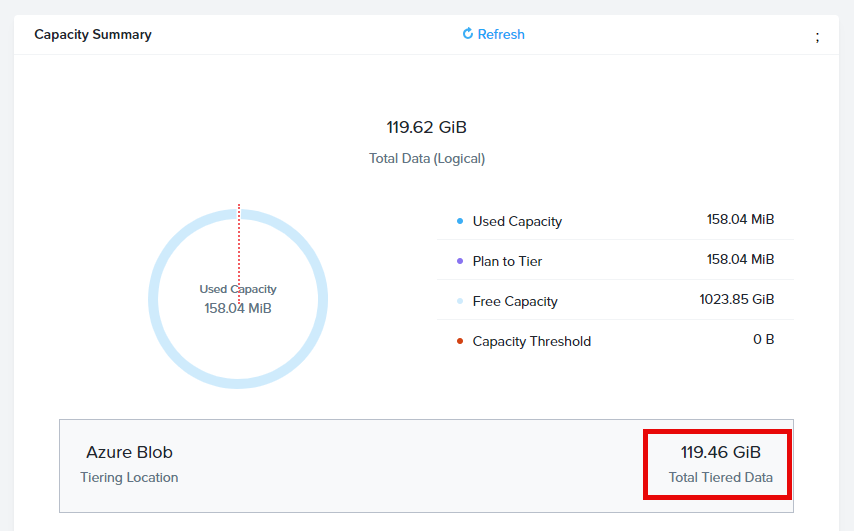
Lets sleep a night to see how the tiering went (or change your “when to tier” to manual and start manual tiering). Just kidding, I have another setup running for months now and let me show you how the capacity summary is looking at that setup:
Monitor Ingress Egress
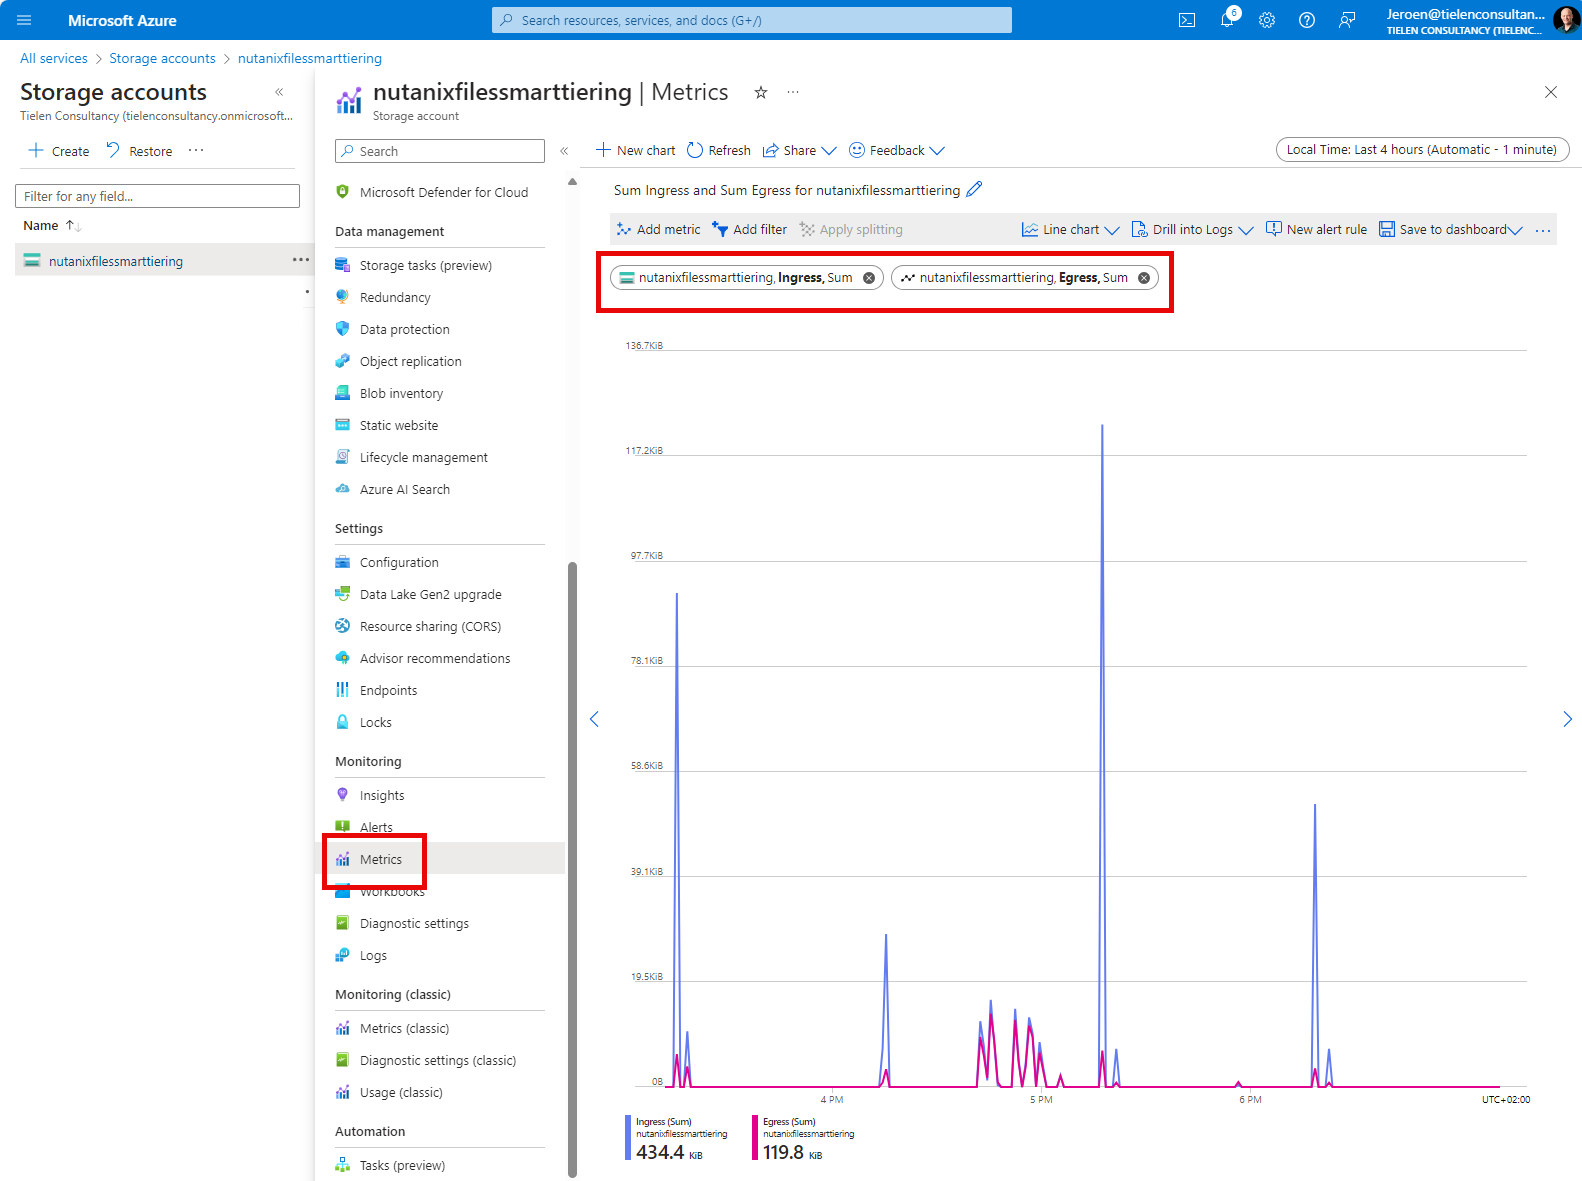
Within Azure you can monitor when Nutanix Files is uploading (Ingress) the data or when data is accessed by the users (Egress). To do this go to the Metrics section under Monitoring in the Storage Account. Make a line graph with the ingress and egress metrics:
Accessing Tiered Data
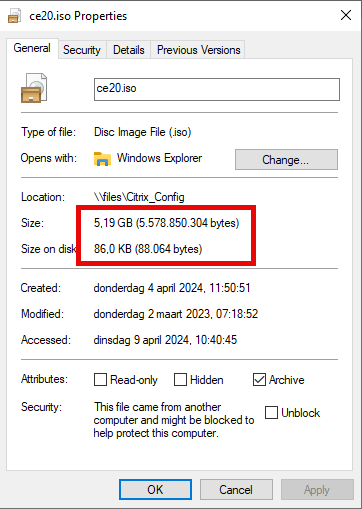
To access the tiered data just browse to the file on the share and open it. It will be downloaded from the blob storage account so accessing the files will be slow, as expected. If you open the properties of a file you can see that it is tiered. Look at the Size and Size on disk.


Netjes hoor.
Ik kom jou (online) ook overal tegen 😀
Altijd gezellig 😂