For work I do travel a lot to customers but I do also work a lot from home. This means I need to have a powerful laptop to be able to run:
- Nutanix Community Edition (Running nested in VMWare Workstation);
- Nutanix Foundation Virtual Machine;
- Windows (For my normal work);
- Virtual Studio Code;
- etc.
The need to run Community Edition (I use this to showcase some features within the Nutanix stack) is becoming less important as I have access to my companies learning lab: https://www.tielenconsultancy.com/nutanix-cluster-rental/
For foundation I’m using more and more the native Windows app. https://portal.nutanix.com/page/downloads?product=foundation
And all other apps, which are needed when working onsite, aren’t that resource hungry. This means I can start using a smalles, less powerfull, less heavy laptop.
But for my main workstation (in my home office) I do need some powerfull hardware and it must be able to run Nutanix Community Edition as well.
I decided to order a Minisforum MS-A2. https://www.minisforum.com/nl/products/minisforum-ms-a2
I got the one with the following specs:
- AMD Ryzen™ 9 9955HX
- 64GB ram
- 1TB SSD (NVME)
The machine connections (at the back) looks like this:
From left to right:
- 2x SFP+ 10Gbps Intel X710
- 2x 2.5Gbps Ethernet
- 1x Intel I226-V
- 1x Realtek RTL8125
- 2x 10Gbps USB-C
- 1x USB 3.2 Gen2 (10Gbps)
- 1x USB 3.2 Gen1 (5Gbps)
And the front connections:
- 2x USB 3.2 Gen1 (5Gbps)
- 1x USB 2.0 (480Mbps)
Inside the box (at the bottom side) we have 3x M2 connection where we can attach the NVME drives to. But the package come with a bracket to add a SATA drive as well. (this will cost 1 M2 slot)
My disks are (top to bottom);
- 1x Kingston OM8TAP41024K1-A00 (1TB)
- 1x Micron 2300 (1TB)
- 1x Samsung 970Evo Plus (500GB)
And, because there is room for it, I’ve added the Nvidia RTX 2000E Ada. (low profile, single slot) GPU.
What I want with this setup is the following.
Install Windows 11 on the first (Kingston) NVMe and use the others (Micron and Samsung) for Nutanix Community Edition.
- Micron 1TB for Data
- Samsung 500GB for CVM
- USB stick for AHV boot
Setting the boot order to boot USB first makes it easy to switch to CE by just reboot with the AHV USB drive inserted. If not inserted it will boot Windows.
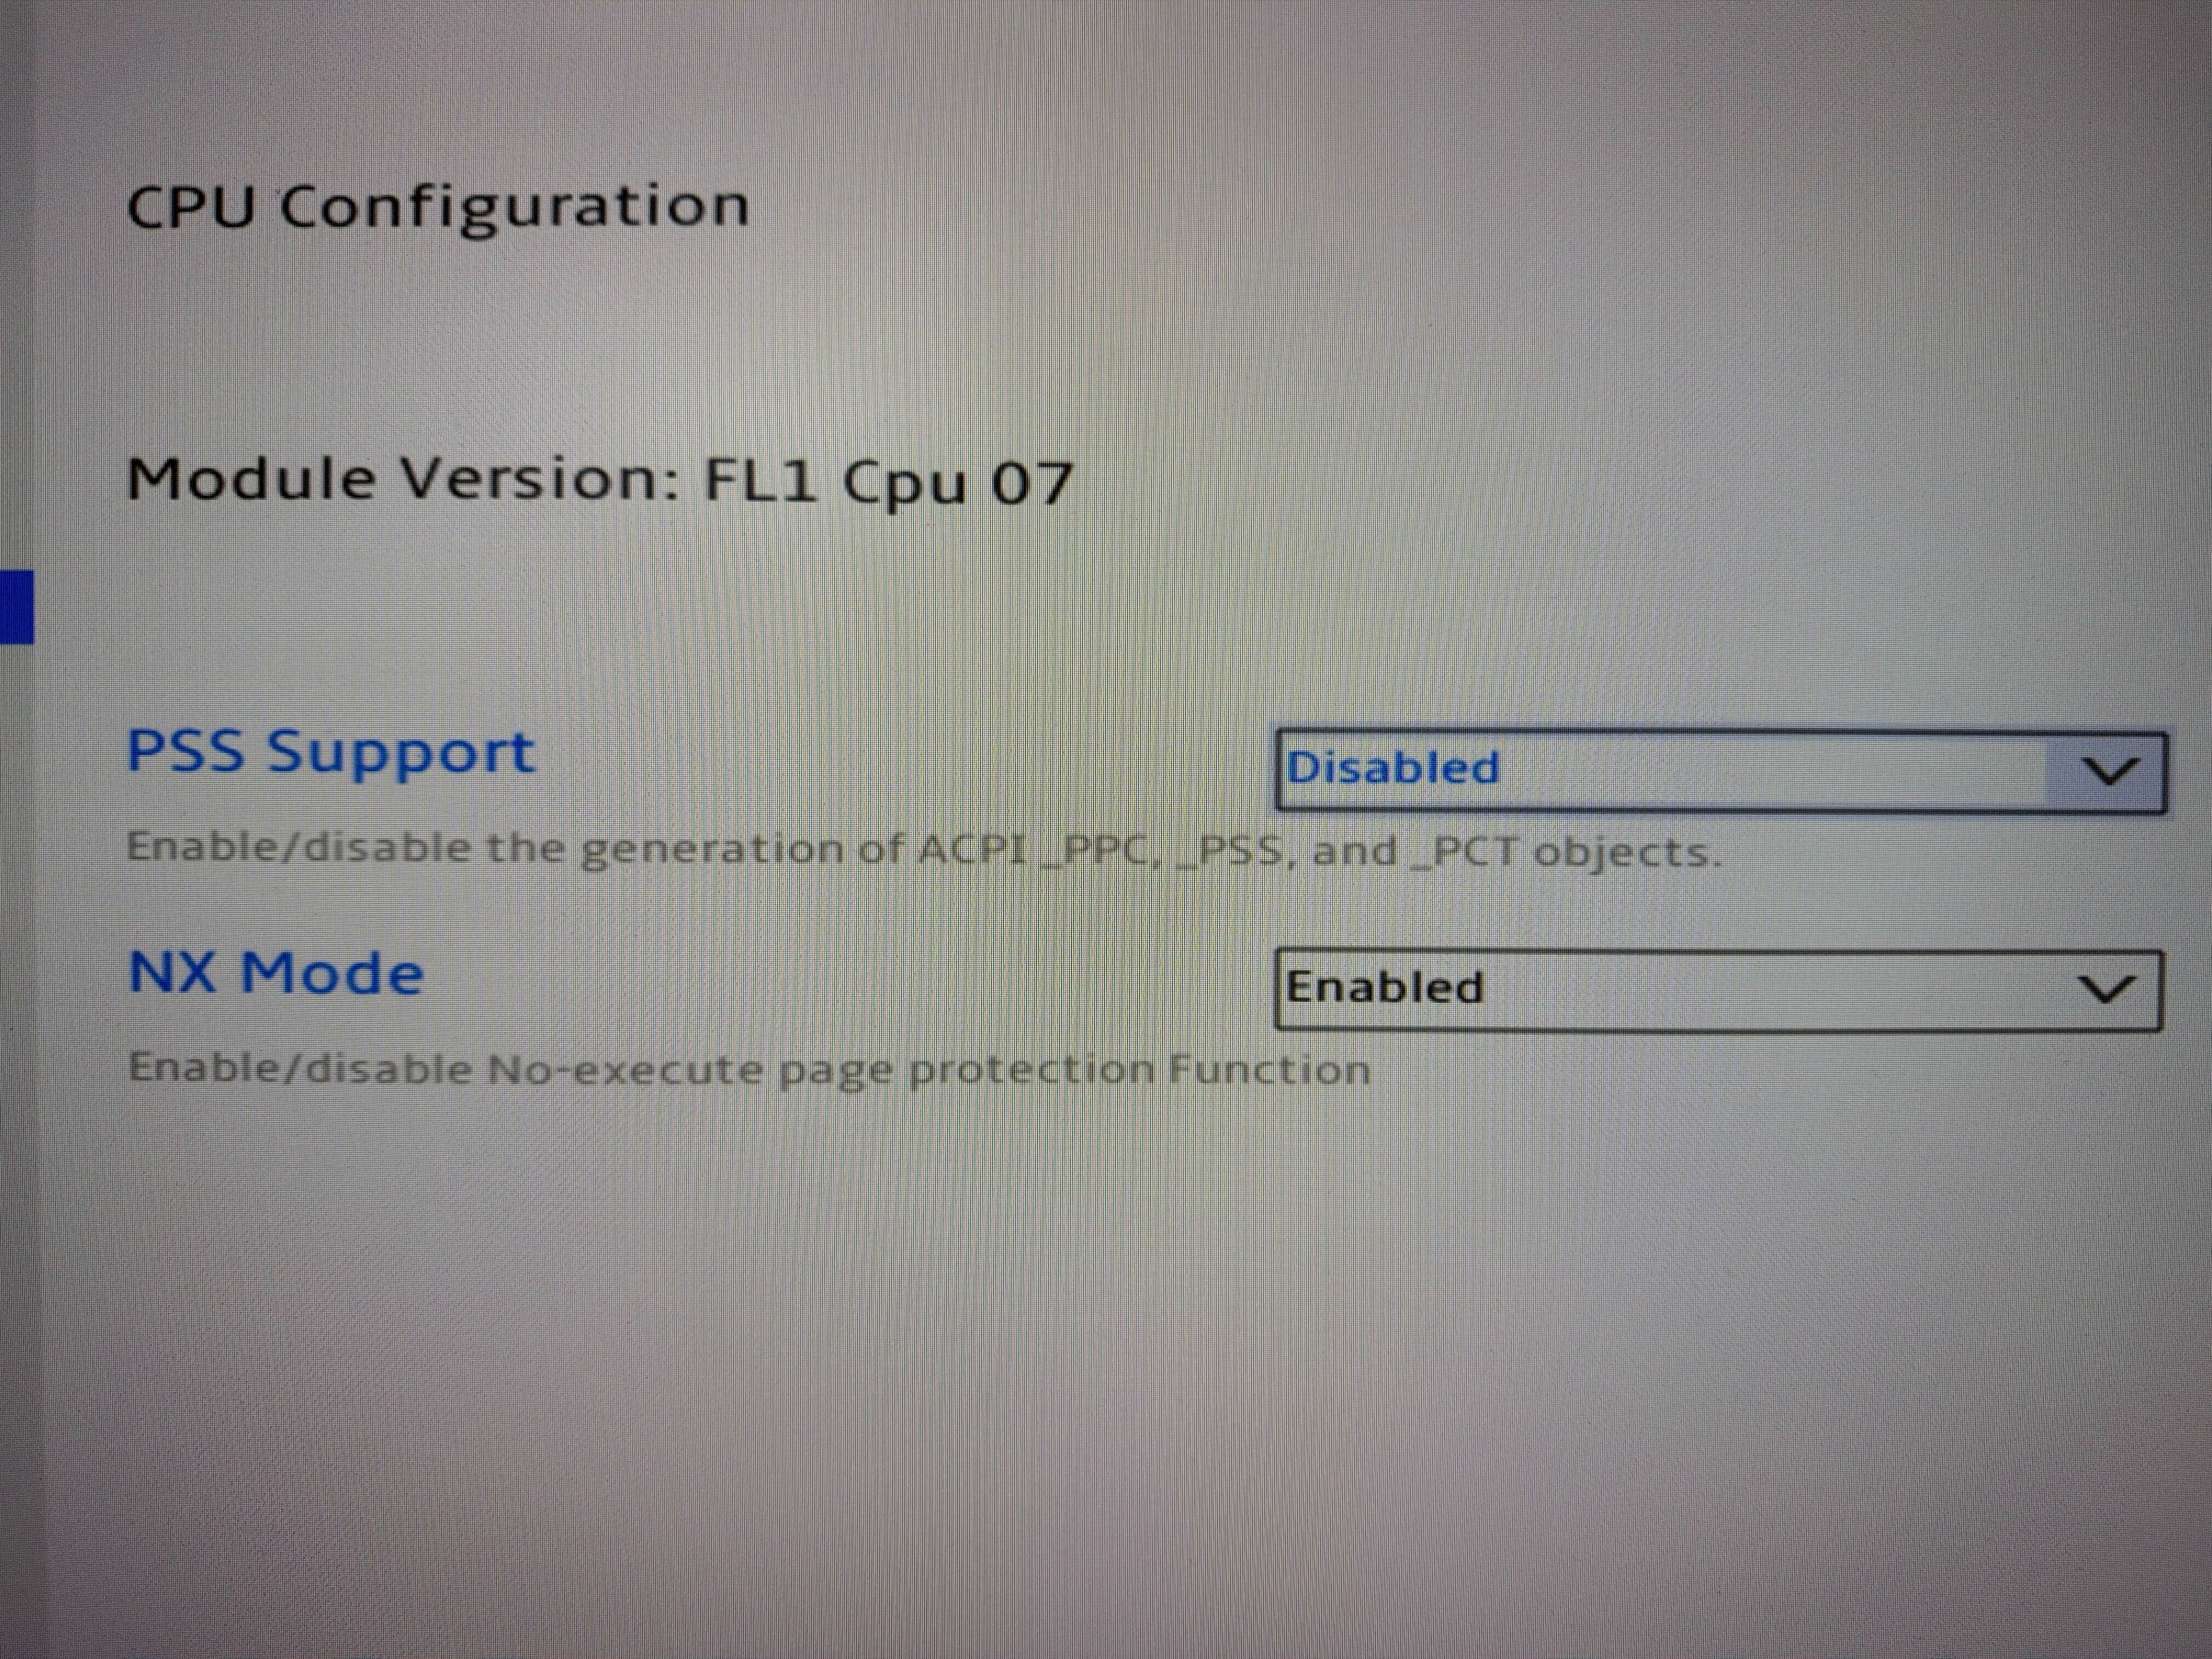
To get Nutanix Community Edition installed correctly make sure you disable “PSS Support” in the bios.
When the CE installer is in the wizard, select the correct drives:
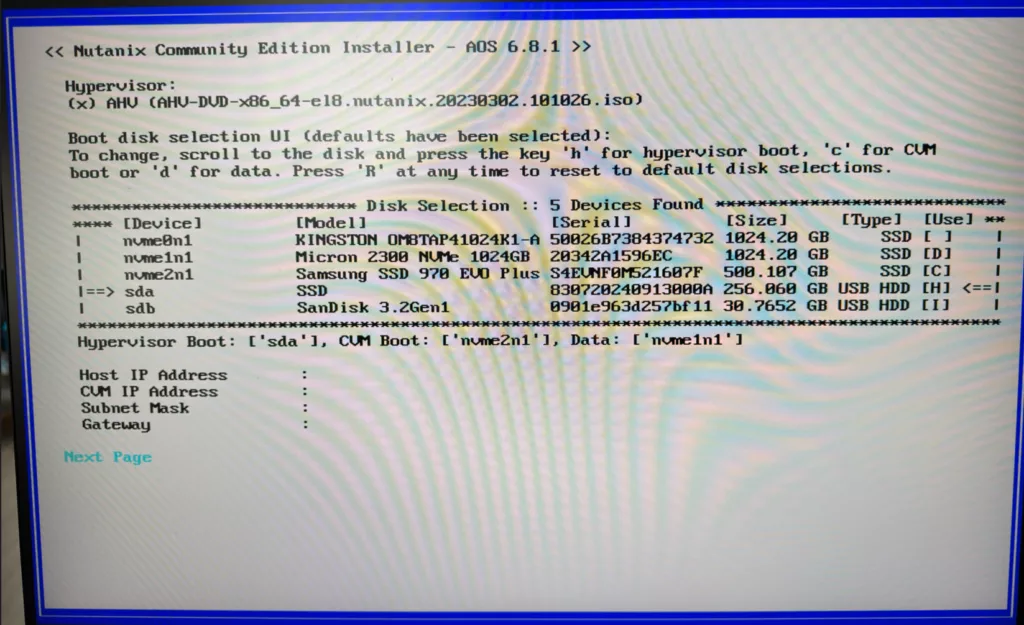
Im my case I made sure the Kingston drive is not selected. (Use is empty) and the rest according my plans. I’m installing via another USB drive.
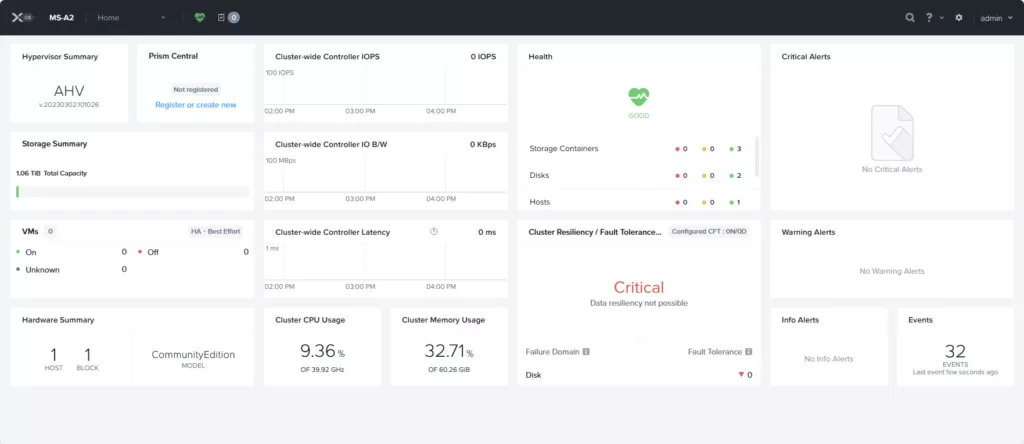
When CE is installed correctly and the cluster is created I have this nice cluster on my desk:
All network interfaces are found by the software:
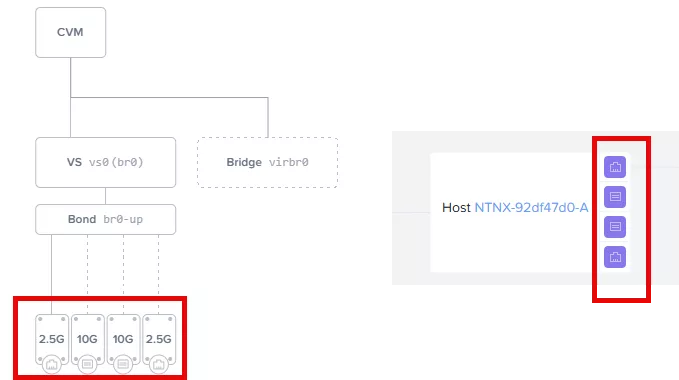
This is pretty cool, this means we can create separate uplinks for different network traffic. Awesome.
Love it. Now reboot back into Windows and back to work Jeroen 😉
Discover more from Jeroen Tielen
Subscribe to get the latest posts sent to your email.

Hi Jeroen,
Great home lab, how much power does this consume?
Ike
Hi Ike, I didnt look at that. I will add the meter later today and will come back here 😉
Hello Jeroen,
Are you occured any problems during initial ISO image installation. I trying to install Nutanix CE on GMKek K8 Plus (only with with 2×2.5GB Intel 226-V network Adapters), but installation procedure fails because the network adapters has not been recognised.
Finaly i suceed to finish instalation forllowing instruction by post https://svenbergendahl.com/resolve-intel-nuc-12th-gen-network-adapter-issue-during-nutanix-ce-installation/.
Thats cool. Did it also survive an AHV upgrade??
Yes, with some manual interventions I succeed to upgrade my 3 node cluster to AHV 20230302.103100 and AOS 6.10.14.
As next step I’ll try to do upgrade to AHV 10.x and AOS 7.x.