In this blog post I will show you how to change a Nutanix Files standard share to a distributed share. The differences between these types of shares is explaned here: https://portal.nutanix.com/page/documents/kbs/details?targetId=kA00e000000LMXuCAO
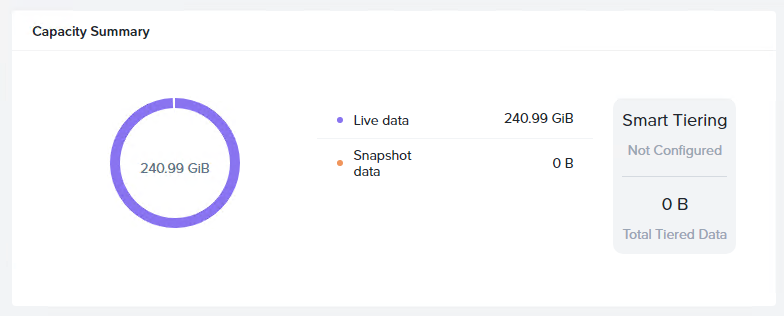
In my scenario I have configured FSLogix profiles on the standard share \\Files\FSlogix. This share holds arround 240GiB of data.
All FSLogix containers are being served via 1 FSVM (because it is a standard share) and for better performance I want to convert this share to a distributed share. Nutanix has written an article how to do this with all requirements: https://portal.nutanix.com/page/documents/kbs/details?targetId=kA07V000000LYGsSAO
So will this work while users are logged in and using theit containers?
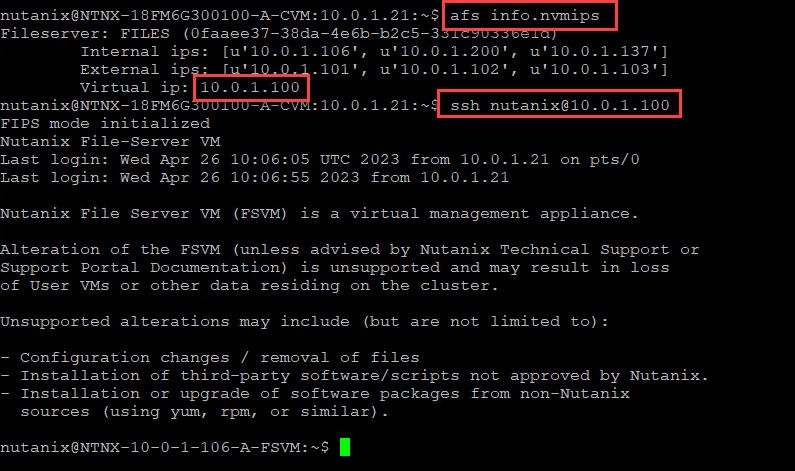
SSH into your Nutanix Files virtual ip:
- afs info.nvmips
- make a note of the virtual ip
- ssh nutanix@<virtual_ip>
Now run the pre-check to see if the share is ready to be converted: afs sync.make_distributed precheck src_share_name=<Share_Name>
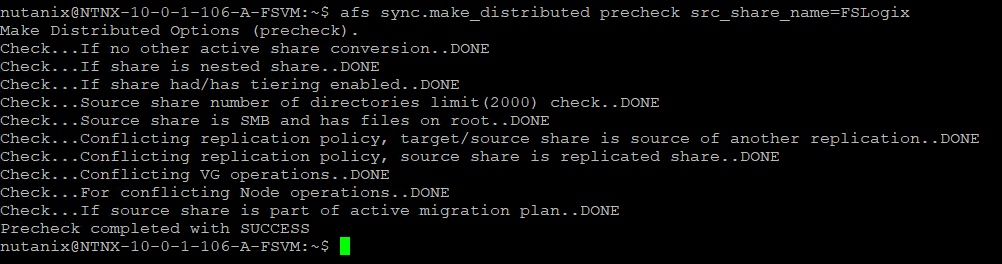
In my case, all requirements are in place so I’m good to go. Let convert the share: afs sync.make_distributed start src_share_name=<Share_Name>
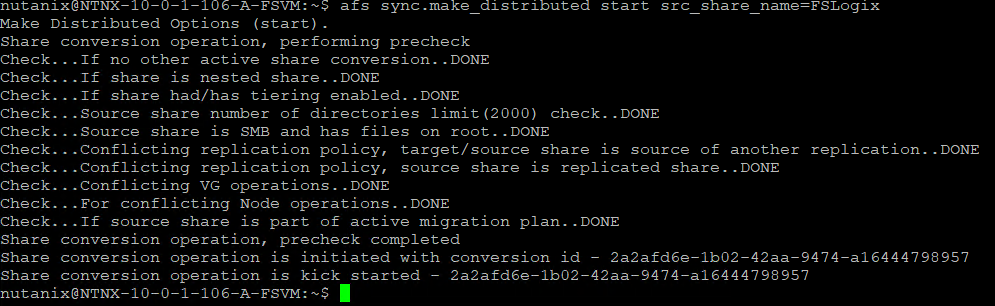
The conversion process creates a temporary distributed share for the standard share:

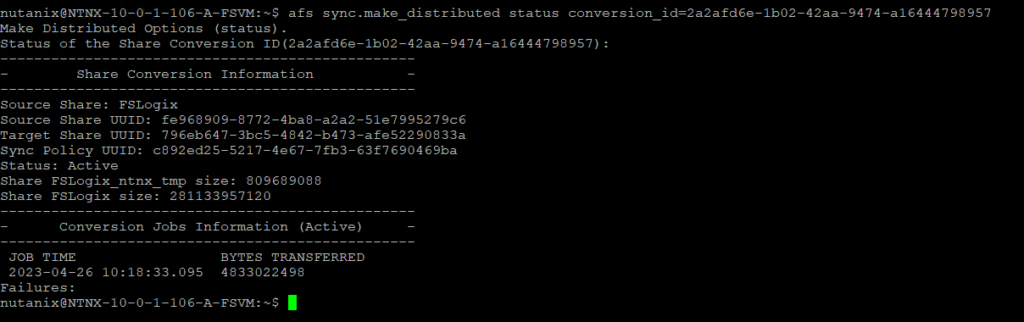
To get the process of the conversion grep the conversion ID (Showed in the SSH session at the bottem) and run: afs sync.make_distributed status conversion_id=<Conversion_Id>

The conversion time took me (For the 240GiB) arround 75 minutes. But this all depends on your network, share size, etc.
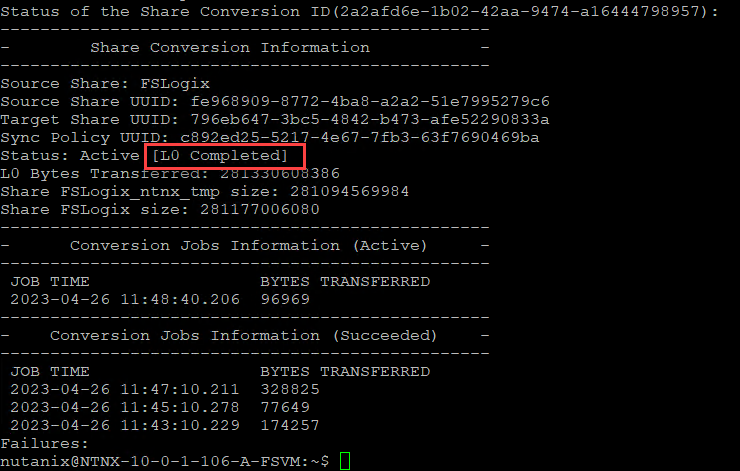
When the status is Active [L0 completed] the cutover can be done.
Note: Both shares (standard and distributed) will not be available. So users cannot access their FSLogix containers. Dont do this step during production hours 😉
Run the command: afs sync.make_distributed cutover conversion_id=<Conversion_Id>

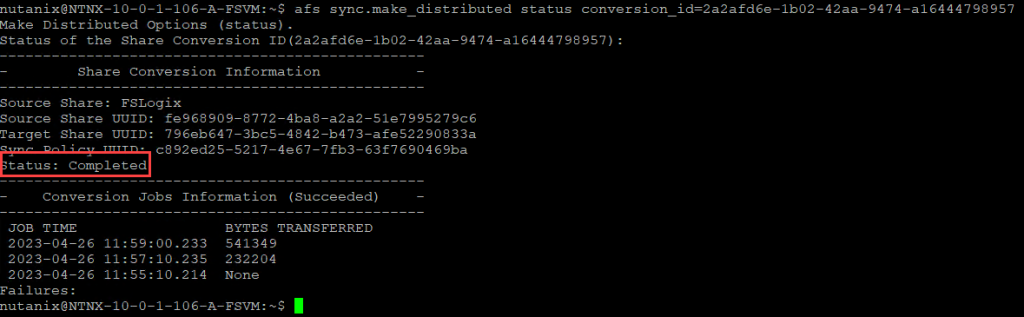
The get the status of the cutover run: afs sync.make_distributed status conversion_id=<Conversion_Id>
When the status is completed the actual cutover is done.
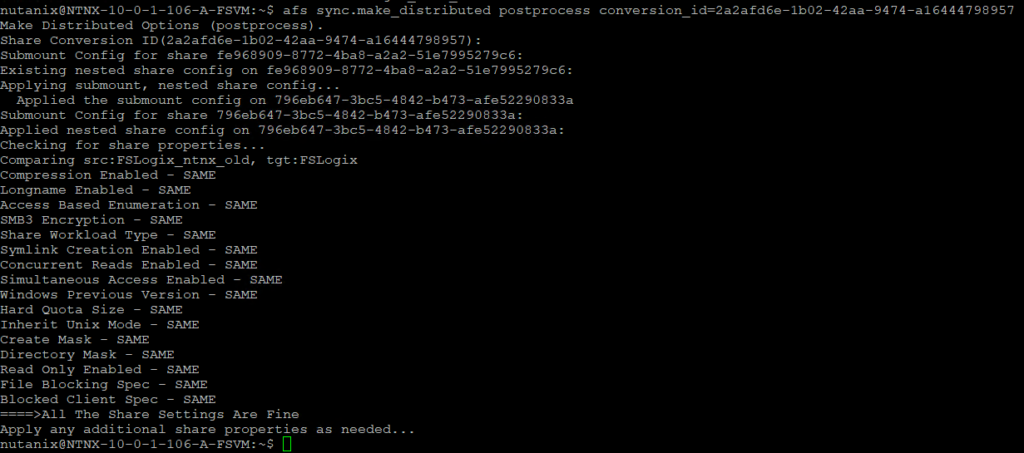
Last step is to migrate the share settings (Nutanix Files share settings) to the new distributed share settings.
Run: afs sync.make_distributed postprocess conversion_id=<Conversion_ID>
And now the Distributed share is available under the share name and the temporary share is the old standard share.

When all is working correctly don’t forget the delete the old standard share 😉
Discover more from Jeroen Tielen
Subscribe to get the latest posts sent to your email.