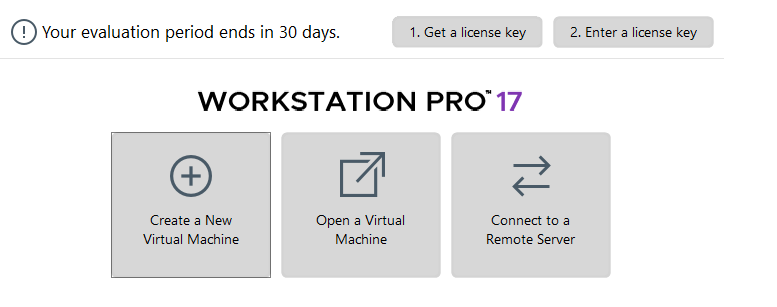
I’m running my Nutanix CE lab on dedicated hardware, but you can also install it virtual in VMware Workstation (for example). In this blog I will explain how to do this. Before we continue there are some requirements:
- Make clear if you want a 1 node or 3 node cluster;
- Make sure you have a list of IP-Addresses available on your own LAN which are not in use;
- For each node 2 ips (AHV and CVM);
- 1 ip for the cluster virtual ip;
- 1 ip for each Prism Central virtual machine;
- 1 ip for Prism Central virtual ip;
- Have enough memory available on the machine where VMWare Workstation is running.
The requirements for Nutanix CE are: (Link)
- 32GB memory minimum;
- 4 CPU Cores minimum;
- 64GB Boot Disk minimum;
- 200GB Hot Tier Disk minimum;
- 500GB Cold Tier Disk minimum.
So if we want a 3 node Nutanix CE cluster we need 96GB ram for the virtual machines (the nodes). In this blog I will create a 1 node “cluster” and give pointers to create a 3 node cluster.
First make sure you have the latest Nutanix CE installer (ISO) downloaded. It can be found in this blog post van Angelo: (Link)
Make a sheet with the IP-Addresses you are going to use :
- Node 1:
- AHV 192.168.2.41
- CVM 192.168.2.42
- Cluster Virtual IP: 192.168.2.40
- Netmask 255.255.255.0
- Gateway: 192.168.2.254
Note: these are ip-addresses for my lan. Again, use ip addresses for your own lan.
These addresses should be on the same network as where you machine is attached to. We are going to use the bridge network functionality from VMWare workstation so that AHV, CVM and Cluster IP is available on your network.
In VMware workstation create a new Virtual Machine:
Select:Custom.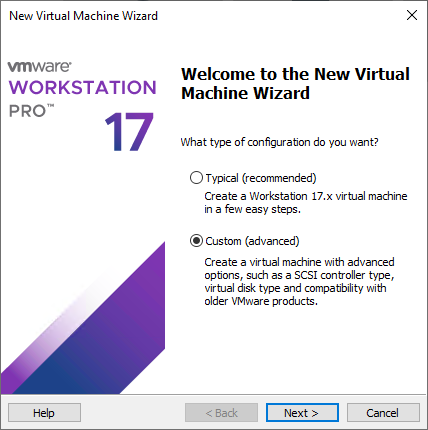
Click: Next.
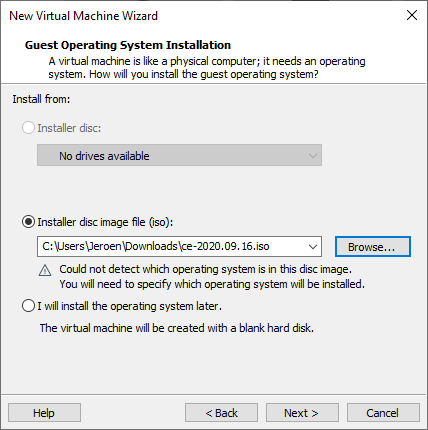
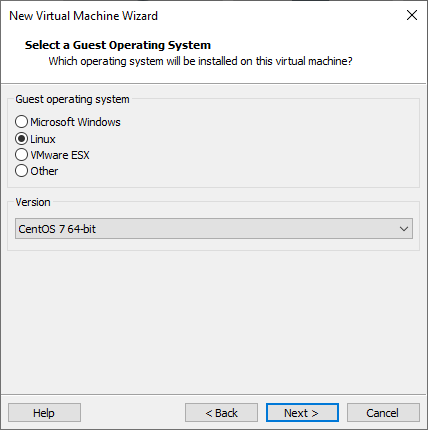
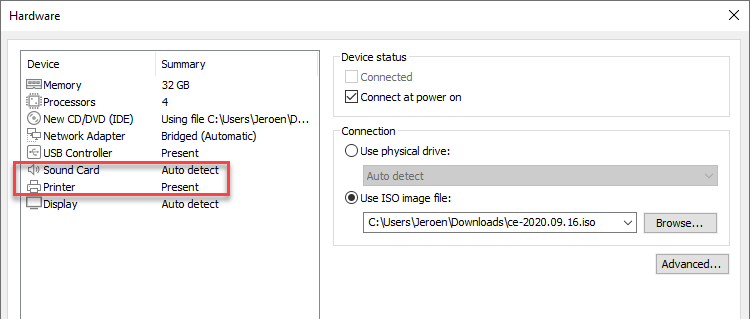
Select the CE installer iso file. (Screenshot shows the old installer but CE 2.0 is working fine as well)
For the guest OS select: CentOS 7.
Virtual Machine name: <Pick your own name>

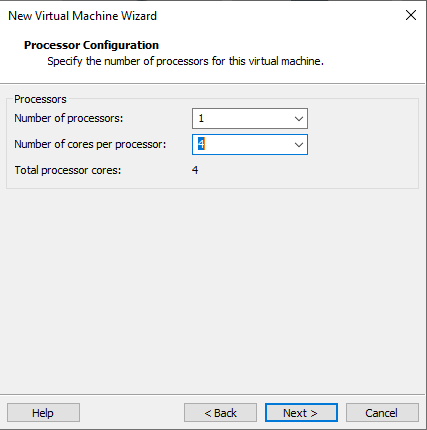
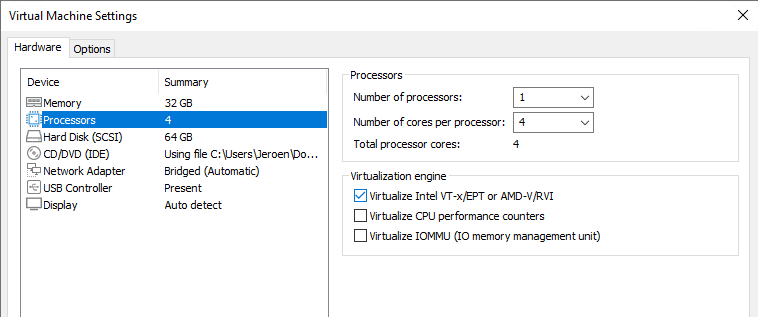
Processor: 1 Processor and 4 cores.
 Memory: 32GB.
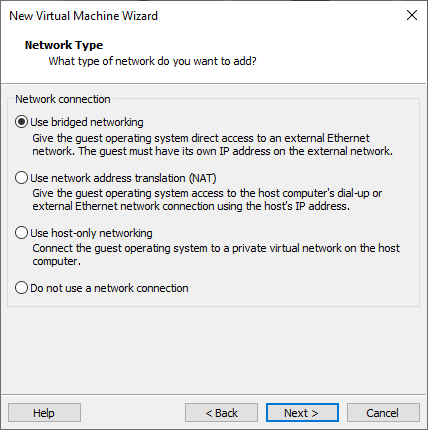
Network Type: Use Bridge networking.
Select for the controller: LSI Logic.
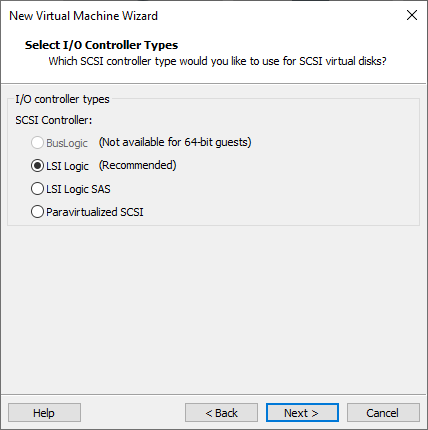
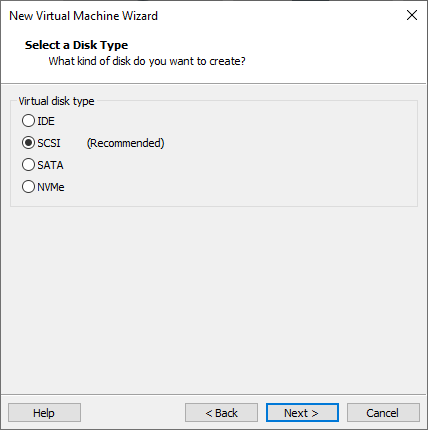
Select for the disk type: SCSI.
Create a new disk.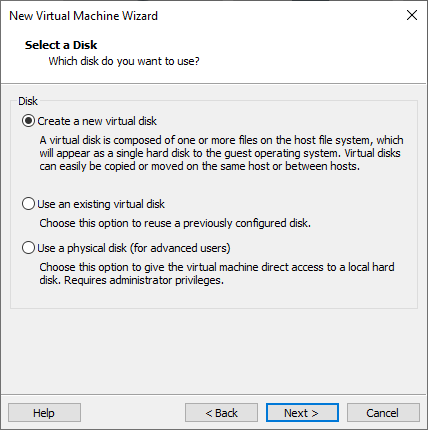
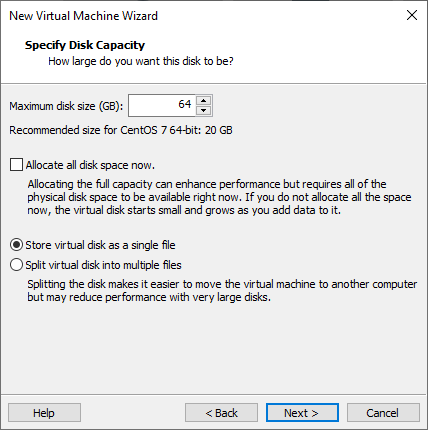
This will be the boot disk. Create a 64GB disk.
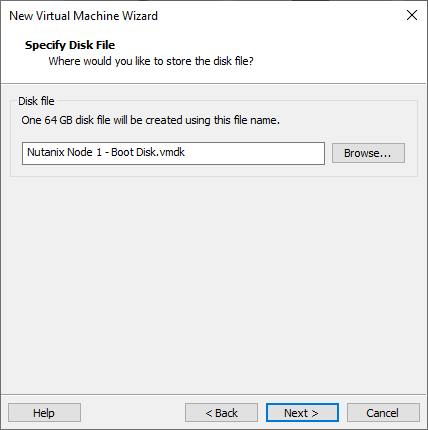
Name the disk.
Click: Finish.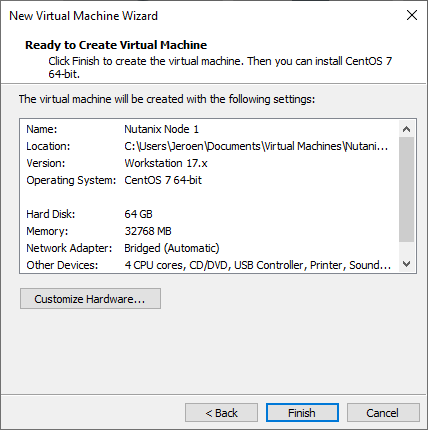
Edit the virtual machine and remove the sound card and the printer.
Select: Processors.
Check: Virtualize Intel VT-x/EPT.
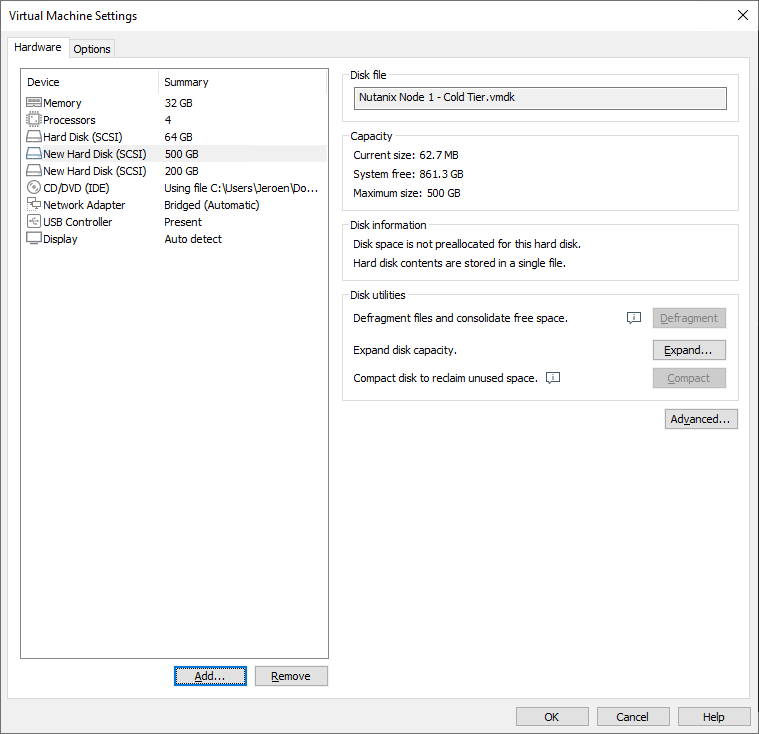
 Add a new 200GB disk, this will be the hot tier disk.
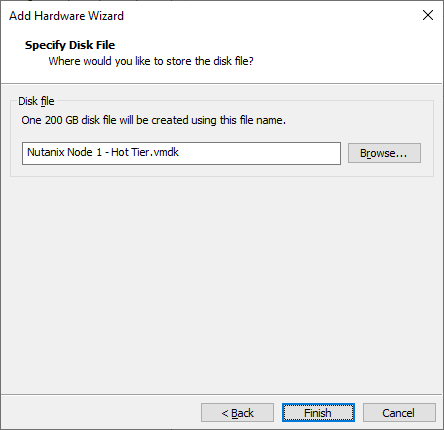 Add a new 500GB disk, this will be the cold tier disk.
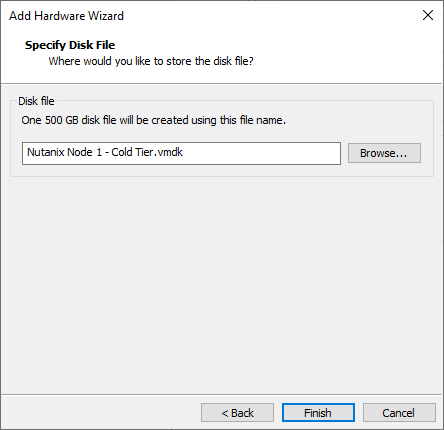
Your virtual machine should like like this:
Update: Add disk.EnableUUID=TRUE in the VMX file manually. This is needed to get the disk serials populated.
Start the virtual machine.

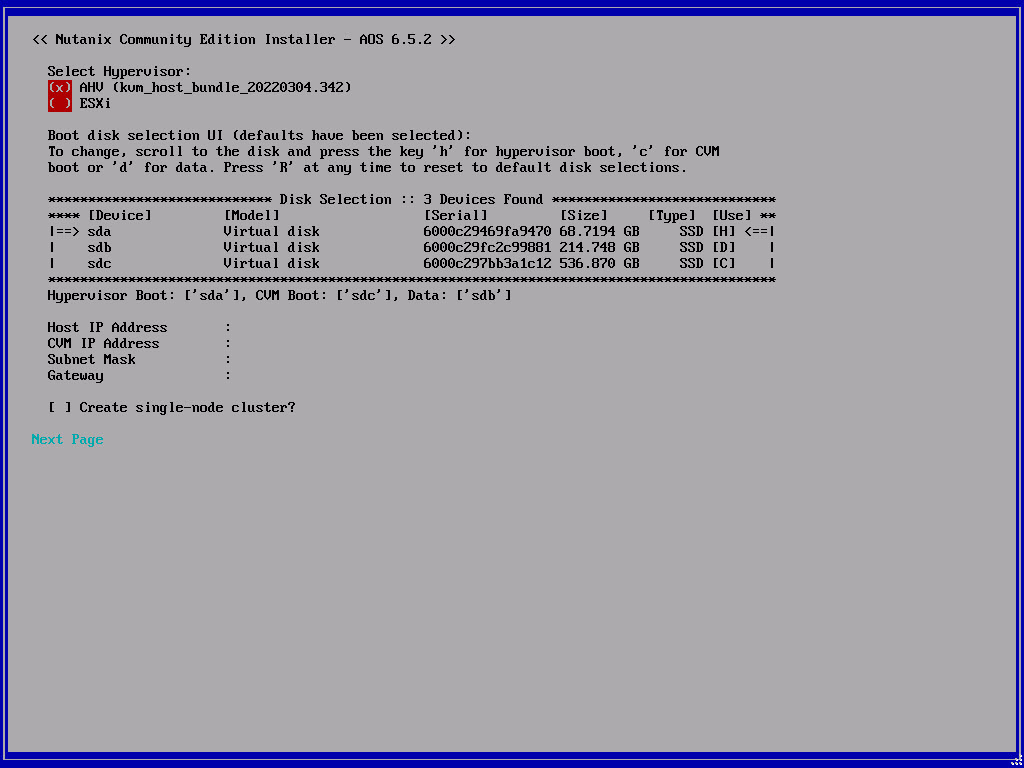
The installer will boot and after a while the configuration screen is displayed. Fill in the correct configuration. For this tutorial I’m skipping the “Create single-node cluster” part.
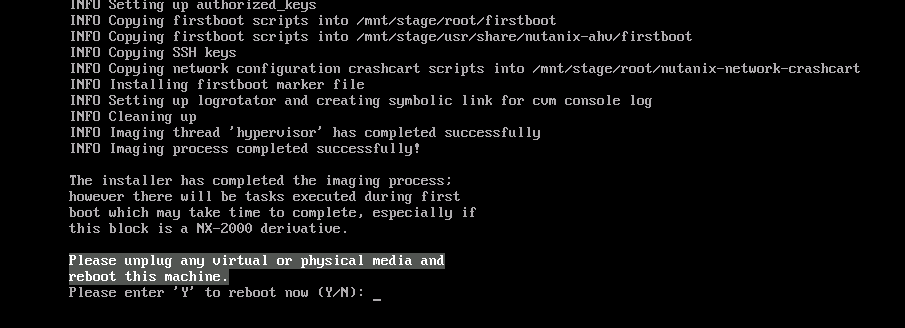
When the installer is ready reboot the virtual machine.
If you need a three node cluster repeat the above steps 2 more times for the 2 others nodes (with their own ip-addresses). And then continue below.
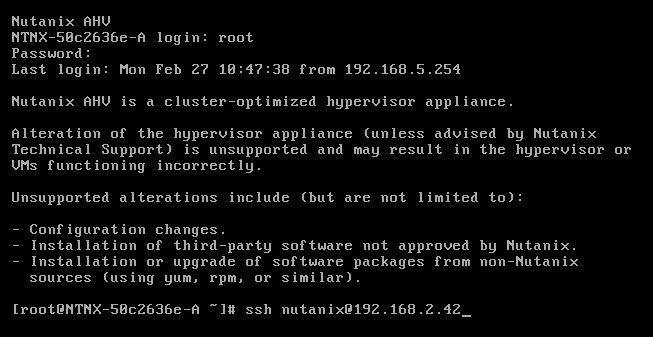
When all (1 or 3) nodes are booted login to the console with the default credentials root nutanix/4u and ssh into the cvm running on the node: ssh nutanix@<cvm_ip>
the default password is nutanix/4u
When you are in the cvm run: watch -d genesis status

If genesis is running (there are pids behind the service name) you can continue to create the cluster. (Press CTRL+C to quit watch)
For a single node cluster the command is: cluster -s <cvm_ip> –redundancy_factor=1 –cluster_external_ip=<cluster_virtual_ip> create
![]()
For a three node cluster the command is (when genesis is running on all three nodes): cluster -s <cvm_ip_1>,<cvm_ip_2>,<cvm_ip_3> create

This will take a while as the cluster is created and alle servicers are started on the CVM(s).
As we didn’t specify dns servers during cluster creation, Community Edition will configure 2 google dns servers.
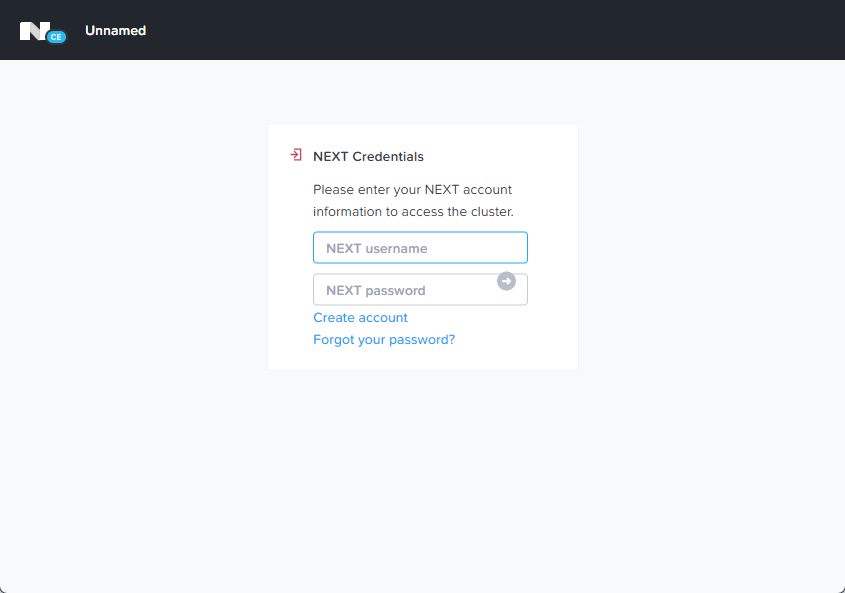
The cluster is accessible via https://<cvm_ip>:9440. Login with admin nutanix/4u

After login you need to login with your Nutanix Community account. Make sure you are registered.
Now you are ready to configure the cluster to your needs (ntp, dns, containers, prism central, password, files, etc etc etc)
Discover more from Jeroen Tielen
Subscribe to get the latest posts sent to your email.
Nutanix CE 2.0 3-node cluster.
Hi Jeroen,
Great post as always.
In the past I’ve deployed a 3-node cluster using Nutanix CE 5.18 in my home lab, nested on ESXi on HP DL360 G9 h/w.
But I have not been able to do so with CE 2.0. I am able to deploy a single node cluster. But not a 3-node which is ideal for lab purposes.
Any thoughts would be appreciated.
Thanks
Ike
Hi Ike,
Did you see the serial numbers of the disks in the ce installer screen? If not, try this:
Add the following parameters to each virtual machine: “disk. EnableUUID” value is “TRUE”
Let me know if that worked? (Yes, I need to update the blog post ;))
Greets Jeroen.
Hi Jeroen,
Thanks for quick response.
The advanced config parameter was added and disk serial numbers are visible.
thanks
Ike
Your welcome. Post is updated as well 😉 Did that resolve your issue?
No, it didn’t resolve the issue.
Single node cluster deployed ok. But not a 3-node cluster.
thanks
ike
OKe what you can do is the following.
1. Install each node without the option to create a cluster automatically;
2. When all three nodes are installed make sure they can see each other (ping to each cvm/ahv from one node);
3. Create the cluster with the cluster create command.
Thanks, I will do so and post the outcome.
Really appreciate your feedback.
Just attempted to deploy a 3-node cluster. Got this error:
nutanix@:172.16.0.123:~$ cluster -s 172.16.0.121,172.16.0.122,172.16.0.123 create
2023-08-14 14:13:55,339Z INFO MainThread cluster:2943 Executing action create on SVMs 172.16.0.121,172.16.0.122,172.16.0.123
2023-08-14 14:13:58,376Z INFO MainThread cluster:1007 Discovered node:
ip: 172.16.0.122
rackable_unit_serial: 26e97e9b
node_position: A
node_uuid: c99ef0ee-cf7d-4f19-b8b3-33193f8aeb38
2023-08-14 14:13:58,377Z INFO MainThread cluster:1007 Discovered node:
ip: 172.16.0.123
rackable_unit_serial: 13f5939b
node_position: A
node_uuid: b2f5ffe0-6eef-48ee-b023-8300d3428750
2023-08-14 14:13:58,377Z INFO MainThread cluster:1007 Discovered node:
ip: 172.16.0.121
rackable_unit_serial: 2ca03e81
node_position: A
node_uuid: 17f18be7-3c67-4774-a798-48f871547a42
2023-08-14 14:13:58,377Z INFO MainThread cluster:1025 Cluster is on arch x86_64
2023-08-14 14:13:58,378Z INFO MainThread genesis_utils.py:8077 Maximum node limit corresponding to the hypervisors on the cluster (set([u’kvm’])) : 32
2023-08-14 14:13:58,383Z INFO MainThread genesis_rack_utils.py:50 Rack not configured on node (svm_ip: 172.16.0.121)
2023-08-14 14:13:58,387Z INFO MainThread genesis_rack_utils.py:50 Rack not configured on node (svm_ip: 172.16.0.122)
2023-08-14 14:13:58,389Z INFO MainThread genesis_rack_utils.py:50 Rack not configured on node (svm_ip: 172.16.0.123)
2023-08-14 14:14:15,691Z INFO MainThread cluster:1332 iptables configured on SVM 172.16.0.121
2023-08-14 14:14:33,570Z INFO MainThread cluster:1332 iptables configured on SVM 172.16.0.122
2023-08-14 14:14:50,963Z INFO MainThread cluster:1332 iptables configured on SVM 172.16.0.123
2023-08-14 14:14:51,159Z INFO MainThread cluster:1351 Creating certificates
2023-08-14 14:15:03,507Z INFO MainThread cluster:1368 Setting the cluster functions on SVM node 172.16.0.121
2023-08-14 14:15:03,509Z INFO MainThread cluster:1373 Configuring Zeus mapping ({u’172.16.0.122′: 2, u’172.16.0.123′: 3, u’172.16.0.121′: 1}) on SVM node 172.16.0.121
2023-08-14 14:15:04,249Z CRITICAL MainThread cluster:1394 Failed to configure Zeus mapping on node 172.16.0.121: RPCError: Client transport error: httplib receive exception: Traceback (most recent call last):
File “build/bdist.linux-x86_64/egg/util/net/http_rpc.py”, line 178, in receive
File “/usr/lib64/python2.7/httplib.py”, line 1144, in getresponse
response.begin()
File “/usr/lib64/python2.7/httplib.py”, line 457, in begin
version, status, reason = self._read_status()
File “/usr/lib64/python2.7/httplib.py”, line 421, in _read_status
raise BadStatusLine(line)
BadStatusLine: ”
nutanix@:172.16.0.123:~$
Hmm let me try if I can reproduce this in house 😉
what was the fix?
nutanix@:172.16.0.121:~$ genesis restart # on all 3 cvms
Then cluster start
3 services came up each: zeus, Scavenger, Xmount and SysStatCollector
Cluster start again. and now all services are up.
Looking good so far.
Thanks
Hi Jeroen,
Finally got 3-node cluster (CE 2.0) working. Just logged into Prism now. Looks good. Thanks for your help today.
Do you mind if I keep in touch. I’m based in the UK.
Ike
Good work 👍🏻. Always here to help.
Hello Jeroen,
Thank you for sharing this with us.
I have uploaded a 1 node cluster here in my lab as per your guidelines. The cluster is operational, I can run several procedures, etc. But a curious fact, I can not boot any VM that I create, I see an error “InternalException” and I do not see more details about this error.
I’m using an AMD Ryzen 8-core PC. I’ve configured the cluster with 32GB, I see CVM running normally, but I can’t start any other VM. I know that in the past we had problems running Nutanix nested on AMD CPU’s, but now I don’t know if this restriction remains; I don’t think so because the official Nutanix Community documentation mentions AMD CPU’s as compatible.
That was the message I saw:
libvirtError: the CPU is incompatible with host CPU: Host CPU does not provide required features: monitor
Try to add cpu passthrough to the virtual machines with: acli vm.update cpu_passthrough=true
Thanks Jeroen, now it’s working fine.
Enjoying, I noticed another behavior, this time with CVM. I created the single node cluster eith 32GB RAM and the installation already sets the CVM to 16GB of RAM, but when I try to increase the CVM’s memory (20 or 24GB), after the cluster is created, I got a message saying that the memory is low. The reason for the increase is to allow the creation of a container with a deduplication option, which requires a CVM with more resources.
Hey there,
Where I can set “disk.EnableUUID=True”? I don’t see such a setting, am I looking wrong or does it apply to vmware vsphere?
You can set this option under the VM Settings: Edit Settings -> VM Options -> Advanced -> Under Configuration Parameters (EDIT CONFIGURATION) -> ADD CONFIGURATION PARAMS
Using…
cluster create -s 192.168.1.92 –cluster_external_ip=192.168.1.93 –redundancy_factor=1
…everything seems to install OK and cluster status reports all up, however I can’t browse to http(s)://192.168.1.92:9440
What do you see on the browser screen?
The standard “page not found” message
I can’t SSH to the .92 address either. .91 is fine (your .41), and from there to .92, but not directly.
I’ve tried rebuilding a few times, maybe the instructions have changed slightly since last year?
I have just seen your new post https://www.jeroentielen.nl/installing-nutanix-community-edition-ce-on-vmware-esxi-vsphere/ I’ll follow that instead.
Thank you
Hi Jackson sir,
Greetings!!!
I am a trying to Install CE in my laptop. I have also same question for this cmd which you provide “disk.EnableUUID=True”? Vm ware 16 I am using so where is the option for set this command can you explain please
How to upload snapshot here for reference
Thnks
Amol
Hi Amol,
At the moment I dont have any vmware workstation installation available. But when you created the virtual machine, browse to the folder where the virtual machine is stored. Open the .vmx file with an editor (notepad for example) and add the line at the bottom.
Save the file, start the vm. Good luck.
HI Jeroen Sir,
It was done yesterday. i followed the same process. now the serial numbers are showing. but i have 1 more query i posted please provide me the solution
Thanks in advance.
Amol
Hi Jeroen sir ,
Sorry for worng name
Thanks
Amol
Hi Jeroen sir ,
Good day,
When the installer is ready reboot the virtual machine. this message is not happening in my screen
i am following your step now that step
INFO Scanning devices to assemble RAID. This may take few minutes
INFO
Scanning devices: [‘sdb’, ‘sdc’ 1 Model detected: CommunityEdition
INFO
upd info (‘upd_nethod: None)
INFO
Generating cluster id
INFO
INFO node serial 77f6cf6f-fecd-4a1d-920d-cbcecd692011, node_uuid 05445a7a-3023-4сае-Выс6-954d3671846b, block id cluster
INFO
Re-reading partition table for sda
id 189714186532159182, model USE LAYOUT, model string ConnunityEdition, node position =
INFO INFO LUM volune group
LUM volune group ahu was not detected; assuming that AHU is installed on normal partitions ahu uas not detected: assuming that AHV is installed on normal partitions
IMFD Getting MOS version Fron the CUM
INFO Phoenix ISO is already nounted
INFO Getting AOS version fron /mnt/iso/images/sun/nutanix_Installer_package.tar.p00, This nay take a few minutes if phoenix is r unning from BMC
(x) AHU (kum host bundle 20220304.342)
(ESXi
Boot disk selection UI (defaults have been selected):
To change, scroll to the disk and press the key ‘h’ for hypervisor boot, ‘c’ for CUM boot or ‘d’ for data. Press ‘R’ at any time to reset to default disk selections.
**** [Device)
1 sda
sdb
sdc
[Model]
[Serial]
Disk Selection
3 Devices Found нннннннннннн
[Size]
6000c29f91fafdc1 69.7932 GB
6000c297772e9437
211.748 GB
6000c291593e2ca9 322.122 611
VMware Virtual S
VMware Virtual S
UMware Virtual S
Hupervisor Boot: [‘sda’l. CUM Boot: [‘sdc’l. Data: [‘sdb’l
[Type] [Usel **
SSD [H]<==
SSD [D]
SSD [C]
Host IP Address
CUM IP Address
Subnet Mask
Gateway
192.168.159.11
192.168.159.12
255.255.255.0 192.168.159.1
[x] Create single-node cluster? DNS Server: 192.168.159.1
Next Page
i accept lic
installation start
INFO Loaded config parameters successfully
INFO
130/24301 Hyperviser installation in progress
INFO
160/2430] Hypervisor installation in progress
INFO INFO
Installer VM finished In 60.6999871731s. Hypervisor installation is done
INFO
Re-reading partition table for sda
INFO
LUM volune group ahu was not detected; assuning that AHU is installed on normal partitions
INFO INFO LUM volune group
LUM volune group ahu uas not detected: assuming that AHU is Installed on normal partitions ahu uas not detected: assuning that AHU is installed on normal partitions
INFO
Cleaning up
INFO
LUM volume group ahu uas not detected; assuming that AHU is installed on normal partitions Inaging thread hypervisor' failed with reason Traceback (most recent call last):
INFO
File "/root/phoenix/kum.py", line 112, in image
self.custonizer.customize()
File "/root/phoenix/customize kun.py", line 1304, in customize
self. mount kun partition()
File "/root/phoenix/custonize kun.py", line 137, in nount kun partition
sysUtil.get_ahu_root_dev(), self.stagel)
File "/root/phoenix/shell.py", line 53, in shell cmd
raise StandardError(err nsg)
StandardError: Failed command: Emount -t ext4 /dev/sdal /mnt/stage] with error: Imount: special device /dev/sdal does not exist]
out: []
1
FATAL Inaging thread 'hypervisor' failed with reason (Traceback (most recent call last):
File "/root/phoenix/kum.py", line 112, in Image
self.customizer.customize()
File "/root/phoenix/custonize kon.py", line 1304, in customize
self. mount_kom_partition()
File "/root/phoenix/customize kun.py", line 137, in nount kom_partition
syslutil.get ahu root dev(), self.stagel) File "/root/phoenix/shell.py", line 53, In shell_cmd
raise StandardError(err_nsg)
StandardError: Failed command: Imount-t ext4 /dev/sdal /mnt/stagel with error: Imount: special device /dev/sdal does not existi
out: 11
[screen is terminating1
[root@phoenix #
in here not showing restart the server
Thanks in advanced
AMol
Looks like your installer iso is corrupt.
Dear Jeroen Sir,
Greetings!!!
So where do I download it? Can you send me that link please?
Sorry for disturbing and thanks for helping the beginner
Thanks
Amol
Dear Jeroen Sir,
Greetings!!!
If you have any iso 5.5 also please share me link for downloading
Thanks sir
Amol
Dont have it.
I tried to setup a 3 node cluster on ESXi8 (Nested) but the SVMs could not discover each other when the network policy for the Port-Group is set to default
It must be changed to
Promiscuous mode Accept
MAC address changes Accept
Forged transmits Accept
hi..
i have 2 physical nodes and a vm.. (thanks to you) but when i create the cluster i get that the VM one is undiscovered.
I read somewhere that it might because the physical nodes has ipmi adresses when installed, but no way i can set an ipmi adress in a bios on the vm.
Is this correct?
nutanix@NTNX-b46a926d-A-CVM:10.98.61.181:~$ ping 10.98.61.185
PING 10.98.61.185 (10.98.61.185) 56(84) bytes of data.
64 bytes from 10.98.61.185: icmp_seq=1 ttl=64 time=2.28 ms
64 bytes from 10.98.61.185: icmp_seq=2 ttl=64 time=1.06 ms
^C
nutanix@NTNX-b46a926d-A-CVM:10.98.61.181:~$ ping 10.98.61.188
PING 10.98.61.188 (10.98.61.188) 56(84) bytes of data.
64 bytes from 10.98.61.188: icmp_seq=1 ttl=64 time=0.817 ms
64 bytes from 10.98.61.188: icmp_seq=2 ttl=64 time=0.874 ms
^C
#All 3 cvms is unconfigured:
nutanix@NTNX-b46a926d-A-CVM:10.98.61.181:~$ cluster status
2024-04-04 08:41:36,244Z CRITICAL MainThread cluster:2930 Cluster is currently unconfigured. Please create the cluster.
nutanix@NTNX-18e40b4d-A-CVM:10.98.61.185:~$ cluster status
2024-04-04 09:33:42,869Z CRITICAL MainThread cluster:2930 Cluster is currently unconfigured. Please create the cluster.
nutanix@NTNX-ac5b4bff-A-CVM:10.98.61.188:~$ cluster status
2024-04-04 10:33:01,427Z CRITICAL MainThread cluster:2930 Cluster is currently unconfigured. Please create the cluster.
#The x.x.x.188 one is the cvm on the vm
#output from cluster creation:
nutanix@NTNX-b46a926d-A-CVM:10.98.61.181:~$ cluster –dns_servers=10.98.4.34,10.98.4.35 –ntp_servers=time.google.com –redundancy_factor=2 -s 10.98.61.181,10.98.61.185,10.98.61.188 –cluster_name=Nutanix_CE –cluster_external_ip=10.98.61.183 create
2024-04-04 08:43:29,322Z INFO MainThread cluster:2943 Executing action create on SVMs 10.98.61.181,10.98.61.185,10.98.61.188
2024-04-04 08:43:32,365Z CRITICAL MainThread cluster:1001 Could not discover all nodes specified. Please make sure that the SVMs from which you wish to create the cluster are not already part of another cluster. Undiscovered ips : 10.98.61.188
nutanix@NTNX-b46a926d-A-CVM:10.98.61.181:~$
#output from genesis.out
2024-04-04 08:43:32,363Z INFO 37518192 node_manager.py:8537 Discovered unconfigured svms: [u’10.98.61.185′, u’10.98.61.181′]
#Any ideas?
i figures out that i have different versions of foundation on physical machines and vm..
Reinstalling physical machines now
reinstalled physical nodes.. same issue
hi jeroen,
thanx for your great article.
I installed ntx-ce 2020.09.16 on my mini pc with 32 gb ram, with proxmox as hypervisor.
my nutanix config is : cpu (host), mem 24 gb, sda 50 gb, sdb 200 gb, sdc 400 gb.
installation was successfull and i can login to AHV and CVM also.
but when I issued “watch -d genesis status” on CVM, it only give me output :
==================================================
nutanix@:192.168.1.102:~$ genesis status
2024-05-09 13:34:34.958341: Services running on this node:
==================================================
there’s no PID at all
another output for checking :
==================================================
nutanix@:192.168.1.102:~$ ps aux | grep genesis
nutanix 2123 0.0 0.0 12540 2244 pts/0 S+ 13:34 0:00 grep –color=auto genesis
nutanix@:192.168.1.102:~$ ps aux | grep genesis
nutanix 2152 0.0 0.0 12540 2316 pts/0 S+ 13:34 0:00 grep –color=auto genesis
nutanix@:192.168.1.102:~$
nutanix@:192.168.1.102:~$ sudo systemctl start genesis
Failed to start genesis.service: Unit not found.
nutanix@:192.168.1.102:~$
==================================================
how to restart genesis, so I can see the PIDs?
thanx you in advace, and greeting from Indonesia
solved.
I resized memory allocation to CVM.
The system is automatically allocate 12G memory to CVM.
I resized to 18G, and now all services needed by CVM are running
I personally had a problem: when restarting nutanix, it’s not more possible to log on web console on prism element having the answer from prism that server is not reachable. After having try to install on windows and linux physical hosts i discovery a trick command on Nutanix’s forun which restart especially just prism services. Logging into root from console on vmware workstation, after ssh on nutanix CVM and issue the follow command:
nutanix@CVM:~$ allssh genesis stop prism; cluster start
(CVM could be an IP address if no DNS configured like 192.168.2.42 from example above).
The “not reachable” means you have to wait. Not all services are up and running.
Thanks for feedback. In my case I’ve waited for a long time and nothing happens, but after doing this itś almost immediately.
Hi Jeroen,
Thank you very much for your great article. I follow your instruction to install Nutanix CE in VMWare workstation 17 player, It’s almost there, however I can’t boot CVM with the errors. How do I fix the errors?
error: Failed to start domain ‘NTNX-585513c2-A-CVM’
error: internal error: process exited while connecting to monitor: 2024-08-27T18:56:16.524355Z qemu-kvm: unable to map backing store for guest RAM: Cannot allocate memory
You need more ram on the vm or reduce the cvm ram.
Hello Jeroen
I’m experiencing connectivity issues with my current setup:
I have a Windows Server 2022 machine configured with NAT as follows:
IP Address: 172.16.10.10/24
Gateway: Initially set to 172.16.10.1 but changed to 192.168.206.2 (to enable communication with the network and Nutanix VM)
DNS: 172.16.10.10
For my Nutanix setup:
AHV IP: 172.16.10.30
CVM IP: 172.16.10.31
Gateway: Initially 172.16.10.1, but I changed it to 192.168.206.2 in both the AHV and CVM configurations (via network scripts and interface settings).
Despite these changes, Nutanix AHV and CVM cannot access the internet or ping the gateway, though they can still ping the server. After modifying the br0 interface IP in the AHV’s system config (via network scripts), the network became unreachable. For the CVM, I made a similar modification to the eth0 interface with the same result.
I’m able to ping the server, but I’m completely lost on how to fix the connectivity issues.
Please advise. Thank you!
dont change ahv/cvm network settings with linux commands. always use the nutanix methods (can be found on the nutanix portal). But before you make a nutanix environment make sure your network is currect. You cannot just change the gateway ip, you should also change your router ip/routing tables etc. So start over and make sure your network is correct.
Thank you Jeroen for a timely response. I didn’t get the router table updating part since I’m provisioning machines on vmware workstation why would I update the router.
Starting over again should I configure both server and nutanix again with NAT or bridged?
Do I install dhcp server role and create a dhcp scope in my server also Dns or not required ?
Keep the ips auto or assign them manually ? Because I remember even though I setup the vm on nat I was seeing class c ips on other interfaces in nutanix vm while the ahv was class b ip that I configured .
Thank you
Hi Jeroen,
I already have a vSphere8 cluster (4 node-ESXi8) running on VMware workstation(Home Lab). Now, i want to install\add only Nutanix CVM to these ESXi host machine to create a Nutanix cluster. Is it possible? Please let me know the steps to add only CVM to the existing ESXi hypervisor, thank you.
Note: Am trying to install Community Edition (CE) 2.1
No that is not possible. And CE2.1 is only available in AHV.
Hi Jeroen,
Thanks for the update. Is there any other version which can used with vSphere8? What I want to know is, is it possible to add only CVM to the existing vSphere without reinstalling/installing the hypervisor. Just want to add the CVM, thank you
No that is not possible. Nutanix is tightly integrated into the hypervisor that it also needs to install it as well. So what you want is not possible. Not in ce not in commercial version.
Hello,
Need your help: i installed CE 5.6.1 on the servers. RAM-64 GB. vcpu-8, also 3 disks (32, 200, 500 gb) thin provisioned. EnableUUID=TRUE is enabled.
promisiouse mode is enabled and all security settings on the port group are enabled. But still recieving this error:
error: Failed to start domain ‘NTNX-586433c9-A-CVM’
error: internal error: process exited while connecting to monitor: 2024-08-27T18:56:16.524355Z qemu-kvm: unable to map backing store for guest RAM: Cannot allocate memory.
What to do more? how to correct? Thanks!
Probably the physical machine has not 64GB of ram free.
hi
im installed nutanix ce host and cvm ip able acces in ssh but cvm ip not accessible in web console
You need to create the cluster after installation. So login (via ssh) into the cvm and give the command: cluster -s –redundancy_factor=1 create