I needed to expand a cluster running Nutanix on ESX. There is a cluster expansion guide available from Nutanix which can be found here: https://portal.nutanix.com/page/documents/details?targetId=Web-Console-Guide-Prism-v6_7:wc-cluster-expand-wc-r.html But I want to show the steps involved doing this. 😉
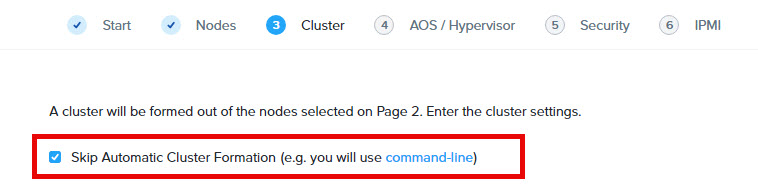
After racking and stacking the new nodes make sure they are connected to switch ports with the same configuration (vlan etc) as the other nodes in the current production cluster. So when running LACP make sure LACP Fallback is enabled on the switch ports as ESX is only doing LACP when it is connected to vCenter and attached to an Distributed vSwitch. With LACP Fallback enabled there will be network connection over one port and later, when adding the node to the dSwitch, LACP will automatically take over. Then foundation the nodes with foundation to the exact same version (AOS and ESX) as the version running on the cluster and make sure you tick the box: “Skip Automatic Cluster Formation”. Also make sure the CVM and ESX are in the same VLAN as the production nodes are.
When the nodes are up and running we need to change the DNS names. SSH into the host with the default credentials (root nutanix/4u) and give the following commands:
root@esxi# esxcli system hostname set --host=hostname

root@esxi# esxcli system hostname set --fqdn=hostname.domain.com

Before we continue make sure:
- The default root password for the ESX nodes isn’t change. So it should be nutanix/4u
- The FQDNs are resolvable via DNS to the IP-Address of the ESX host;
- The CVM is shutdown on the node(s) to add (ssh into cvm and type: sudo shutdown -h now)
- The ESX host to add is in maintenance mode (login to ESX web interface and put node into maintenance)
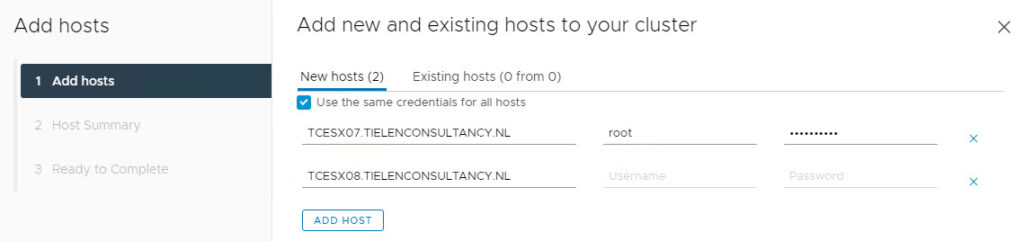
Next step is to add the new nodes to the vCenter cluster. Right click on the cluster in vCenter and select: Add hosts. Fill in the form and use the FQDN names for this. Next –> Next –> Finish this wizard.
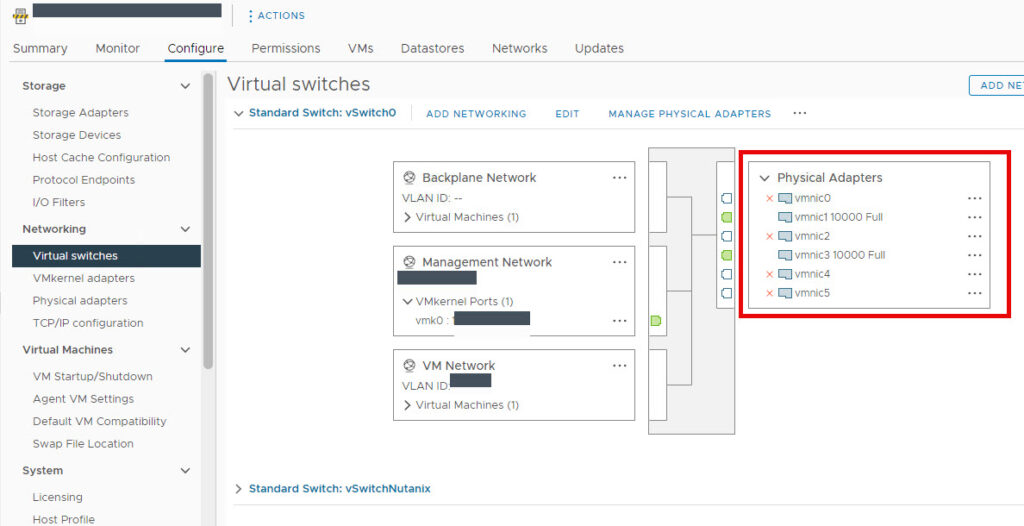
When the nodes are added to the cluster make sure the dSwitch is updated with the new hosts and the correct physical interfaces are chosen for the uplinks (Make sure you double check the connected/used interface numbers).
On the next step select the new hosts and click Next. On the next page you need to map the physical interfaces (vmnic interfaces) against the uplinks. My my case it will be the LACP group.
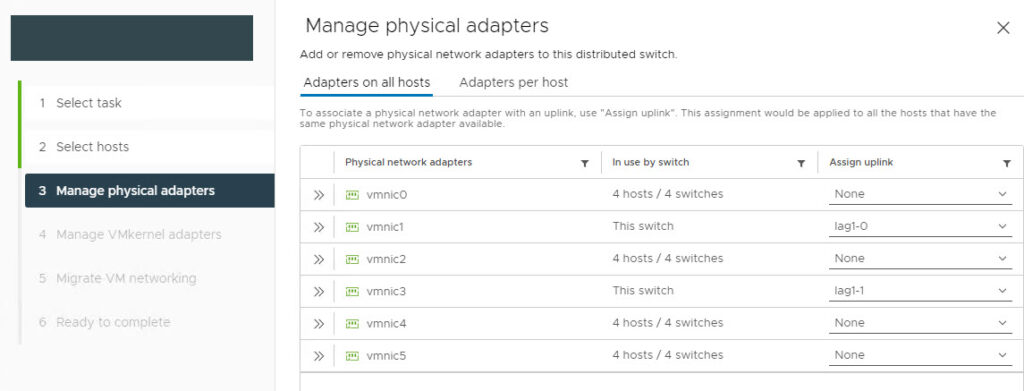
Leave the rest as is and next next finish the wizard. Now the interfaces are using the LACP. If this is not working try to do the following:
- Remove 1 interface from vSwitch0
- Add the freed interface to the dSwitch
- Swap vmk0 (management kernel port) to dSwitch
- Swap the last interface from vSwitch0 to dStwitch.
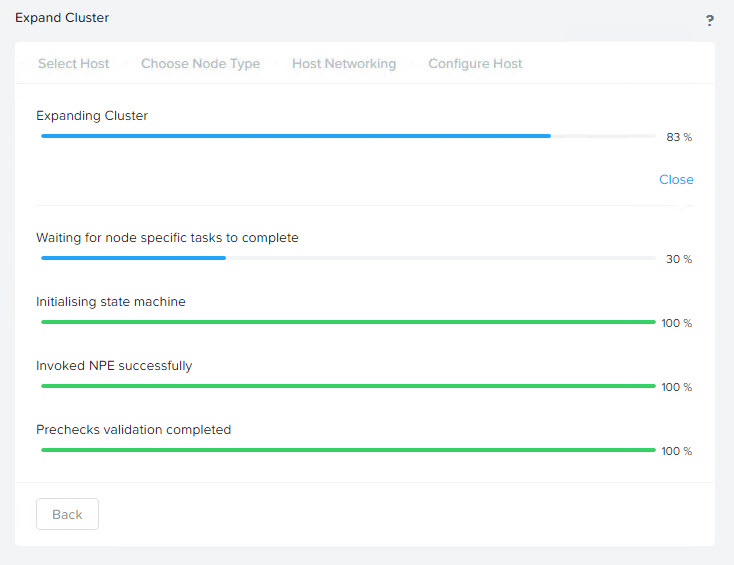
When all the interfaces are configured and the VMKernel adapters are moved to the correct dSwitch you can exit maintenance mode from the ESX nodes. Then start the CVM’s. Wait a couple of minutes until CVM is booted correctly. Log into Prism Element and do the cluster expansion.
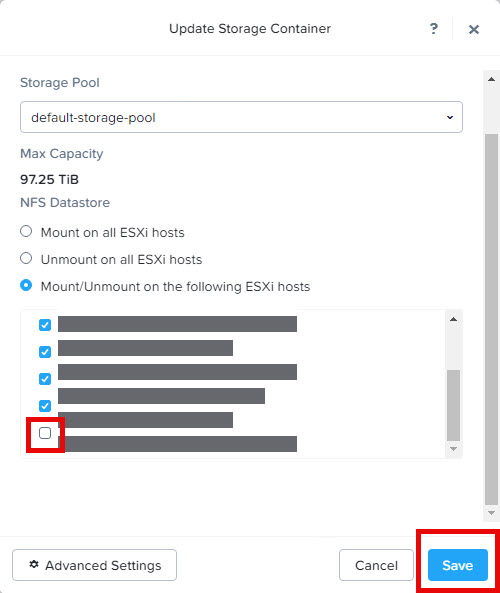
When the expansion is done you need to mount the storage containers to the newly added node(s).
Don’t forget to add the CVM’s in the “VM Overrides” to have them not participating in DRS/HA activity.
Discover more from Jeroen Tielen
Subscribe to get the latest posts sent to your email.