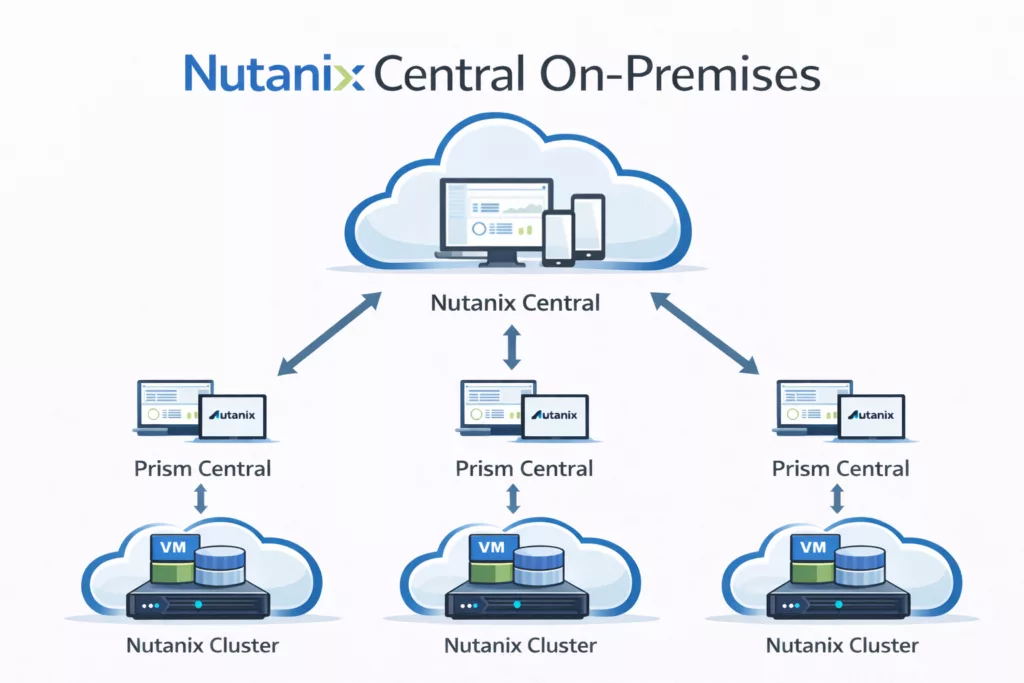
In this blogpost I will show you how to deploy Nutanix Central on-premises. This will allow you to manage multiple Prism Central’s from one single pane of glass. Nutanix Central (v1.7.1) release notes can be found here: https://portal.nutanix.com/page/documents/details?targetId=Release-Notes-Nutanix-Central-Onprem-v1_7_1:Release-Notes-Nutanix-Central-Onprem-v1_7_1
The complete admin guide can be found here: https://portal.nutanix.com/page/documents/list?type=software&filterKey=software&filterVal=Nutanix%20Central
Prism Central Requirements are:
- pc.7.5, pc.7.5.0.1
- pc.7.3, pc.7.3.0.5, pc.7.3.0.6, pc.7.3.1, pc.7.3.1.1, pc.7.3.1.2, pc.7.3.1.3
- pc.2024.3, pc.2024.3.0.1, pc.2024.3.0.2, pc.2024.3.0.3, pc.2024.3.1, pc.2024.3.2, pc.2024.3.3, pc.2024.3.4, pc.2024.3.5, pc.2024.3.6, pc.2024.3.7, pc.2024.3.8, pc.2024.3.9, pc.2024.3.10
- pc.2024.2, pc.2024.2.0.1, pc.2024.2.0.2, pc.2024.2.0.3, pc.2024.2.0.4, pc.2024.2.0.5, pc.2024.2.0.6, pc.2024.2.0.7, pc.2024.2.0.8, pc.2024.2.0.9, pc.2024.2.0.10, pc.2024.2.0.11, pc.2024.2.0.12, pc.2024.2.0.13
So that will cover most of the Prism Centrals used in the field 😉
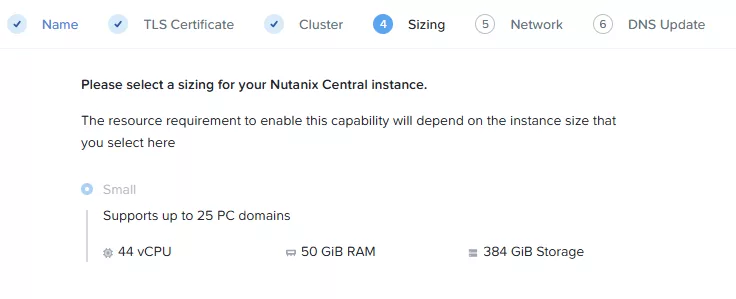
You only need to install Nutanix Central once. So decide on which cluster you want to have this running. It will be virtual machines with the following specs (total):
- 44 vCPU
- 50GiB RAM
- 384GiB Storage
This will support up to 25 registered Prism Centrals.
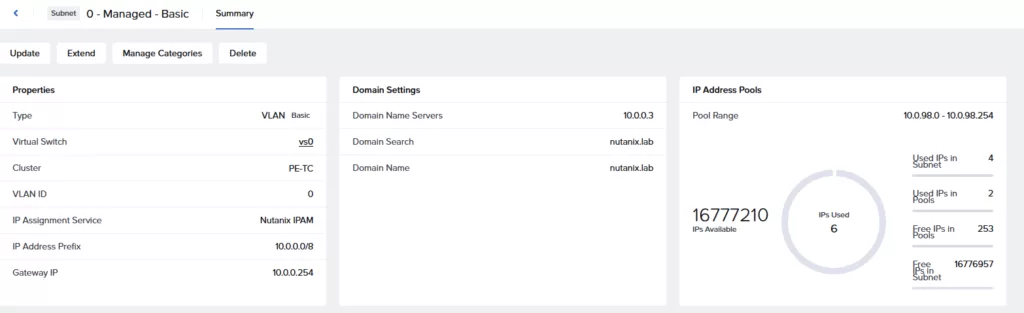
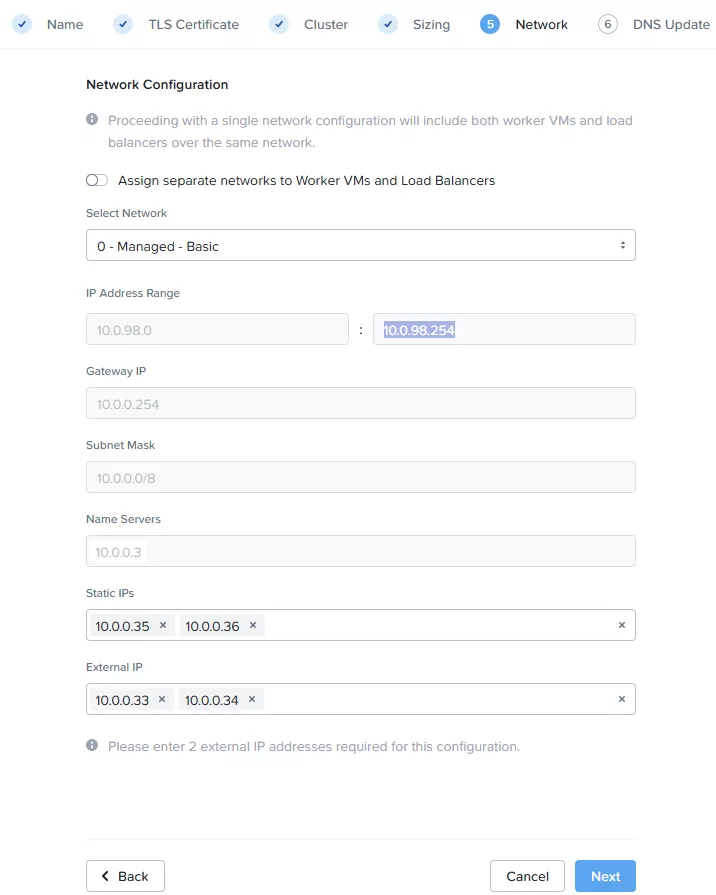
Create a managed network (IPAM enabled) with a minimum of 10 free ip’s.
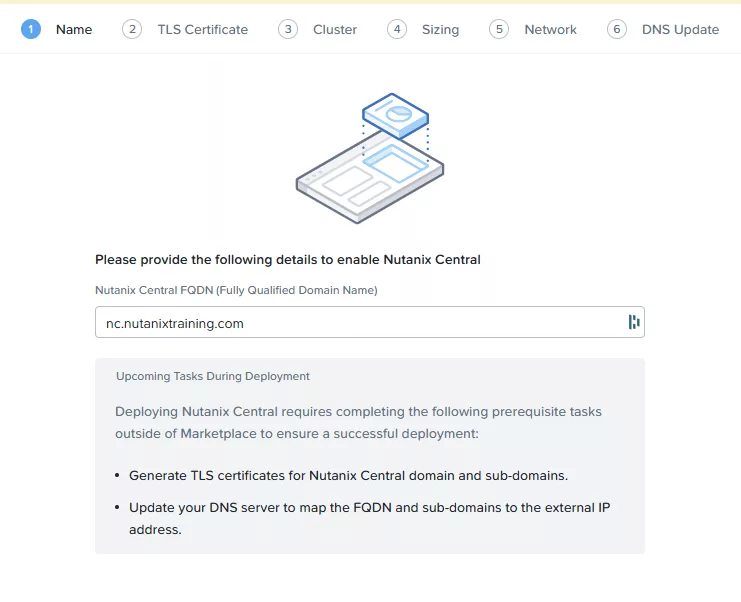
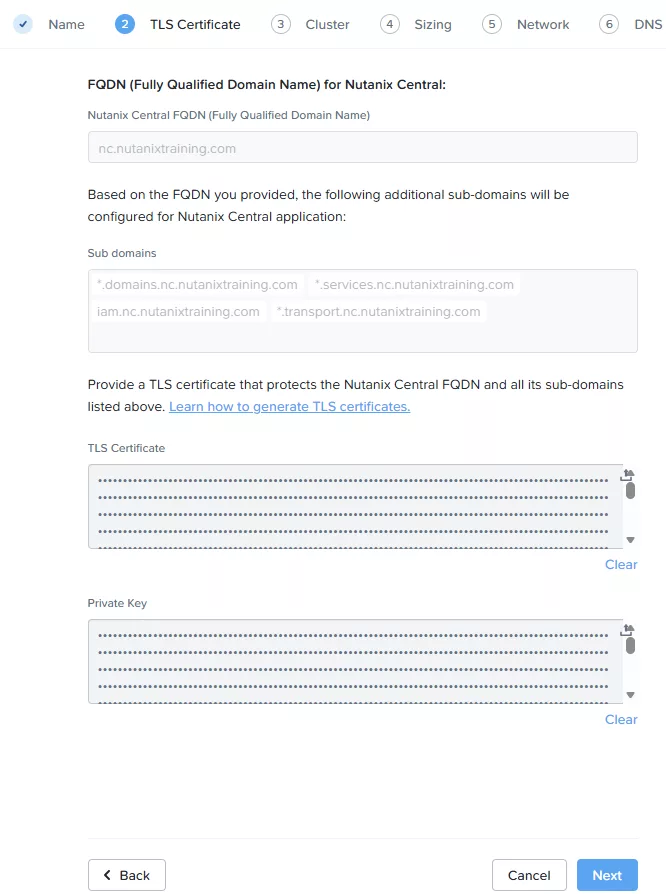
Define a FQDN for your Nutanix Central configuration. In my case it will be nc.nutanixtraining.com.
Make sure you have the certificate for this domain available. (Including private key) The certificate must include the following domains as well:
- *.domains.<Your_FQDN>
- *.services.<Your_FQDN>
- iam.<Your_FQDN>
- *.transport.<Your_FQDN>
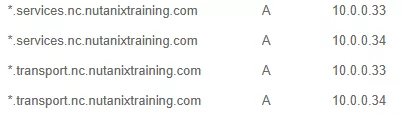
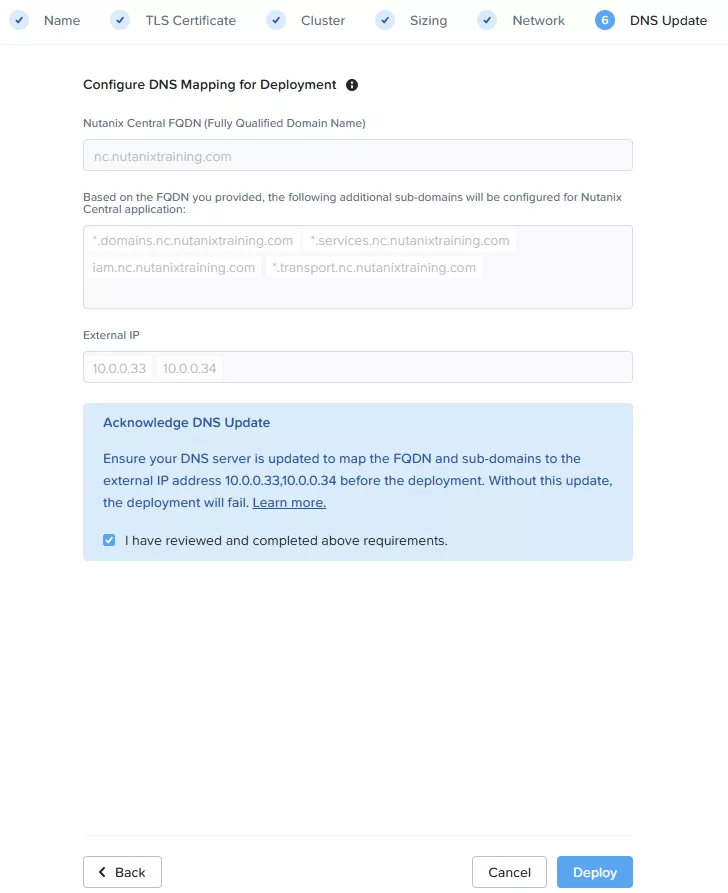
Create DNS records pointing to the Nutanix Central IPs for all these domains. In my case it will be the following two IPs 10.0.0.33 and 10.0.0.34.


Make sure the Identity Provider in Prism Central is the same as the Identity Provider used in Nutanix Central. You cannot work with local accounts.
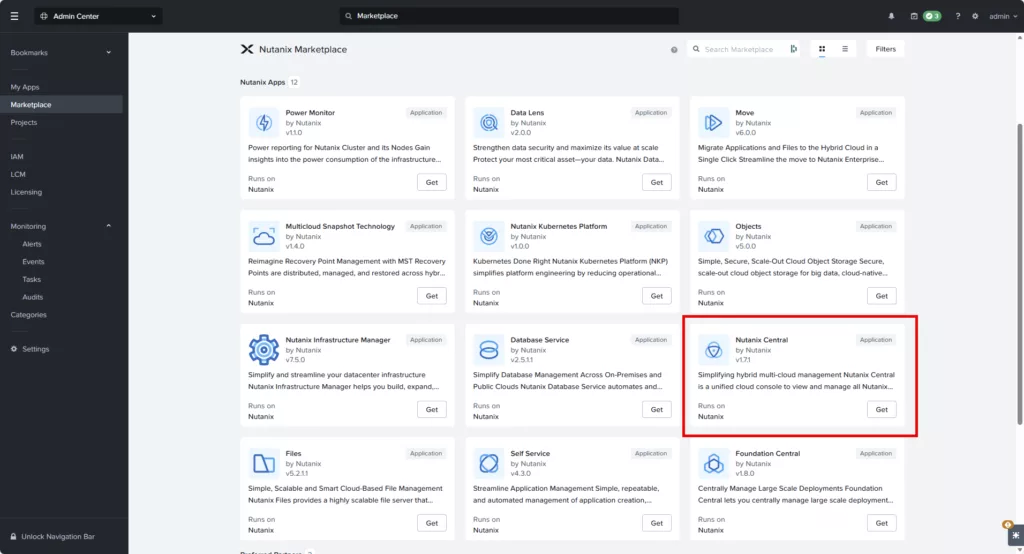
Go to the marketplace of the Prism Central managing the cluster where you want it to be installed. And click on GET at Nutanix Central. If this is not being showed, run LCM (against Prism Central) and update the components.
Now on the deployment wizard give the FQDN corresponding with your created DNS record:
On the TLS Certificate page upload your certificate and private key:
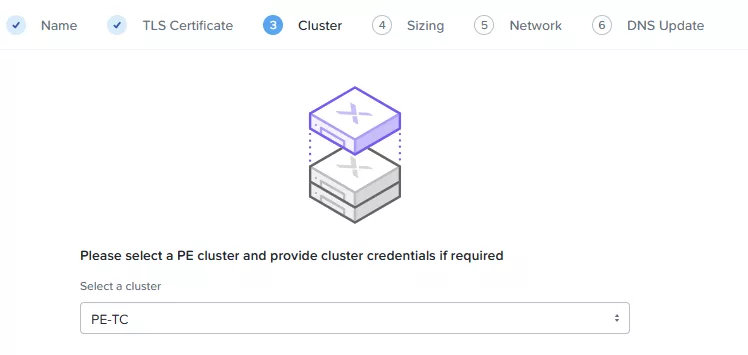
On the next page select the cluster where you want the Nutanix Central virtual machine te be running:
Select the size and click Next. (At the moment of writing there is only 1 size, SMALL)
On the next screen you need to select the managed network and assign IP addresses. So the two (2) external IPs are the 2 you have created the DNS records for and the 2 statics are for the Service MSP (SMSP). The cluster uses these IP addresses.
When you are sure you have uploaded a correct certificate and all DNS record are in place. select the checkbox and click deploy.
When everything is correct the installer will continue installing Nutanix Central. Where the checks are not correct you can download a txt file explaining what is wrong:
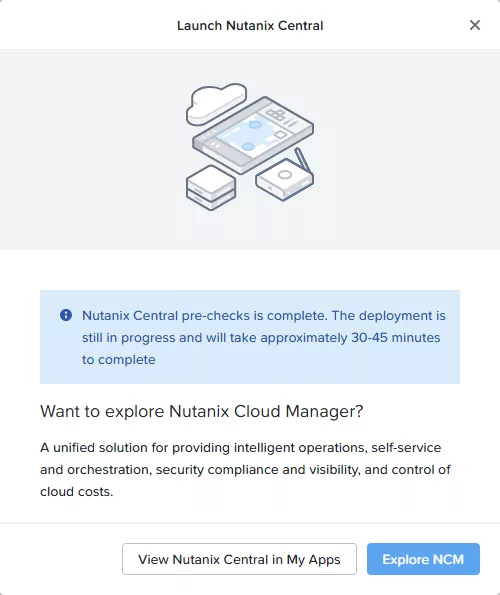
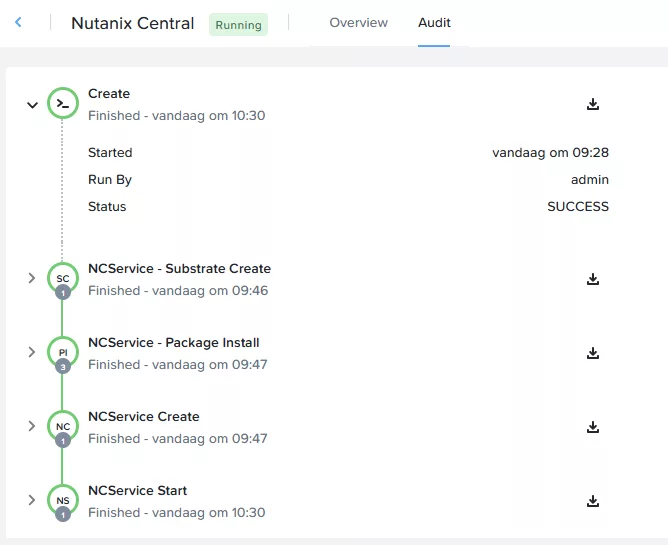
Installation took around an hour in my lab environment:
These are the created virtual machines:

The two virtual machines at the bottom (env) have the 10.0.0.33 and 10.0.0.34 assinged. So when accessing https://nc.nutanixtraining.com is will use DNS round robin to access 1 of those virtual machines. If you don’t want to use DNS round robin you can always decide to add a loadbalancer in front to do proper load balancing.
In your browser browse to https://<Your_FQDN> and login with the default credentials:
- Username: admin
- Password: Nutanix.123
You need to change the default password and after login in again with the newly created password you will be presented with this screen:
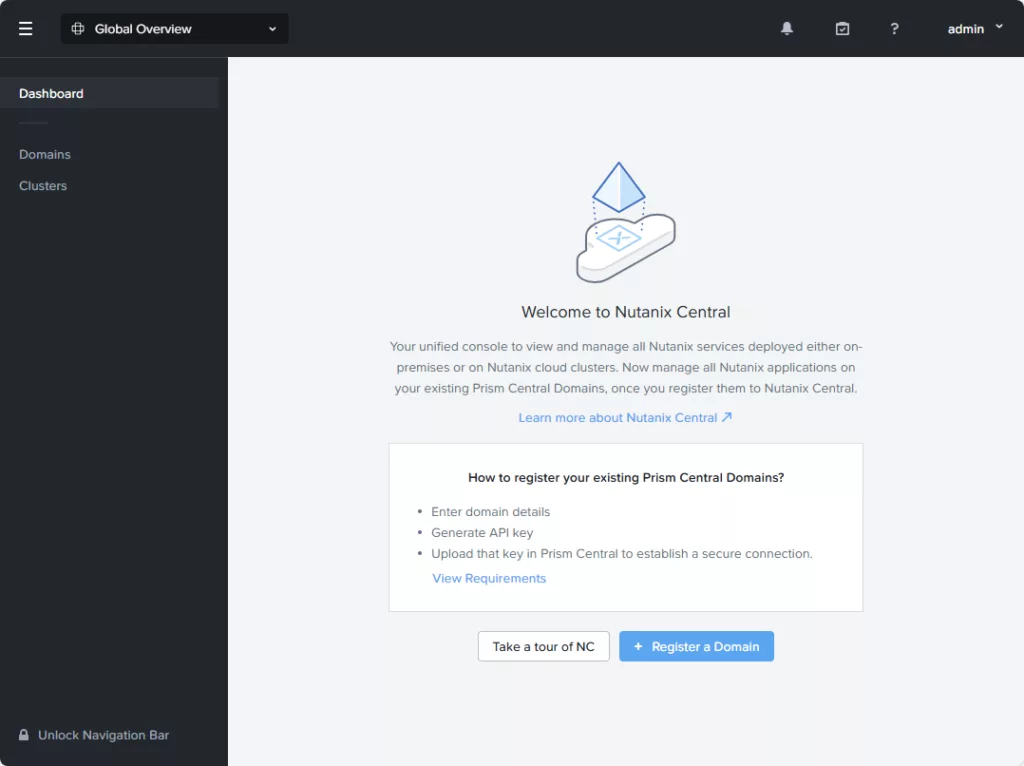
Click on “+ Register a Domain” and register the Prism Central which is managing the cluster where Nutanix Central is deployed:
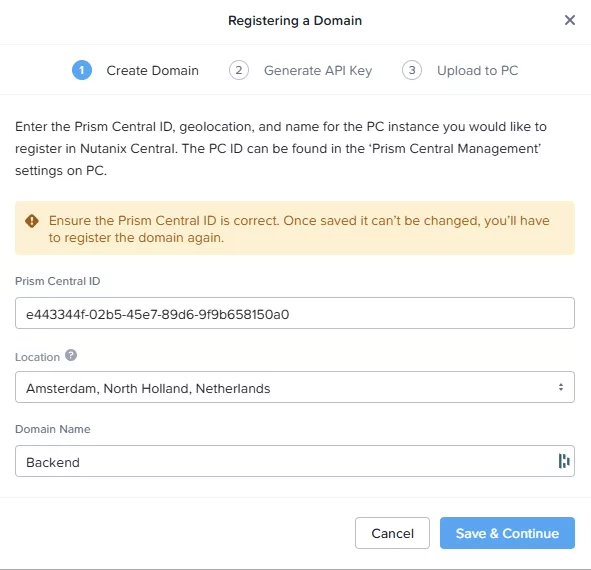
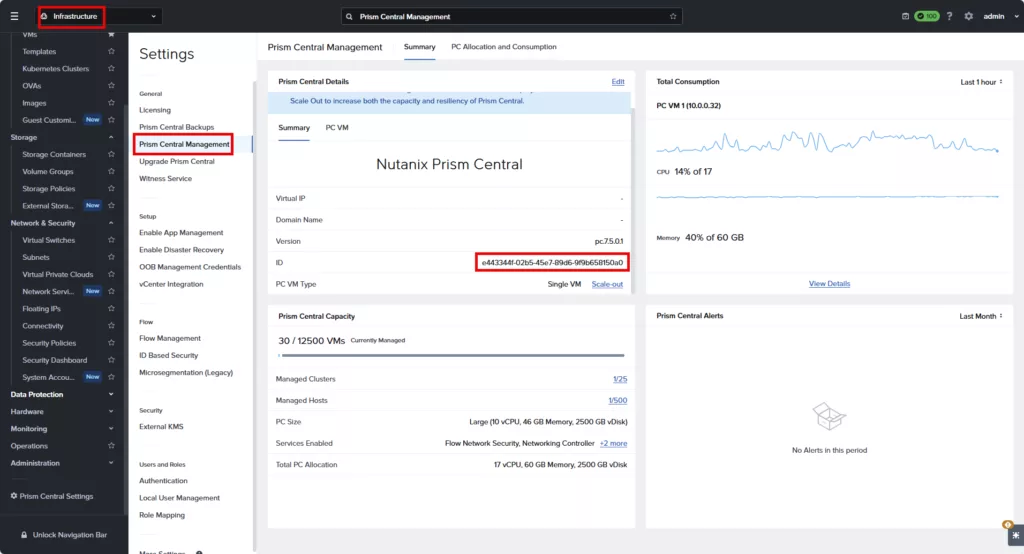
Fill in the location and a name. The Prism Central ID can be found in Prism Central –> Infrastructure –> Settings –> Prism Central Management –> ID
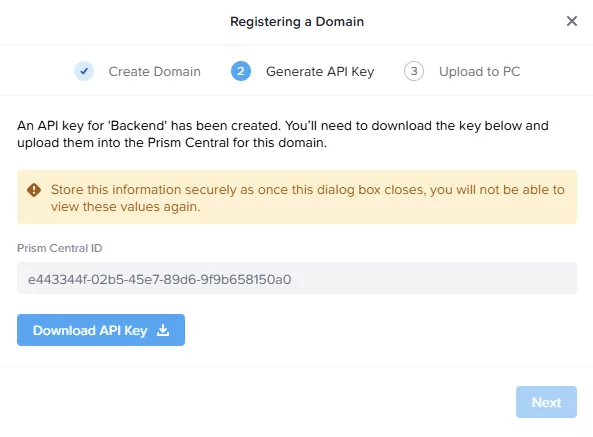
Click on Save & Continue. Now you need to download the API Key.
Jump to Prism Central and navigate to: Application Center –> Settings –> Register to Nutanix Central. The first to steps can be skipped (add Identity Provider and Generate API Key).
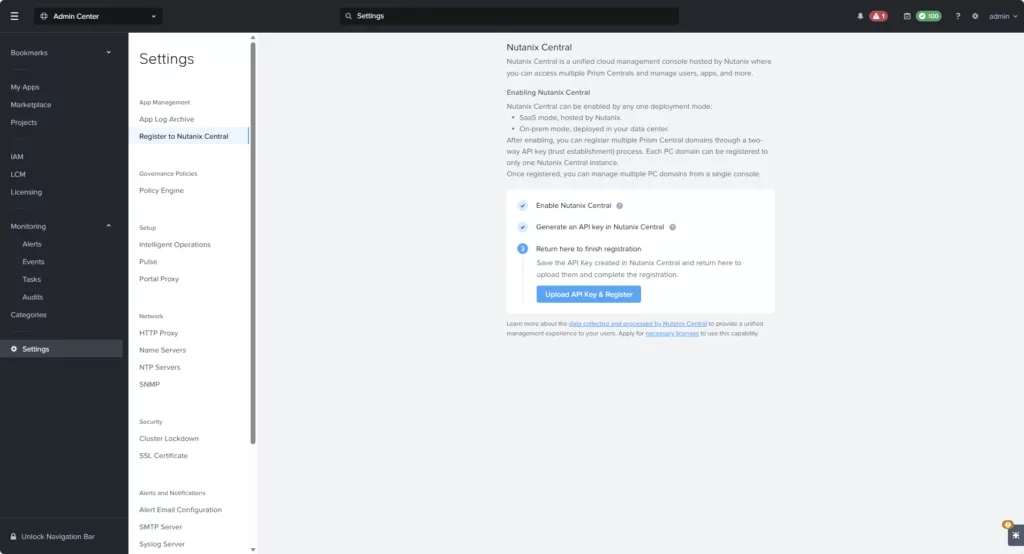
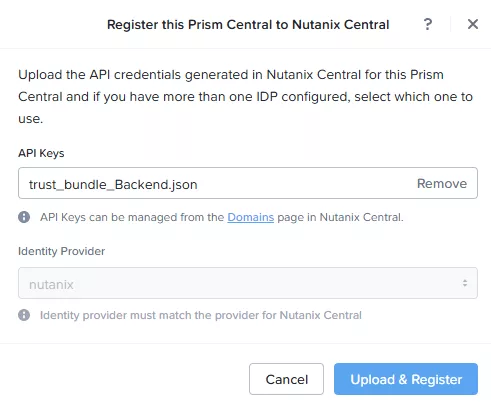
Click on “Upload the API Key & Register” (Upload the downloaded json file). Click on: “Upload & Register”
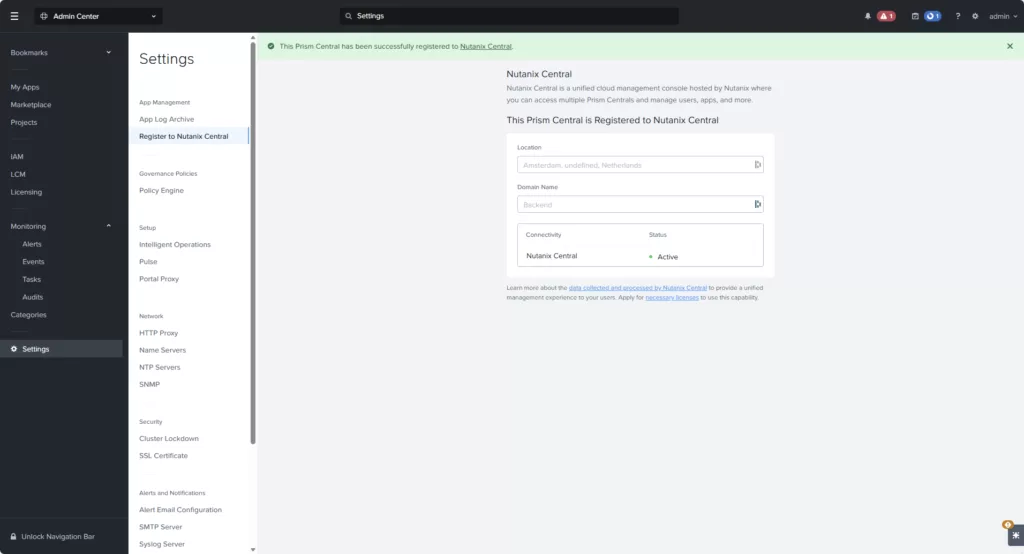
Now your Prism Central instance should be registered with Nutanix Central:
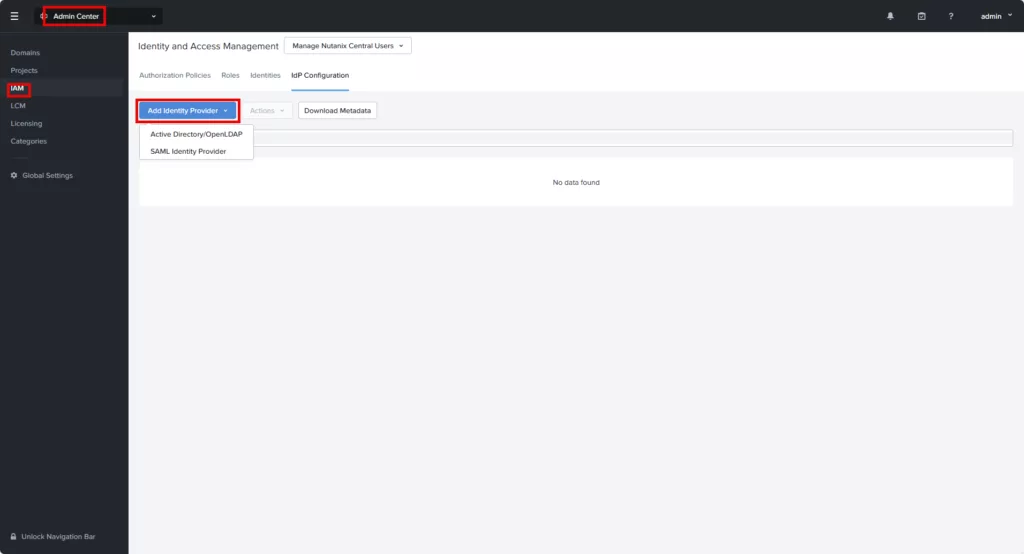
We need to add the same IDP as Prism Central is using. Navigate to: Admin Center –> IAM –> Add Identoty Provider.
I will nopt cover this setup as this is unique to each customer/setup. I’ve added my AD admin account as a Nutanix Central Admin. Now logging with my admin account:
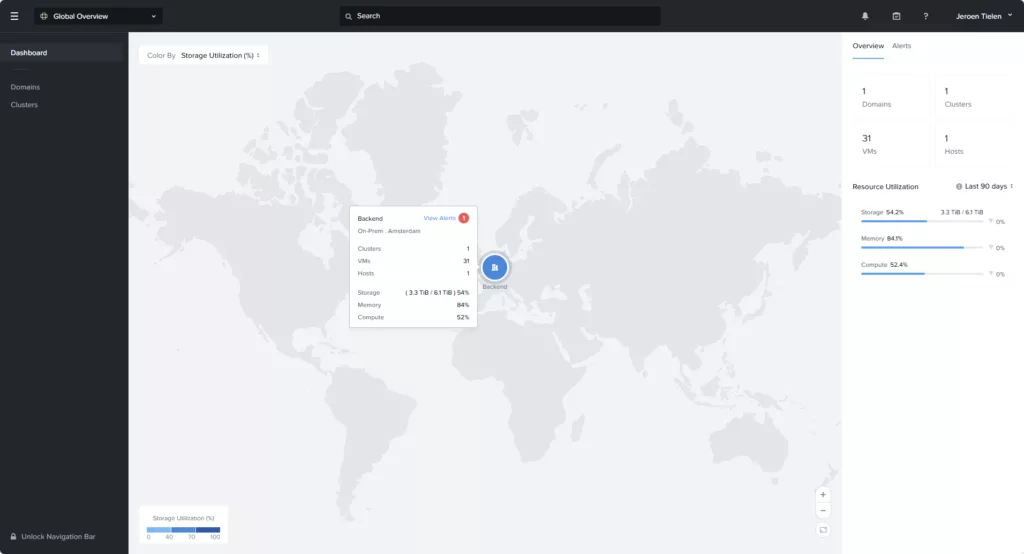
And there you have it. My Backend cluster. Now lets add my other lab cluster running in Melbourne.
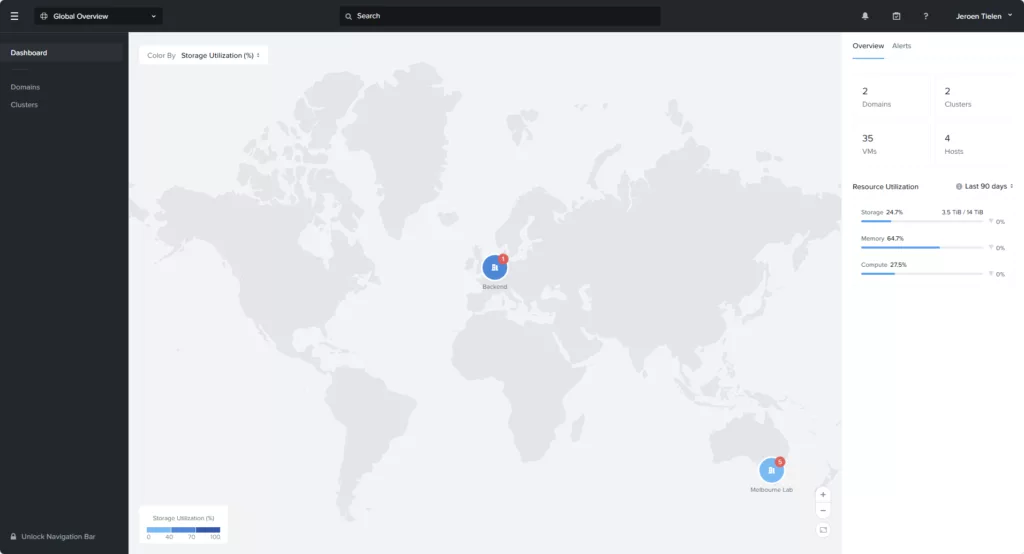
That is pretty cool. All on-premises.
Discover more from Jeroen Tielen
Subscribe to get the latest posts sent to your email.

Jeroen,
again, as usual, a very good example and explanation!