In Prism Central 7.5 Nutanix has added “Guest Customization Profiles”. With this nice feature we can create unattended installs for Windows (current only Windows).
In Windows we have two (2) types of unattended installations:
- The silent installation which will do the initial installation of Windows (selecting the Windows version, partition the disk etc).
- Create a bootable, silent installation by following this blog post: https://www.jeroentielen.nl/slipstream-virtio-drivers-into-windows-iso-to-use-on-nutanix-ahv/
- The OOBE (Out Of Box Experience) where the remaining installation of Windows can be automated.
- This part will be shown in this blogpost. (Well a bit different ;))
Before we continue we need to know the requirements: (link)
- You must upgrade to pc.7.5 or later and AOS 7.5 or later.
- Supports only Windows guest operating systems.
- The source VM must have a Windows guest OS along with NGT version 4.5 or later installed and enabled.
So to continue we first need to create a Windows template with NGT 4.5 (or later) installed. This can be found here: https://www.jeroentielen.nl/creating-and-maintaining-a-template-virtual-machine-in-nutanix/
The template can be sysprepped but it is not necessary. The “Guest Customization Profile” will take care of it.
To check which version of NGT is installed in the Virtual Machine open the summary page of the VM in Prism Central:
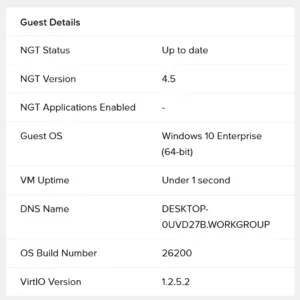
At the moment there is no direct download of NGT 4.5 and installing it directly from Prism Central will give you NGT 4.5
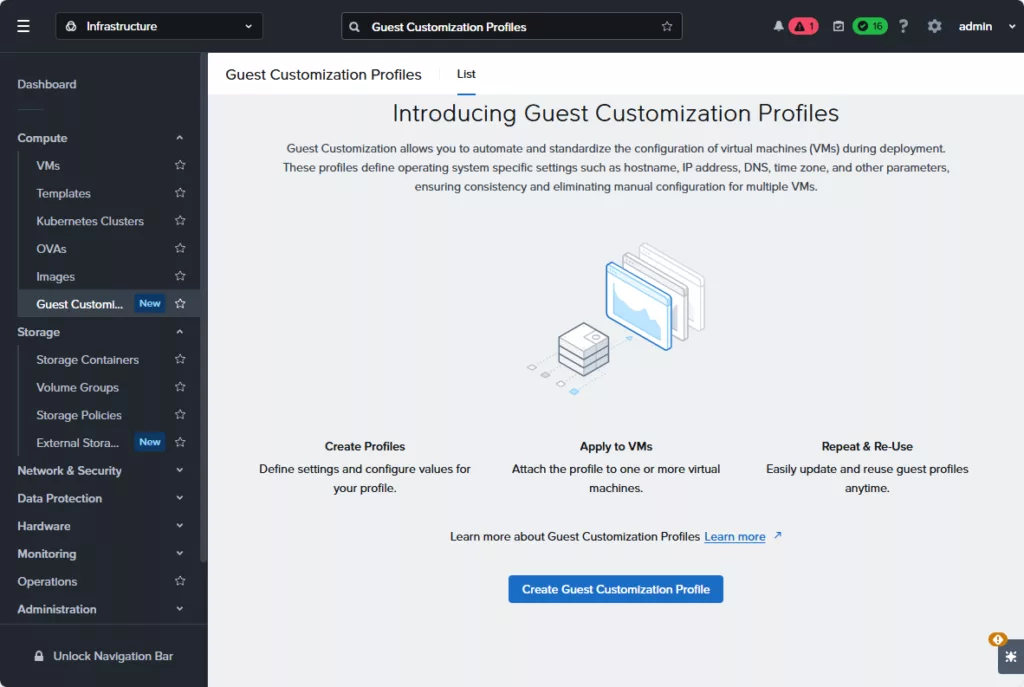
Ready? Let’s go into Prism Central and navigate to Compute –> Guest Customization Profiles –> And click: Create Guest Customization Profile.
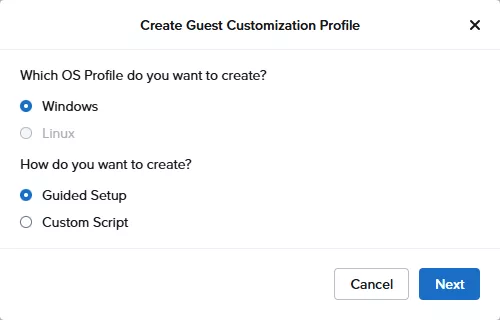
Select Windows and Guided Setup. You can chose Custom Script but then you need to upload your, already created, xml file. The Linux version will follow later.
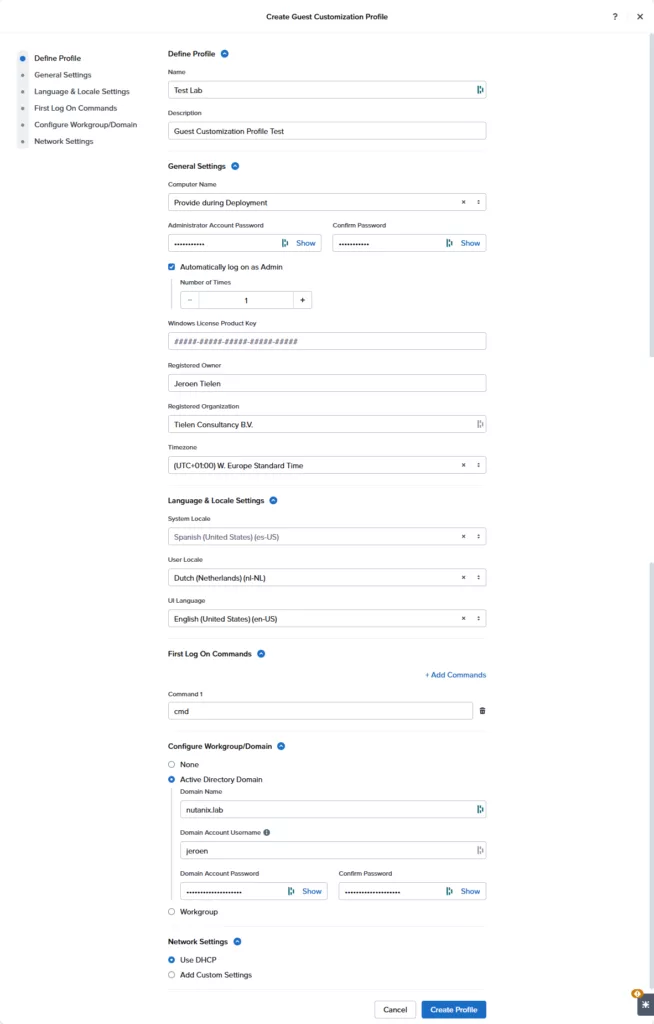
Now you will be prompted with lots of questions. Fill them in according to your needs. I will automatic start cmd after login just to test if this all works 😉 Click on Create Profile when done. Please make sure the languages are correctly set an that they are available in the Windows template.
Now you have two methods to use the profile:
- Deploy a vm from template are select the profile;
- Update the template to use the profile (You can also enable that users cant override this).
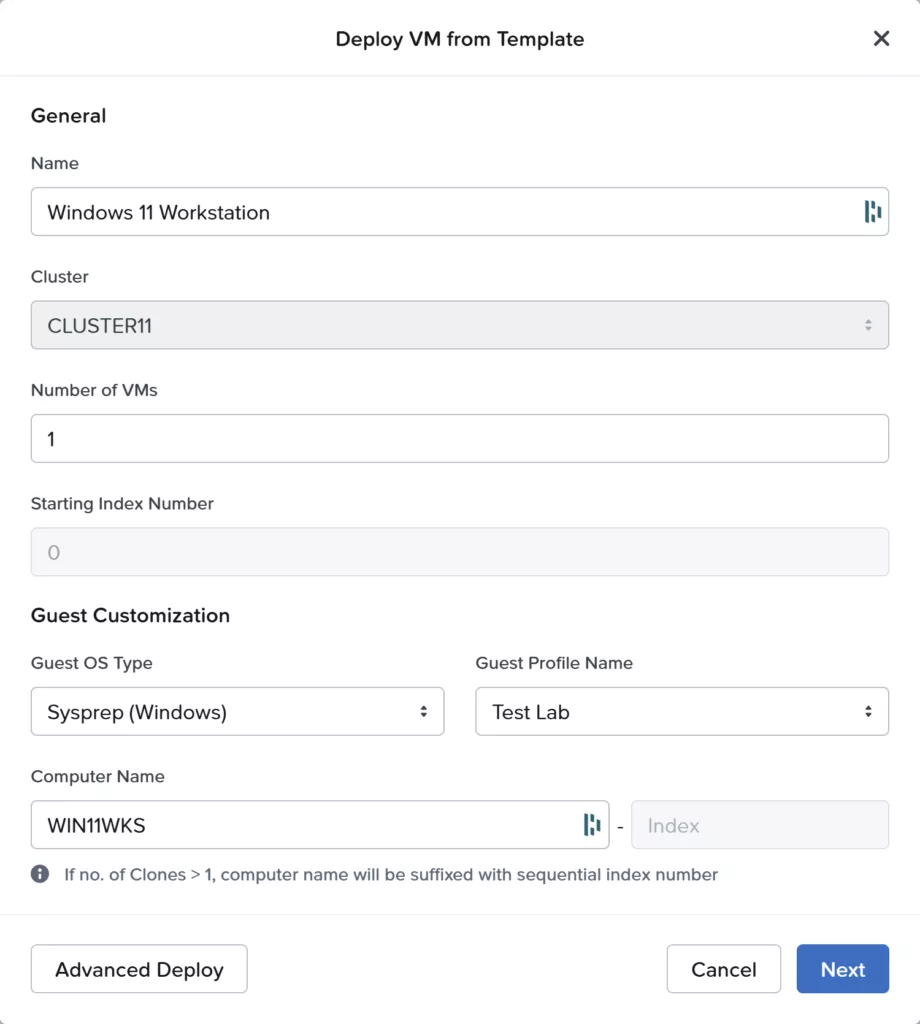
For now I will use option 1. In the VMs dashboard click: “Create VM from Template”

Select your template and click begin.

Fill in all required fields and select the create “Guest Profile”. As you can see it will ask for the computer name (Windows name). As I specified this during creation of the Profile. When ready click Next –> Deploy.
When the VM is created, power it on yourself, open the console to see all magic happens. I don’t have a video recorded 😉
After booting up, let the VM run. Just wait. It took around 5 minutes (at my environment) before the magic happens.
IF the template is sysprepped you will so the OOBE wizard. Just ignore it. Leave it running. The process will kick in automatically.
It automatically reboots and this is the result:
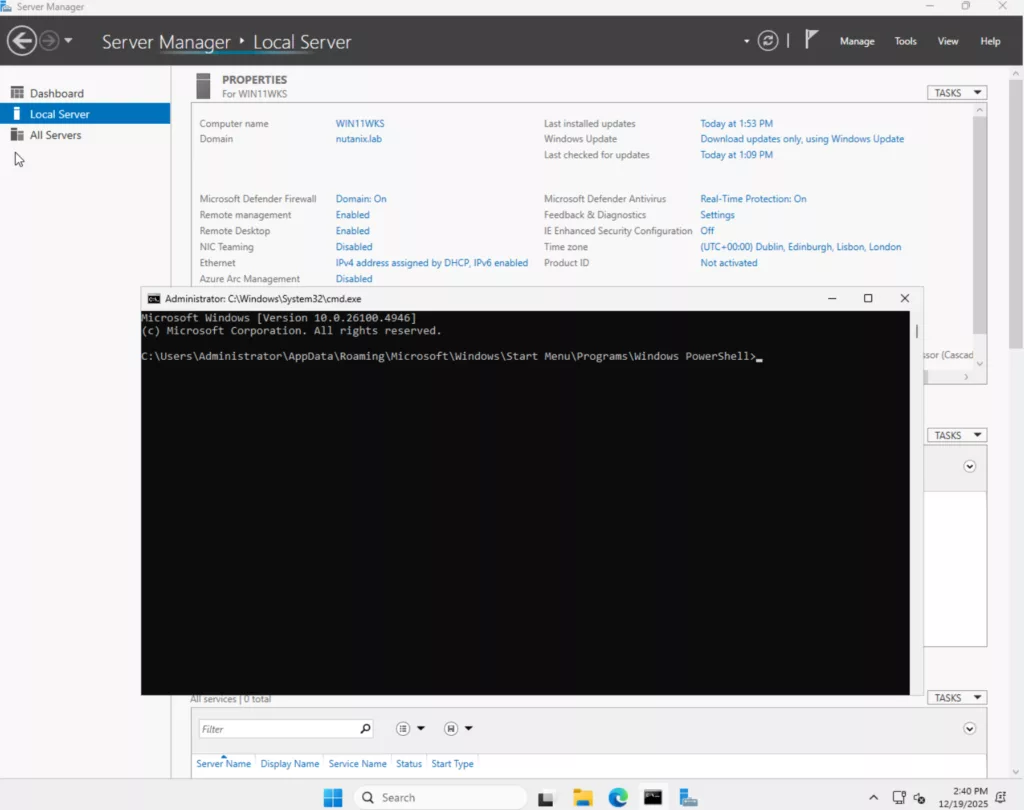
As you can see, domain joined and CMD started automatically. Pretty nice.
Discover more from Jeroen Tielen
Subscribe to get the latest posts sent to your email.
Nice been waiting for something like this having moved from VMWare its something we missed. Using djoin and Sven Groots Windows Answer File Generator is fairly good but its a 3 stage process, having to prestage the VM to the domain with djoin then generate the answer file and then finally deploy the VM.
The guest customization profile is not visible to domain joined users/accounts but only for local, and if you use local account then “Deploy VMs” on Templates menu gets grayed out so have not been able to test this so far.
The deployment using this method seems to work fine.
My question is how to correctly combine this with your article “Creating and Maintaining a Template Virtual Machine in Nutanix”, because after upgrading the template the customization does not work anymore ? Possibly linked to NGT certificate …
If you use the latest ngt version it must work. I will try to update the template blogpost when I have some spare time.
I have NGT Version 4.5 (and the Template is for Windows Server 2022 , also another one for Server 2025).
Did I understood correctly that with the Guest customization, I do not need to run Sysprep anymore ? (I tried both, but no success, as sson as I update the Template, Guest customization profile does not work anymore (for me).)
Thats should work yes. But I havent tried it yet. I have this in the agenda to test this friday. I will update the blogpost when I have the information.
Jeroen,
I have done some more testing, and I found out a workaround :
1. In the temporary VM, after performing the required update and before shutting it down, delete the following file:”C:\Program Files\Nutanix\config\ngt_config.json »
2. Shut down the VM and proceed with “Complete Guest OS Update” as per Nutanix instructions.
From this new version of the template, you can deploy Windows VM using Sysprep Guest Customization Profiles, and after power on, the Customize Guest VM will take place successfully like with the original version of the template.
Thank you for the great writeups!
I am banging my head with templating Windows Server 2025.
Install vm -> audit mode (windows updates, adjust language and other settings) -> sysprep with oobe, generalzie, mode:vm and shutdown -> VM comes up black screen with language switcher.
Doesn’t matter if I use Nutanix customization or not – the customization does not seem to apply anyway.
I checked the sysprep logs – there is nothing there besides the sysprep and shutdown.
If I don’t sysprep the machine and use that as a template – the customization applies. But when I log in with the new admin password from the customization explorer does not start (crashes in event log).
Seems like sysprep on Windows Server 2025 is simply a disaster.
I’m not using audit mode. I dont like that. Did you install ngt 4.5 in it?? (Minimum version 4,5)
Yes. NGT 4.5
Totally agree with you about sysprep and server 2025! The Windows Store apps “bug” is a shambles for starters! I templated 2025 last year and have been having issues with windows updates applying to VM’s built from the template, basically the winxsx cbs store gets corrupted at some point (not right away) and windows updates won’t install. I think its probably something to do with appX probably language settings. VM’s installed via the ISO are fine but 2025 VM’s installed from our template are not! If the in place updates of 2025 don’t work to fix the issue we’re going to have to rebuild in the region of 50 VM’s 30 of which are in production! 🙁 Wish we had stuck with 2022!
I found a workaround with the black screen Windows Store apps “bug” in OOBE.
Basically, do sysprep with a config XML that sets the password and autologins in. Then provided the XML to sysprep.
You can still use any customization to override the existing sysprep.
Example:
C:\Windows\System32\Sysprep\sysprep.exe /generalize /oobe /shutdown /mode:vm /unattend:C:\Windows\System32\Sysprep\unattend-server2025-appxfix.xml
true
true
true
true
ChangeThisPASSWORD!!!!!123
true
true
Administrator
2
ChangeThisPASSWORD!!!!!123
true
The XML did not paste through, but you get the point.