Offcourse I encourage customers to use AHV when using Nutanix, but sometimes customers are stuck using VMWare due to specific requirements or others reasons.
Setting up Nutanix on AHV is pretty straightforward but on VMWare it is a bit different. In this blog I will show you how to setup the network stack (Distributed vSwitch) including backplane traffic.
When deploying/foundation a Nutanix cluster with the ESX hypervisor this is the default network stack:
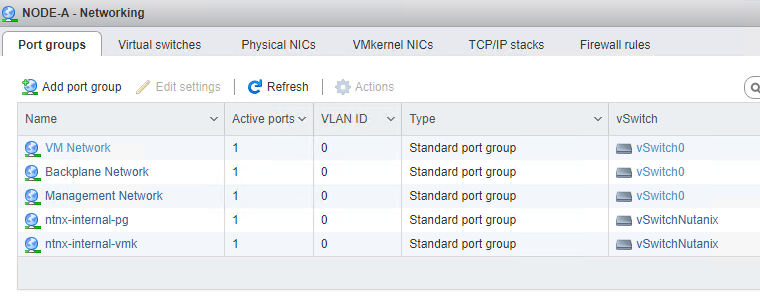
As you can see there are 2 standard virtual switches created:
- vSwitch0 – Port groups on this switch can be changed;
- All uplinks are connected to this switch;
- vSwitchNutanix – It is not supported to change this switch. On this switch the CVM’s are connected to the Hypervisor via subnet 192.168.5.0/24. And there are no uplinks connected. !! Leave it like it is !!
There are 2 kernel ports created:

As you can see the vmk0 is connected to the “Management Netwok”. This is where you can do management agains the host and cvm (PRISM, API, SSH, etc), and is used for intra-cluster communications.
vmk1 is in the “ntnx-internal-vmk” portgroup and used for cvm to host communication. !! Never change this, as it can break the cluster !!
The default setup works as it should be, new guest vm’s can be deployed in the “VM Network” port group as needed. You can create extra port groups with different vlans in the vSwitch0 if needed. But there is no LACP possible on the default standard virtual switch. Therefore a distributed switch is needed.
I assume the cluster is already connected against a vCenter. For more info on howto configure basic cluster settings for Nutanix clusters in vCenter read the first part of my other blog: Step-by-Step Guide Deploying Nutanix Metro Availability
Let start creating the following:
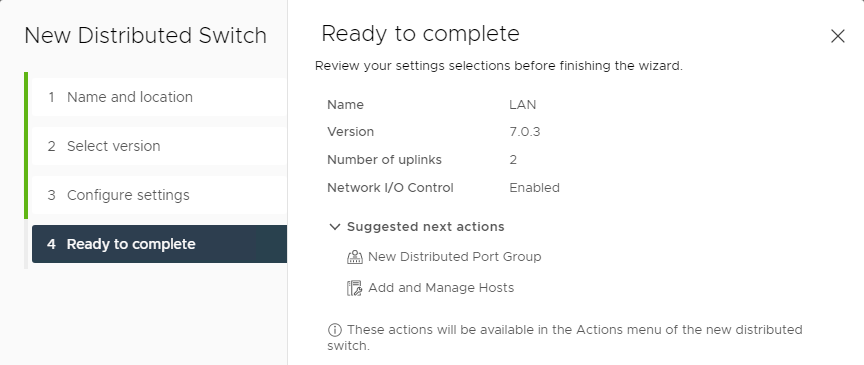
- a Distributed vSwitch (Name: LAN) with 2 uplinks;
- Management port group for management tasks;
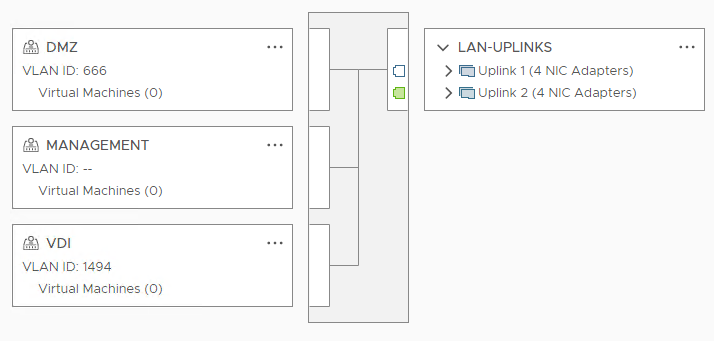
- DMZ port group for DMZ virtual machines on vlan 666;
- VDI port group for VDI workloads on vlan 1494;
- a Distributed vSwitcvh (Name: Backplane) with 2 uplinks;
- This will be used to intra-cluster traffic on vlan 6.
Note1: In my test cluster there are 2 active uplinks and 2 inactive uplinks.
Note2: The following steps are way easier if LACP is not configured. You can enable LACP later. Don’t make it yourself so difficult 😉
Create a new distributed vSwitch with 2 uplink ports and no default port group.
Add the hosts to the dSwitch and add vmnic0 and vmnic2 to it (in my case, vmnic2 is 1 of the active uplinks and vmnic0 is not connected) Be sure you leave an active uplink present a vswitch0. Other config in the “Add and Manage Hosts” wizard:
- Manage physical adapters:
- vmnic0 = Uplink 1;
- vmnic2 = Uplink 2;
- Manage VMkernel adapters: Leave as is for the moment;
- Migrate VM networking: Leave as is for the moment.
Create the other port groups with their vlans and (at least, that is what I always do ;)) rename the uplinks port group. Now the LAN dSwitch looks like this:
Let’s migrate the vm connections and hosts kernel ports in “Management Network” from vSwitch0 to “Management” in dSwitch LAN.
Start the “Add and Manage Hosts” wizard again: Select Manage host networking.
- Select hosts: Select all hosts; !! On production clusters, always change 1 host at the time !!
- Manage physical adapters: Leave as is;
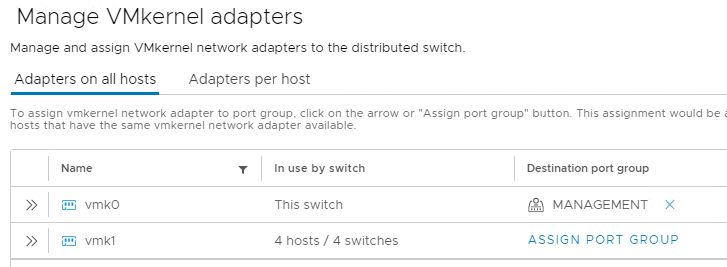
- Manage VMkernel adapters:
- Assign kernel port, which is attached to vSwitch0, to the “Management” port group (in my case vmk0);

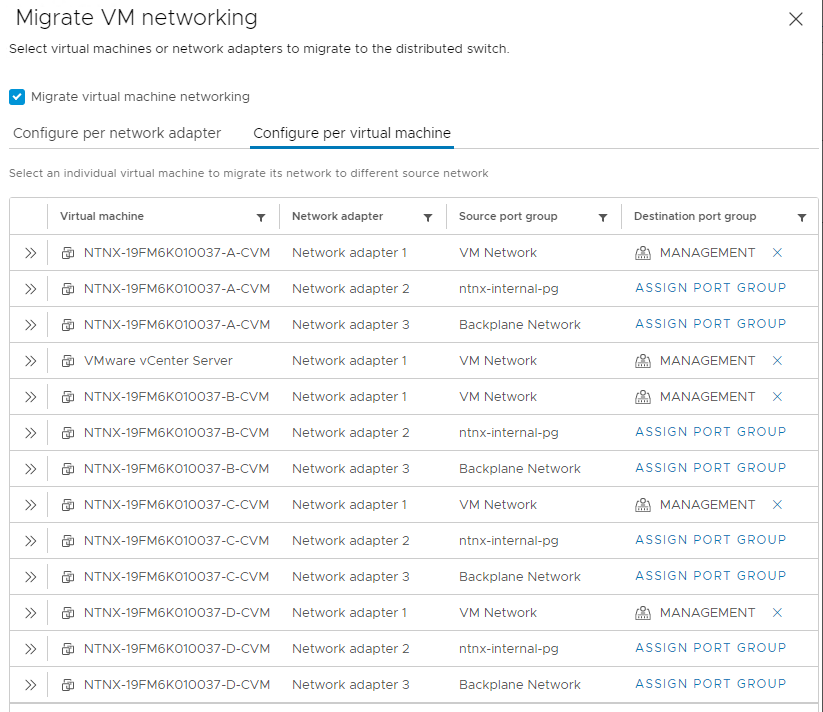
- Migrate virtual machine networking:
- Select all CVM network adapters in port group “VM Network” and select destination “Management”

- In my case I’m migrating vCenter also to this port group.
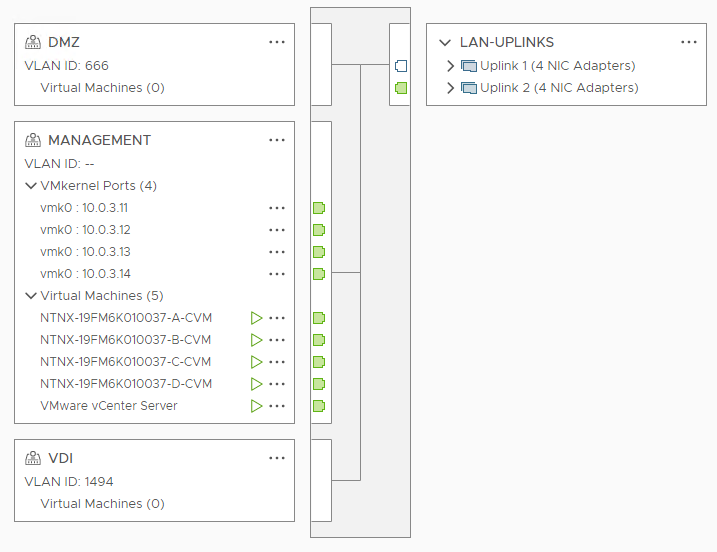
Now the LAN dSwitch look like this:
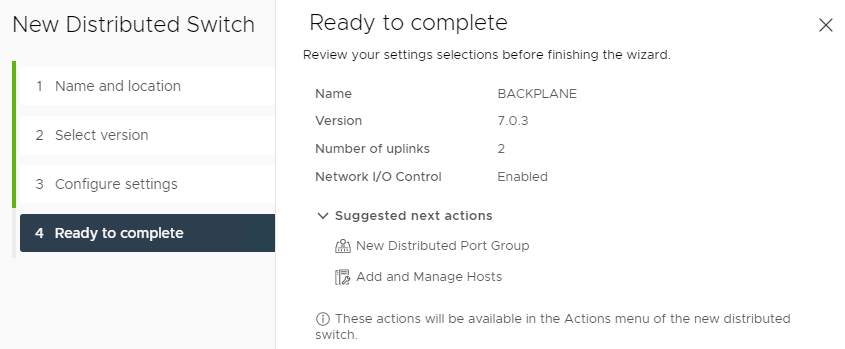
The “Backplane Network” is used to separate intra-cluster traffic from the guest vm’s traffic uplink ports. Lets migrate this port group to another dSwitch with his own uplinks (vmnic1 and vmnic3 in my case). Create a new dSwitch named “Backplane” with 2 uplinks and assign the remaining vmnics to it. Dont create the default port group.
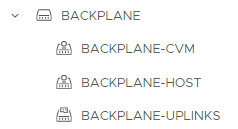
Rename the uplinks port group and create 2 extra port groups:
- BACKPLANE-CVM;
- BACKPLANE-HOST.
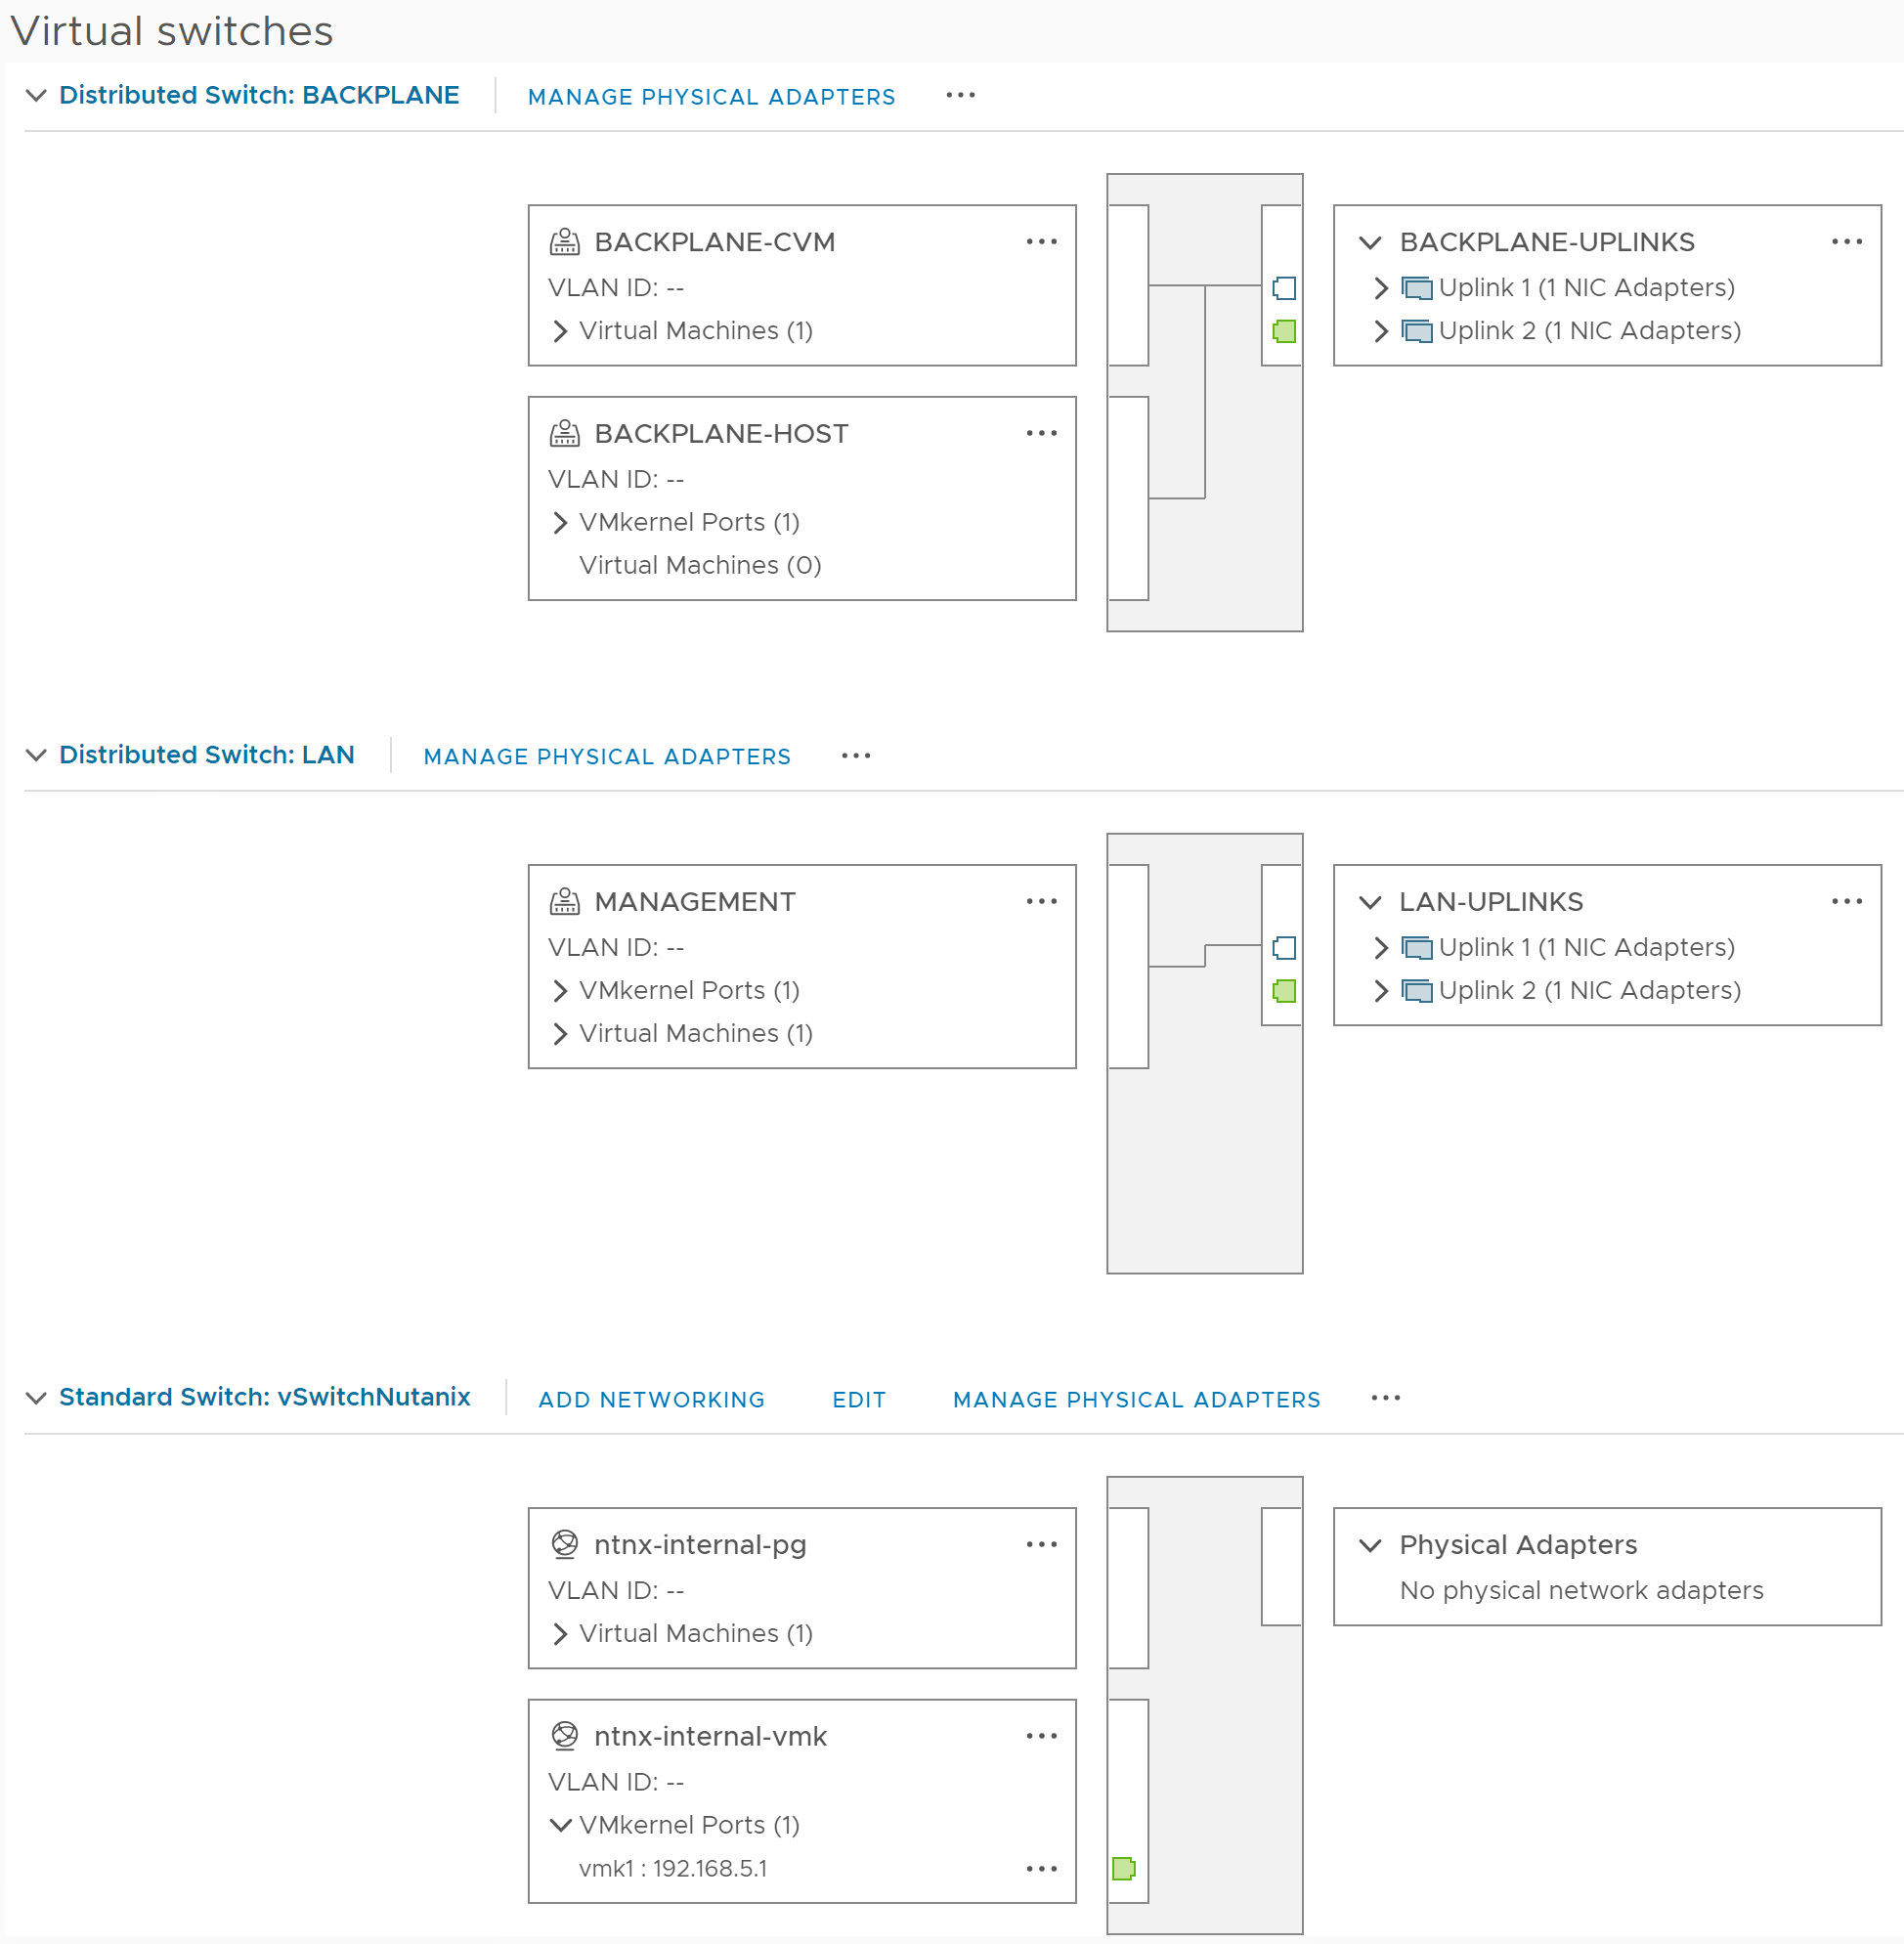
The new dSwitch should look like this:
Start the “Add and Manage Hosts” wizard for this dSwitch:
- Select hosts: All hosts; !! On production clusters, always change 1 host at the time !!
- Manage physical adapters:
- vmnic1 = Uplink 1;
- vmnic3 = Uplink 2;
- Manage VMkernel adapters: Leave as is;
- Migrate VM networking: Leave as is;
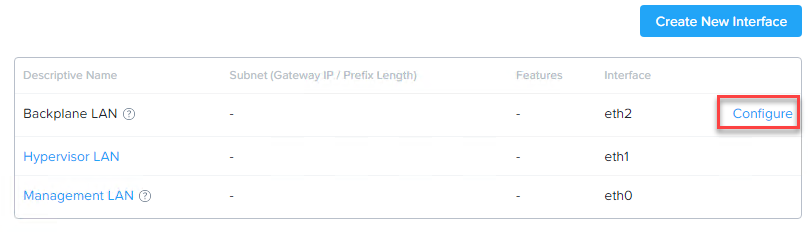
Open Prism Element and goto: Settings -> Network Configuration -> Click “Configure” behind Backplane LAN.
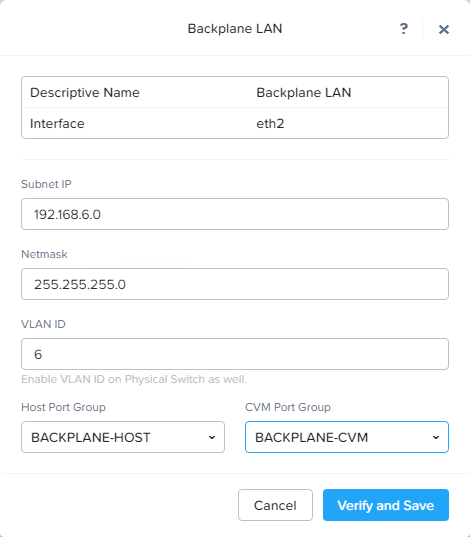
Fill in the form. In my case I’m using the 192.168.6.0/24 subnet for backplane traffic. Select the correct vlan, if needed. For the port groups choose the correct port groups which you created in dSwitch Backplane. Click verify and save.
This will trigger a hypervisor restart. When the nodes are back up we can remove the standard virtual switch vSwitch0 from each node.
Last step is to migrate the vmotion service from Management to Backplane-Host. If you prefer to keep the vmotion traffic in the management vlan skip this step. At the moment it looks like this:

Disable the vmotion service on vmk0 and enable it on vmk2. It should look like this:

Do this on all nodes and we are ready with the basic setup. The end result should look like this per node:
Optional you can enable LACP on the dSwitches if needed.
Discover more from Jeroen Tielen
Subscribe to get the latest posts sent to your email.

One thought on “Nutanix on ESX, howto setup the network stack”