This simple blog post will show you how to create a Microsoft Failover Cluster on Nutanix. (Focussing only on the witness disk).
There are some blogposts available already:
- https://next.nutanix.com/installation-configuration-23/microsoft-failover-cluster-msft-on-nutanix-38573
- https://www.vmwaremine.com/2015/09/04/deploy-microsoft-failover-cluster-on-nutanix/
But not one is showing the real steps for the witness disk. So I decided to share this with you.
In this example I have two Windows Server 2022 servers:
-
- CLUSTER-01 60GB Boot, 2 vCPU and 4GB RAM;
- CLUSTER-02 60GB Boot, 2 vCPU and 4GB RAM.
Create a shared storage, needed for the witness on the cluster:
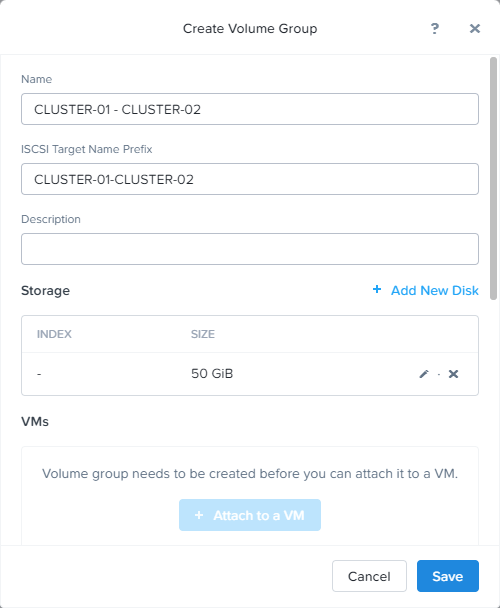
In Prism navigate to Storage -> Volume Group, and click: “+ Volume Group”;
Give it a name and attache some storage
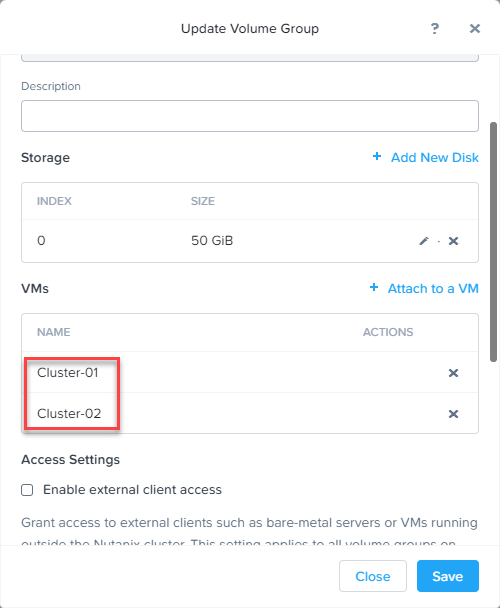
After clicking on save you have to update the created volume group. Now it is possible to attach virtual machines.
Attach the VM’s:
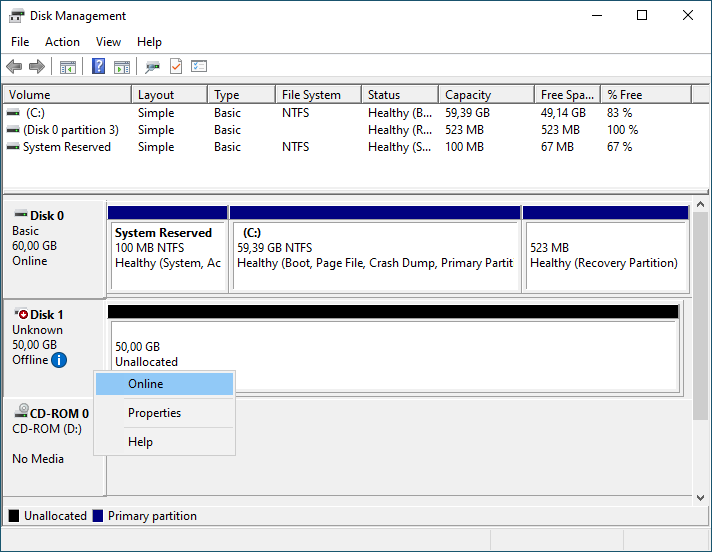
In Windows open disk management and mark the witness disk online and then initialize:
Create a volume, format it (NTFS) and assign a drive letter:
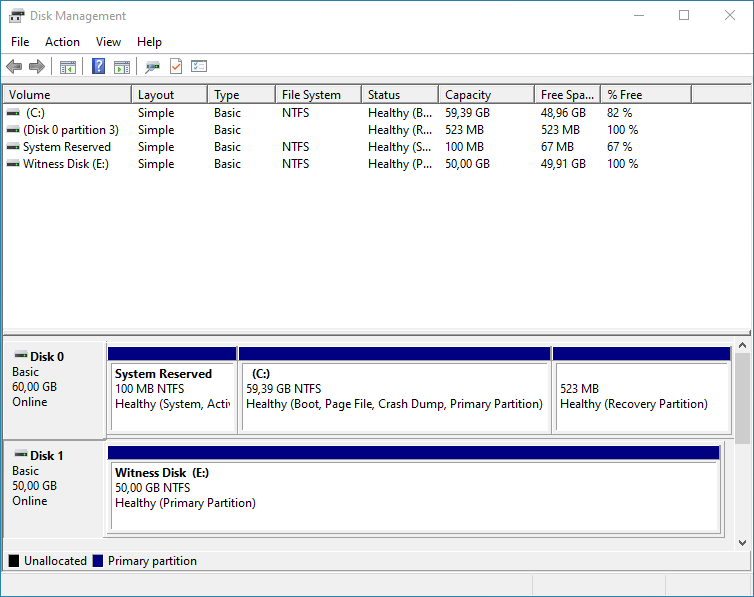
On the second Windows machine you only have to mark the disk online.
Create the Microsoft Failover Cluster:
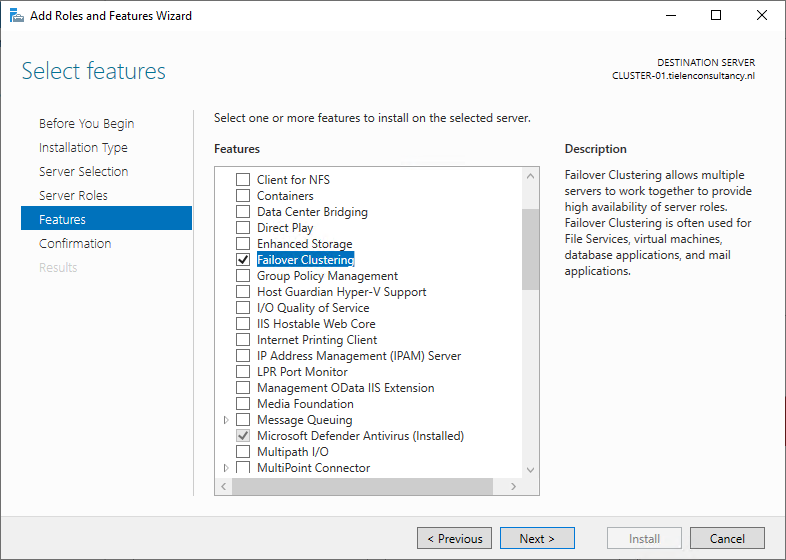
On each node install feature: Failover Clustering.
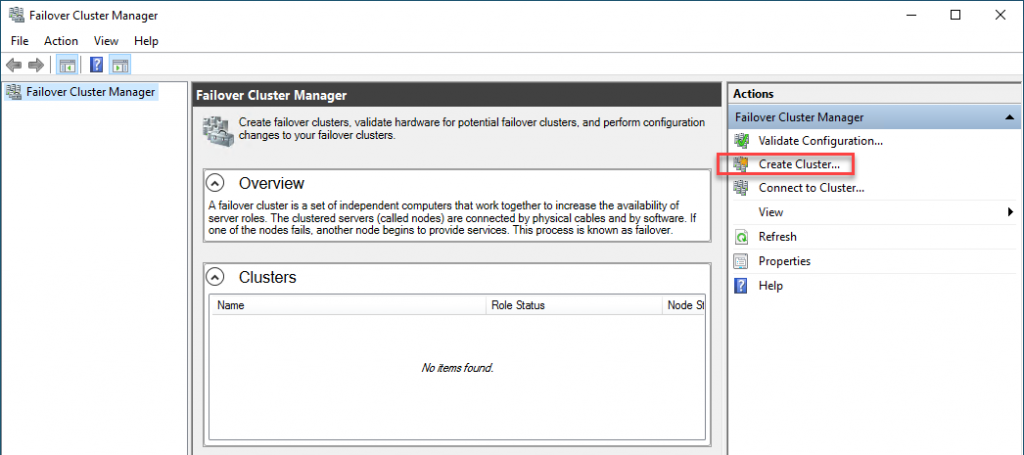
Start: Failover Cluster Manager and select: Create Cluster.
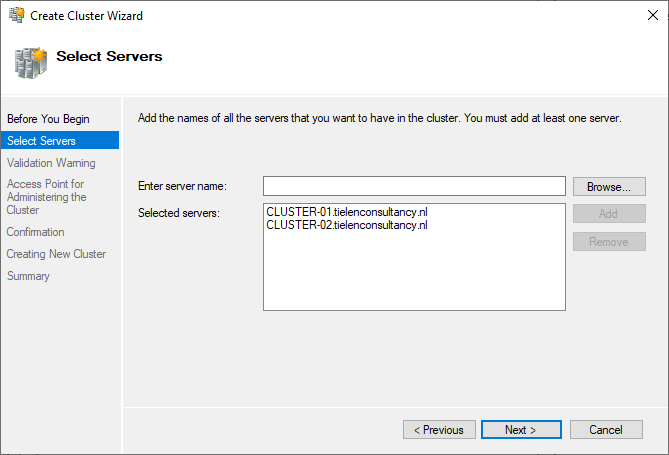
Add both servers and click next.
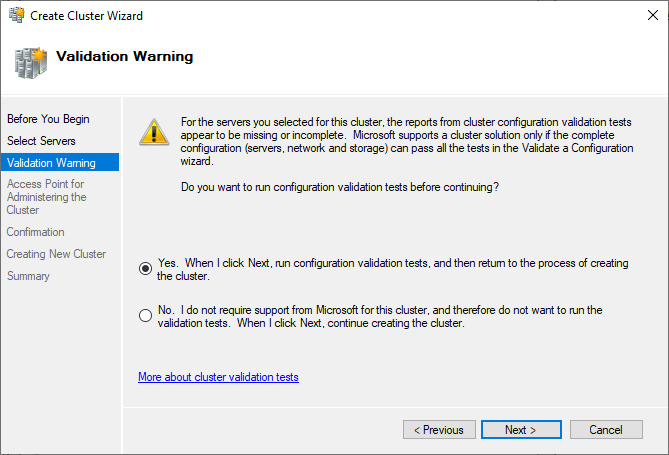
Let the wizard run all validation tests to see if all is correct:
When you fixxed all errors 😉 you will return to the create cluster wizard to enter a cluster name and click: Next.
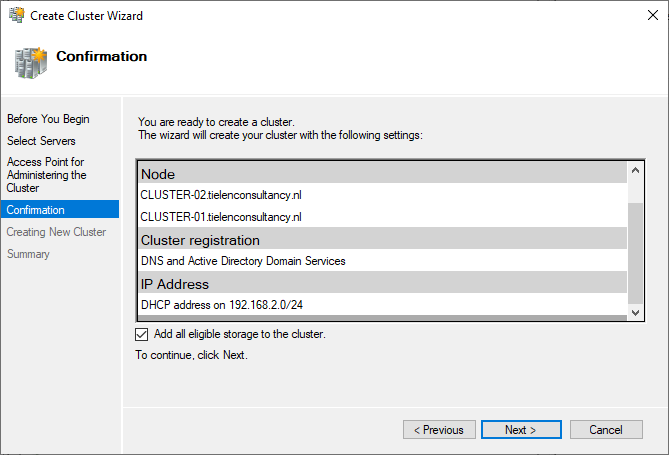
In the confirmation screen, make sure “Add all aligible storage to the cluster” is selected and click: Next.
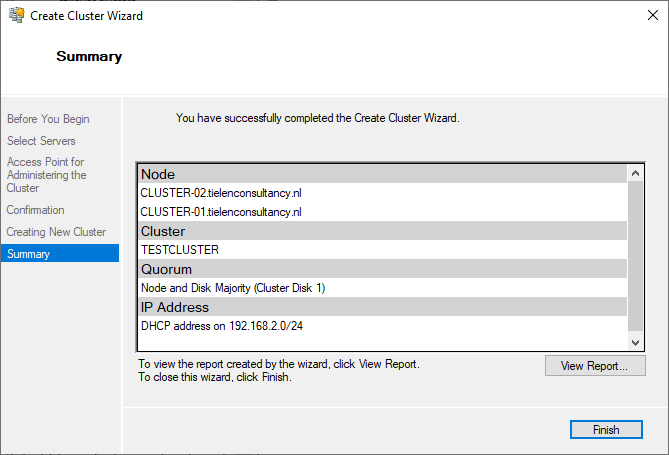
When cluster is created click finish. (Notice the Quorum disk ;))
Thats all. Now deploy you cluster aware applications 😉
Discover more from Jeroen Tielen
Subscribe to get the latest posts sent to your email.