Blogpost updated for Nutanix Community Edition 2.1
In this blog post I will explain how to install a Nutanix CE node (there are pointers for the 3 node cluster ;)) cluster nested in Proxmox.
Before we continue there are some requirements:
- Make sure you have a list of IP-Addresses available on your own LAN which are not in use;
- For each node 2 ips (AHV and CVM);
- These addresses should be accessible from your management machine;
- 1 ip for the cluster virtual ip; (not going to use it in this blogpost, but you can add them later when the cluster is running)
- 1 ip for each Prism Central virtual machine; (not going to use it in this blogpost, but you can install Prism Central later on your own when the cluster is running)
- 1 ip for Prism Central virtual ip; (You can use this when you have Prism Central installed)
- Have enough memory available on the Proxmox environment.
The requirements for Nutanix CE are: (Link)
- 32GB memory minimum ;
- I recommend at least 64GB as 32GB will give you no space to run virtual machines;
- 4 CPU Cores minimum;
- 64GB Boot Disk minimum;
- 200GB Hot Tier Disk minimum;
- 500GB Cold Tier Disk minimum.
So if we want a 1 node Nutanix CE cluster we need 32GB ram for the virtual machine (the node). In this blog I will create a single node “cluster” and give pointers to create a 3 node cluster.
First make sure you have the latest Nutanix CE installer (ISO) downloaded. It can be found in this blog post van Angelo: (Link)
Make a sheet with the IP-Addresses you are going to use:
- Node 1:
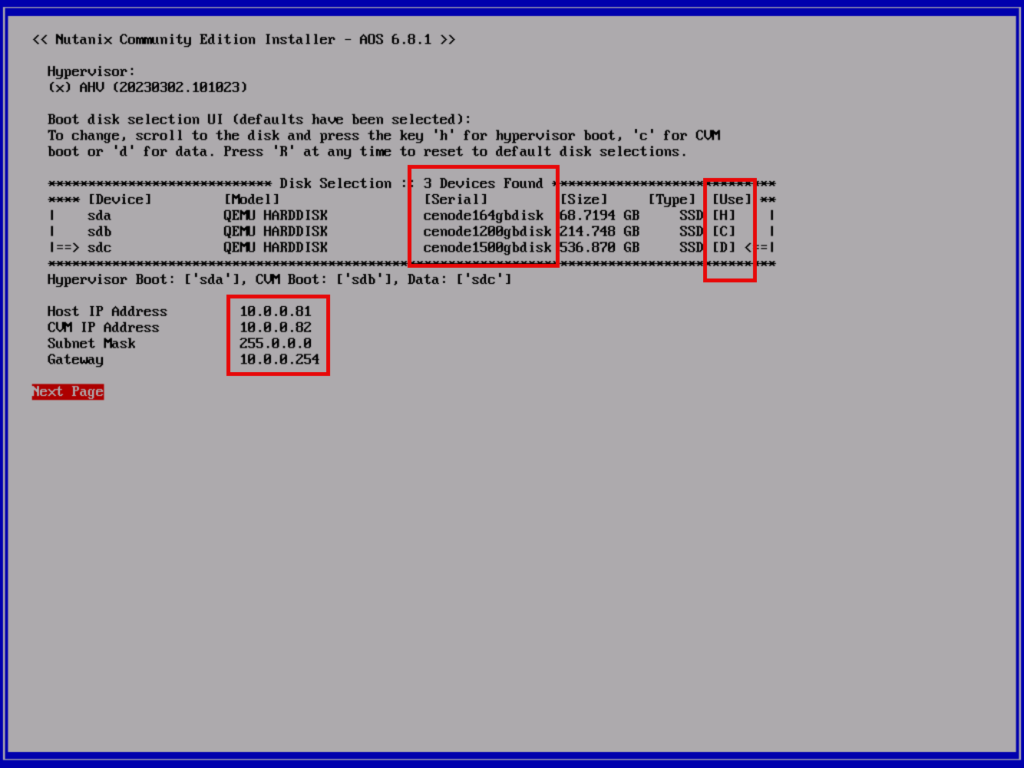
- AHV 10.0.0.81
- CVM 10.0.0.82
- Netmask 255.0.0.0
- Gateway: 10.0.0.254
Note: these are ip-addresses for my LAN. Again, use ip-addresses for your own LAN.
Make sure the CE iso file is uploaded to your Proxmox environment.
Create a new virtual machine with the following specs:
- Name: Nutanix-CE-Node-1
- Guest OS: Linux 2.6 kernel
- Mount the CE installer ISO
- System: Leave everything default
- Make sure the BIOS is: Default (SeaBIOS)
- Disks:
- 64GB (Boot) – SCSI 0
- 1x 200GB (CVM) – SCSI 1 – Make sure you enable SSD emulation on this disk. As the CVM needs to be running on an SSD.
- 1x 500GB (Data) – SCSI 2
- CPU: 2 sockets, 2 cores
- Select advanced and enable: hv-evmcs
- Memory: 32GB
When the VM is created open the console or the proxmox sever and edit the conf file of the created virtual machine. For example: nano /etc/pve/nodes/<proxmox server name>/qemu-server/<vm id>.conf

Add the following line and serials for the disks:
- args: -cpu host,+svm
- Add after each disk: ,serial=<somerandomserial>

When the editor gives you problems you can also winscp into the proxmox server and edit the file via winscp.
When the file is saved you can start the virtual machine. Wait for the installer to display the wizard.
Make sure the serials are correctly populated. Select the correct disks and their purpose (64GB AHV boot, 200GB CVM, 500GB Data)
Fill in the correct ip-addresses.

When the installer is finished reboot the node and let it rest for 20 minutes (there will be some background tasks running, and the cvm will reboot an extra time)
Login to the cvm via ssh. In my case: ssh nutanix@10.0.0.82 (password is nutanix/4u)

And run:
- watch genesis status

This will show you the services which are running in the cvm. The screen will refresh every 2 seconds. Wait until foundation and genesis are running:

When the services are running we can create the cluster. CTRL-C to stop the watch screen and type:
- cluster -s <cvm-ip> –redundancy_factor=1 –dns_servers 1.1.1.1 create

Or, repeat above steps 2 more times to have 3 nodes (with different disk serials and ip-addresses of course) and create the cluster via:
- cluster -s <cvm-ip-node-1>,<cvm-ip-node-2>,<cvm-ip-node-3> –dns_servers 1.1.1.1 create

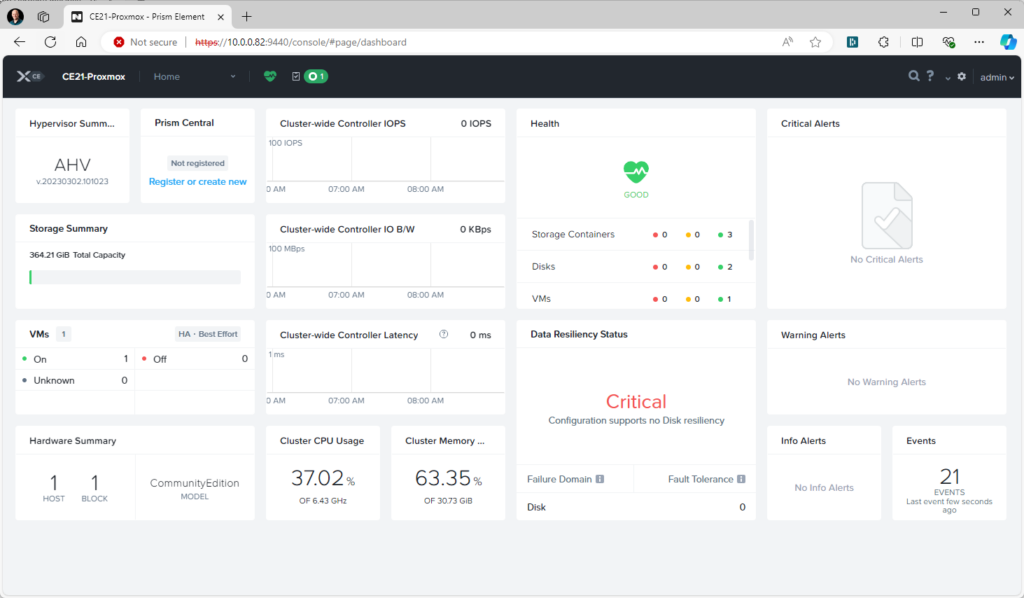
When the cluster is created you can access it via a webbrowser: https://<cvm-ip>:9440. Login with the default credentials admin nutanix/4u and change the password when requested. Next there will be a login prompt to login nutanix, this is a mandatory step for Community Edition. Login with your nutanix credentials (request access here) and you will have a running Nutanix Community Edition cluster.


