We all know that Nutanix has this lovely tool named Nutanix Move. This is used to migrate your virtual workloads from one vendor to Nutanix. What about that physical/bare-metal-server/desktop you want to virtualize? In this blogpost I’m showing you how to do that. I’m using a Windows 10 desktop on my desk which has secure boot, TPM and BitLocker enabled.
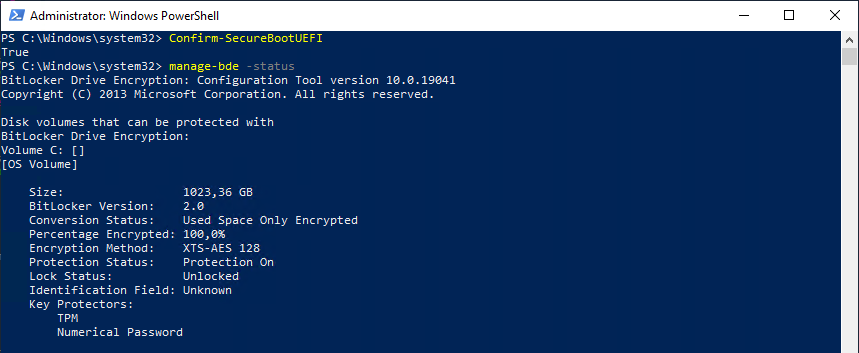
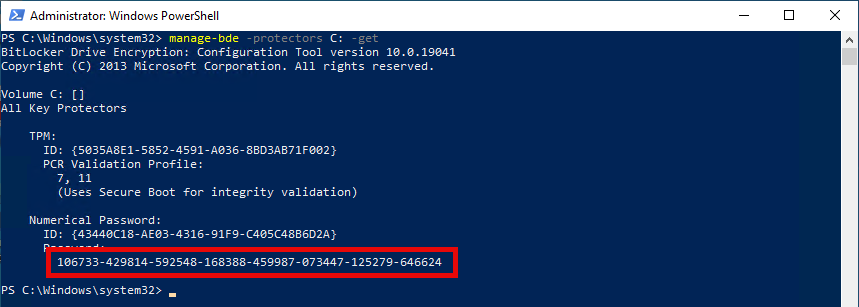
Make sure you have your BitLocker recover key present. If you don’t know it, here is the command te reveal it: manage-bde -protectors C: -get
It is easier to disable BitLocker now as it will be disabled either way by the conversion.
Download and install the correct VirtIO drivers: https://portal.nutanix.com/page/downloads?product=ahv

If you don’t want to install the VirtIO drivers on the original machine you can do it later. Here is a tutorial how to do this: https://portal.nutanix.com/page/documents/kbs/details?targetId=kA00e000000kAWeCAM But is is way easier to do it beforehand 😉
Download Disk2vhd from Sysinternals: https://learn.microsoft.com/en-us/sysinternals/downloads/disk2vhd
When ready to do the conversion, start (Do a last restart of the system before continue): disk2vhd64.exe
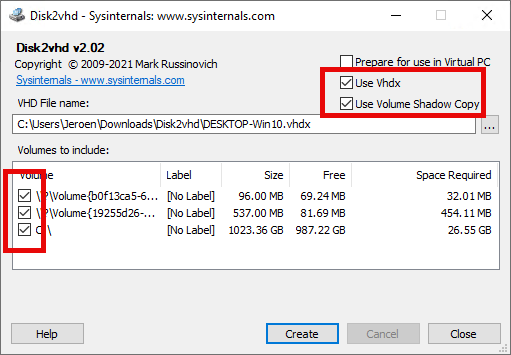
Select: Use VHDX and Use Volume Shadow Copy.
Make sure all volumes are selected as this (in my case) is an UEFI machine and we need those volumes to boot.
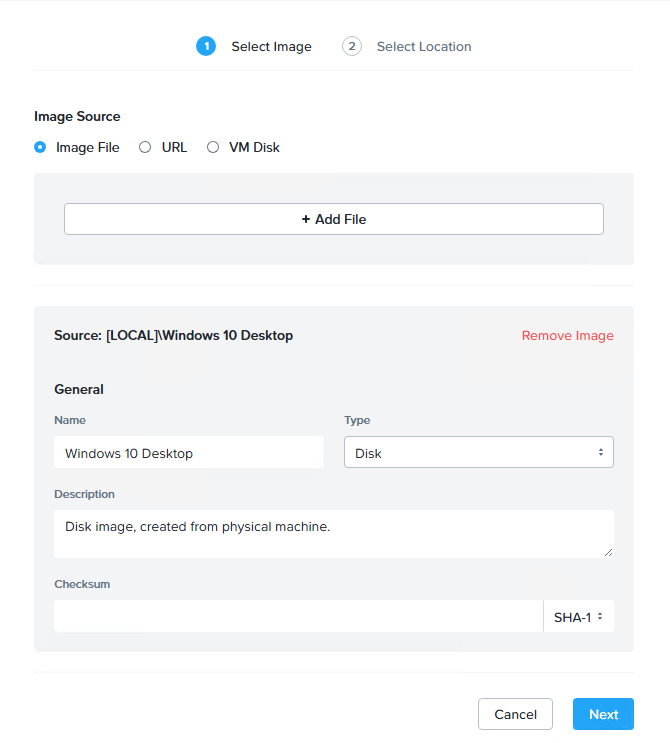
When the VHDX file is created (this can take a long time, depending on the used size of the selected disks) we need to upload it to the Nutanix Cluster. You can use Prism Element or Prism Central for this. Just make sure you upload it as a disk image.
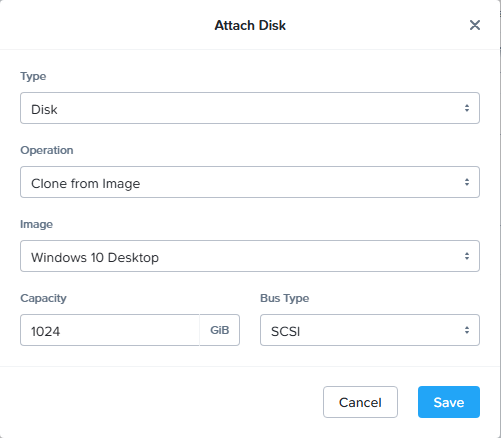
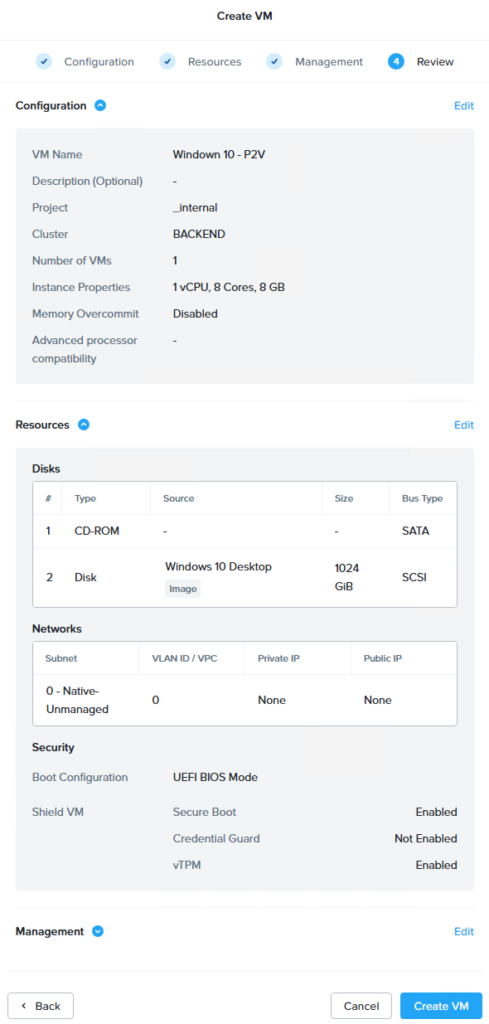
When the disk image is created make a Virtual Machine with the specs you want. But keep the same BIOS/UEFI setting as the original machine. So if your machine is BIOS make sure the virtual machine is also a BIOS virtual machine. In my case the original desktop uses UEFI so my virtual machine will also use UEFI. (and secure boot and vTPM ;)). When adding the disk to the virtual machine make sure you select “Clone from Image” and select the uploaded disk.
The complete virtual machine (for me) looks like this:
Now Power On the virtual machine and open the console.
In my case it just booted Windows without asking for the BitLocker recovery key. And after getting the status, BitLocker is not enabled anymore.
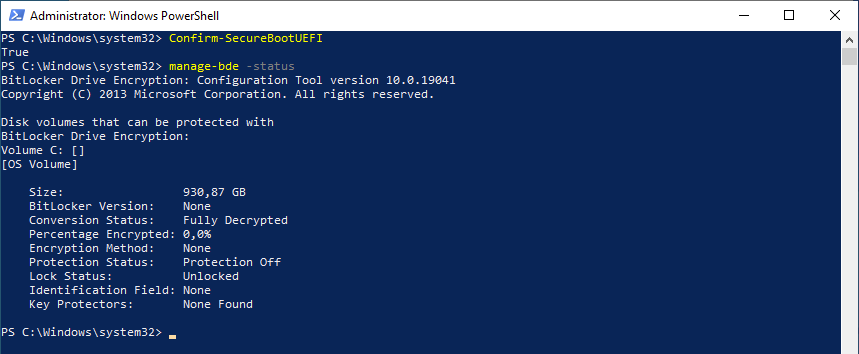
I’m fine with this, I can enable it again. After some testing it is the disk2vhd tool doing BitLocker disabling 😉 Makes sense though. So if the machine needs to have BitLocker turned on, enabled it afterwards again.
And there you have it, Physical to Virtual.
Discover more from Jeroen Tielen
Subscribe to get the latest posts sent to your email.