In Prism Central 7.5 Nutanix has added “Guest Customization Profiles”. With this nice feature we can create unattended installs for Windows (current only Windows).
In Windows we have two (2) types of unattended installations:
- The silent installation which will do the initial installation of Windows (selecting the Windows version, partition the disk etc).
- Create a bootable, silent installation by following this blog post: https://www.jeroentielen.nl/slipstream-virtio-drivers-into-windows-iso-to-use-on-nutanix-ahv/
- The OOBE (Out Of Box Experience) where the remaining installation of Windows can be automated.
- This part will be shown in this blogpost. (Well a bit different ;))
Before we continue we need to know the requirements: (link)
- You must upgrade to pc.7.5 or later and AOS 7.5 or later.
- Supports only Windows guest operating systems.
- The source VM must have a Windows guest OS along with NGT version 4.5 or later installed and enabled.
So to continue we first need to create a Windows template with NGT 4.5 (or later) installed. This can be found here: https://www.jeroentielen.nl/creating-and-maintaining-a-template-virtual-machine-in-nutanix/
The template can be sysprepped but it is not necessary. The “Guest Customization Profile” will take care of it.
To check which version of NGT is installed in the Virtual Machine open the summary page of the VM in Prism Central:
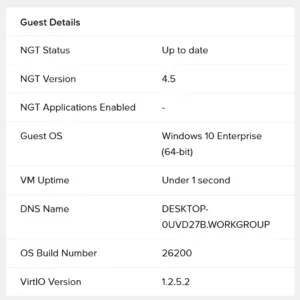
At the moment there is no direct download of NGT 4.5 and installing it directly from Prism Central will give you NGT 4.5
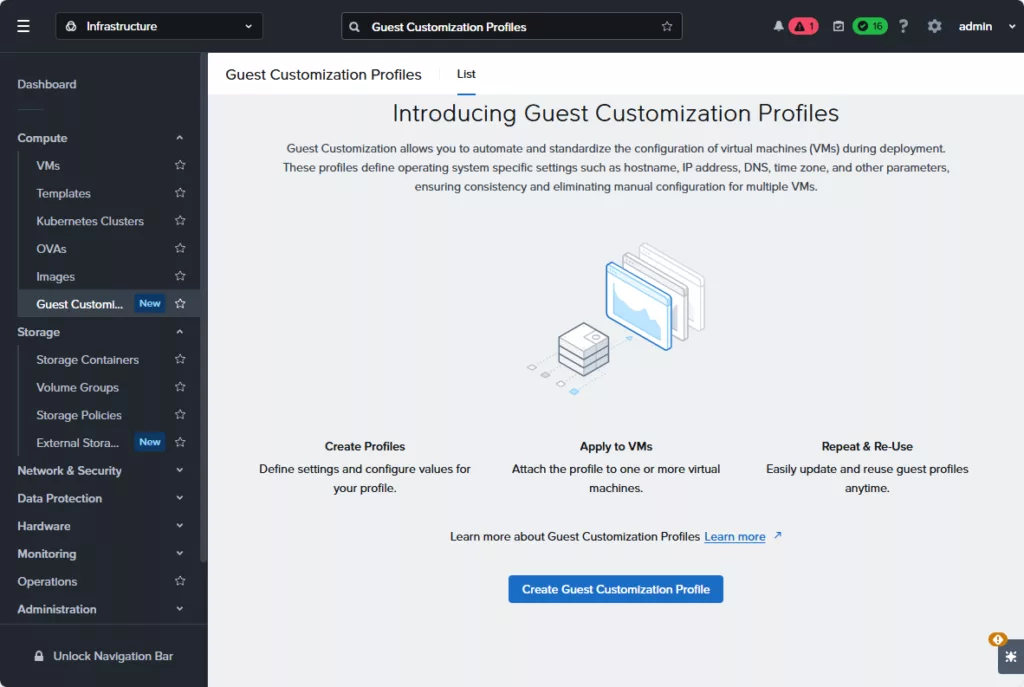
Ready? Let’s go into Prism Central and navigate to Compute –> Guest Customization Profiles –> And click: Create Guest Customization Profile.
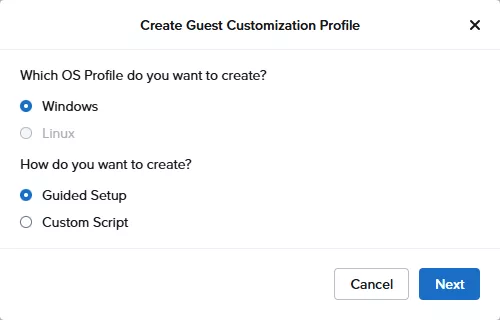
Select Windows and Guided Setup. You can chose Custom Script but then you need to upload your, already created, xml file. The Linux version will follow later.
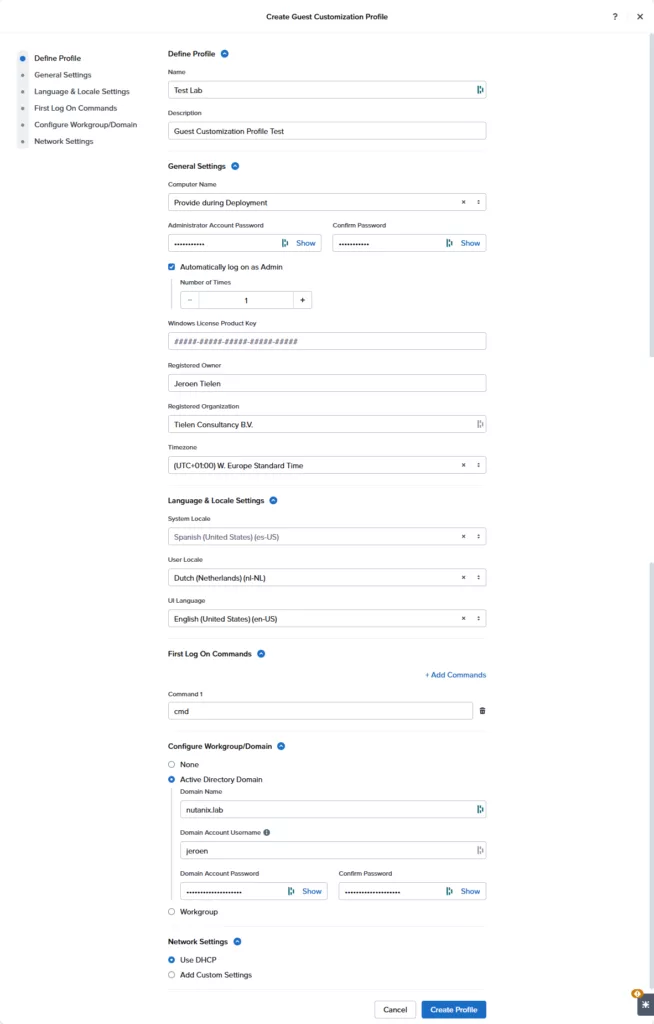
Now you will be prompted with lots of questions. Fill them in according to your needs. I will automatic start cmd after login just to test if this all works 😉 Click on Create Profile when done. Please make sure the languages are correctly set an that they are available in the Windows template.
Now you have two methods to use the profile:
- Deploy a vm from template are select the profile;
- Update the template to use the profile (You can also enable that users cant override this).
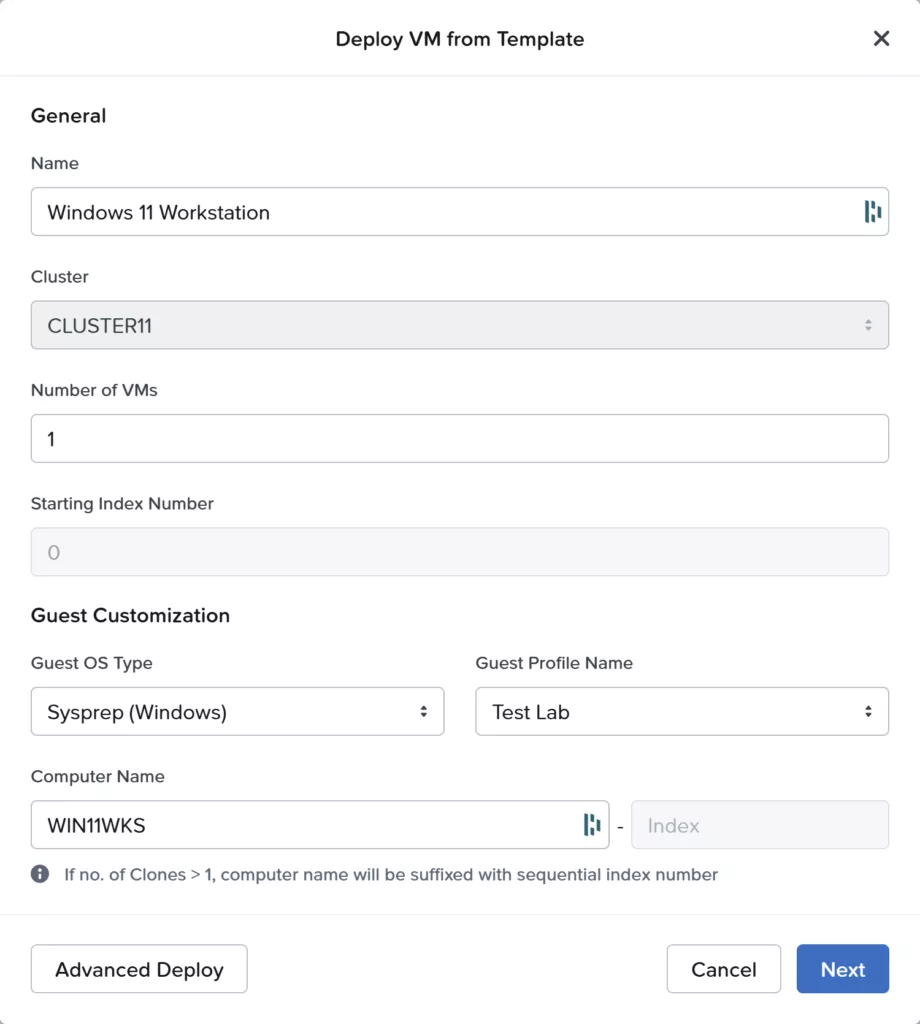
For now I will use option 1. In the VMs dashboard click: “Create VM from Template”

Select your template and click begin.

Fill in all required fields and select the create “Guest Profile”. As you can see it will ask for the computer name (Windows name). As I specified this during creation of the Profile. When ready click Next –> Deploy.
When the VM is created, power it on yourself, open the console to see all magic happens. I don’t have a video recorded 😉
After booting up, let the VM run. Just wait. It took around 5 minutes (at my environment) before the magic happens.
IF the template is sysprepped you will so the OOBE wizard. Just ignore it. Leave it running. The process will kick in automatically.
It automatically reboots and this is the result:
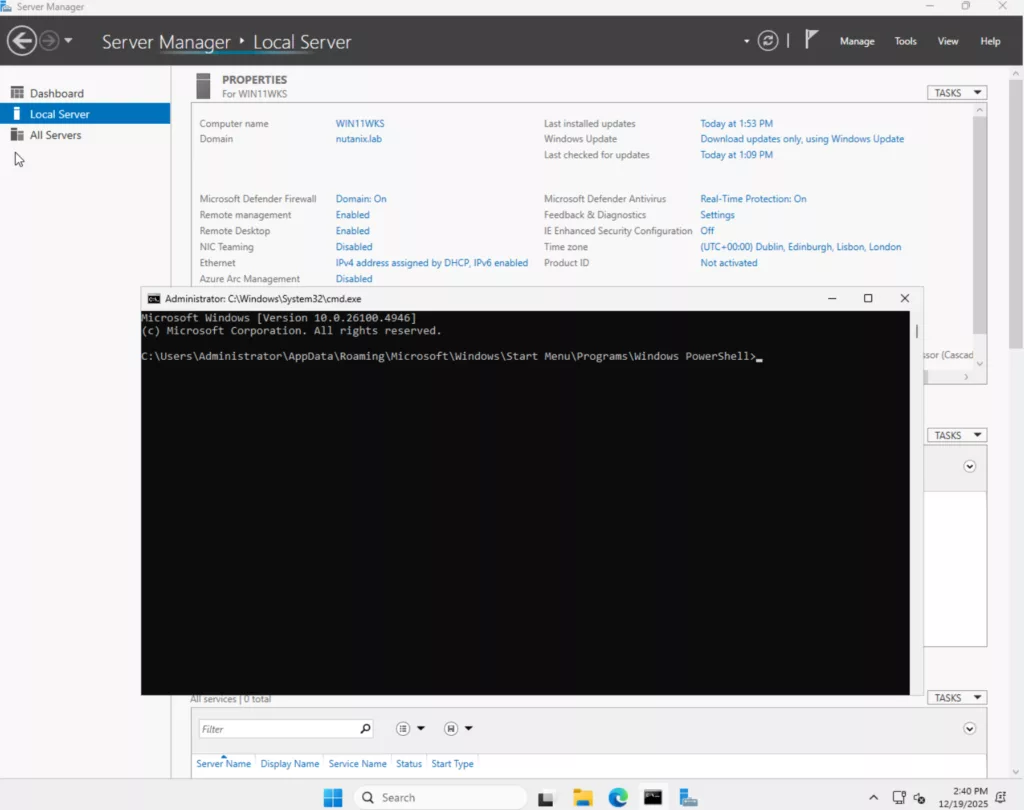
As you can see, domain joined and CMD started automatically. Pretty nice.

Nice been waiting for something like this having moved from VMWare its something we missed. Using djoin and Sven Groots Windows Answer File Generator is fairly good but its a 3 stage process, having to prestage the VM to the domain with djoin then generate the answer file and then finally deploy the VM.
The guest customization profile is not visible to domain joined users/accounts but only for local, and if you use local account then “Deploy VMs” on Templates menu gets grayed out so have not been able to test this so far.