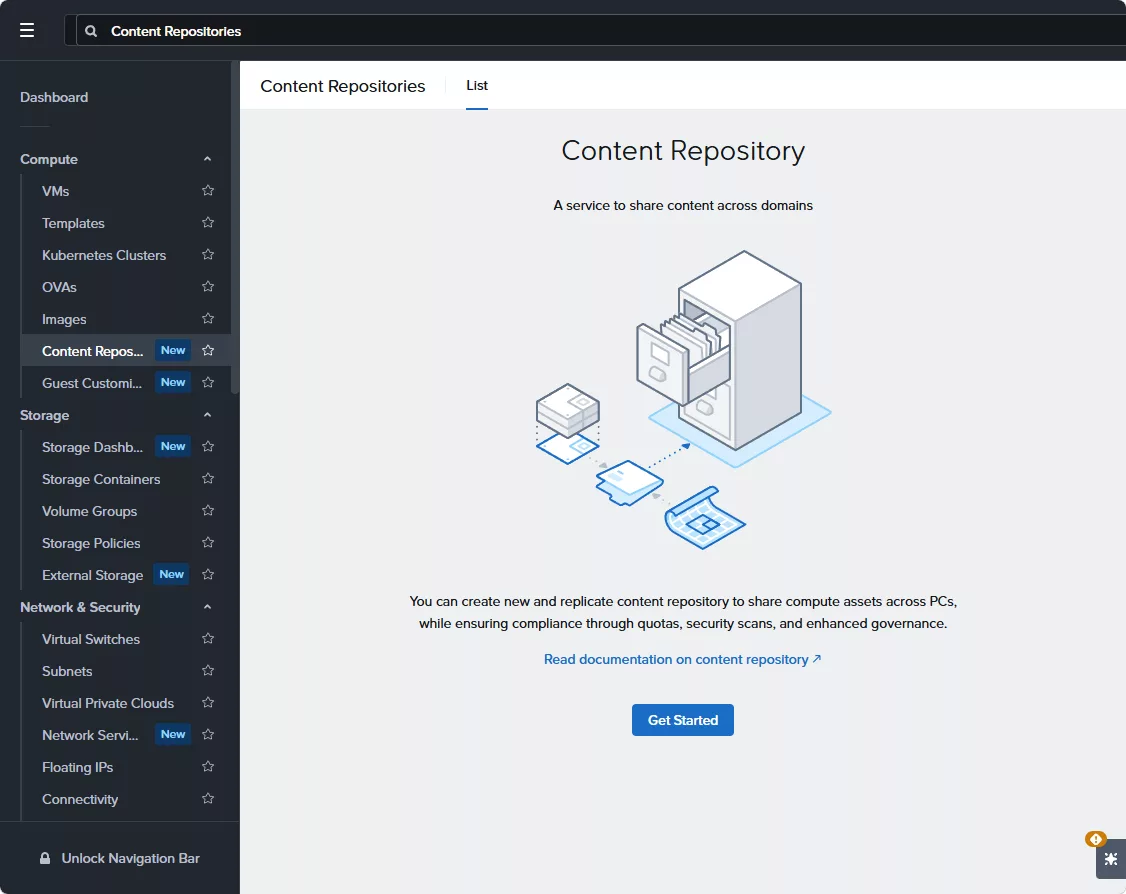
In Prism Central 7.6 there is a new menu item under Compute: Content Repositories. It has the blue “New” label next to it, so I had to click on it of course 😉 In this blogpost I will show you what it is and how-to create your first content repository and fill it with images.
What is a Content Repository?
According to the Nutanix documentation a content repository is a central place where you manage your VM images and keep them in sync across multiple Prism Central instances. You create the repository on one Prism Central, the source. Other Prism Centrals subscribe to it and become a target. When you add, update or delete an image on the source, these targets receive these changes when they synchronize. The target repositories are read-only, so all changes are done on the source.
If you have more than one Prism Central you know the pain. You upload the same Windows ISO and the same VirtIO drivers on every Prism Central, and after a while nobody knows which one is the latest version. This should fix that.
Limits and guidelines
Before you start, these are the limits from the documentation:
- A source Prism Central supports up to 32 content repositories (This should be enough 😉).
- Each content repository supports up to 128 items (Maybe this could be a thing to remember, but you can have 32 content repositories).
- The maximum size of an item is 200 GB (Hmm large disk images can be a problem).
- A target Prism Central can subscribe to a maximum of 8 remote content repositories (should be enough as well).
- A source content repository supports up to 16 target Prism Centrals.
Nutanix also advises to recreate items from a URL instead of migrating existing images, to save storage. Keep that in mind, because in my lab I’m doing exactly the opposite below 😉
Create a content repository
Go to Compute –> Content Repositories. When you open it for the first time you will see this screen. Click on Get Started.
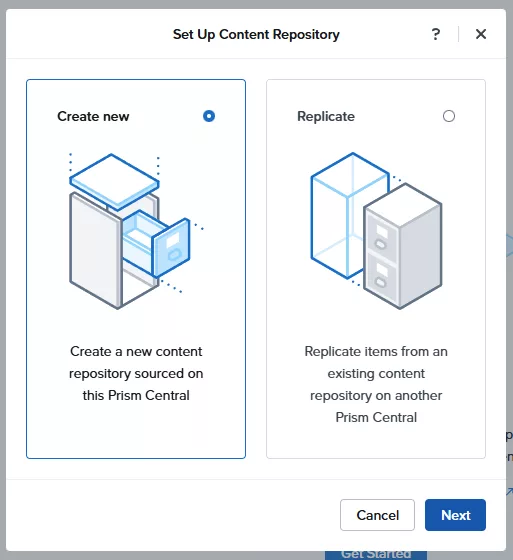
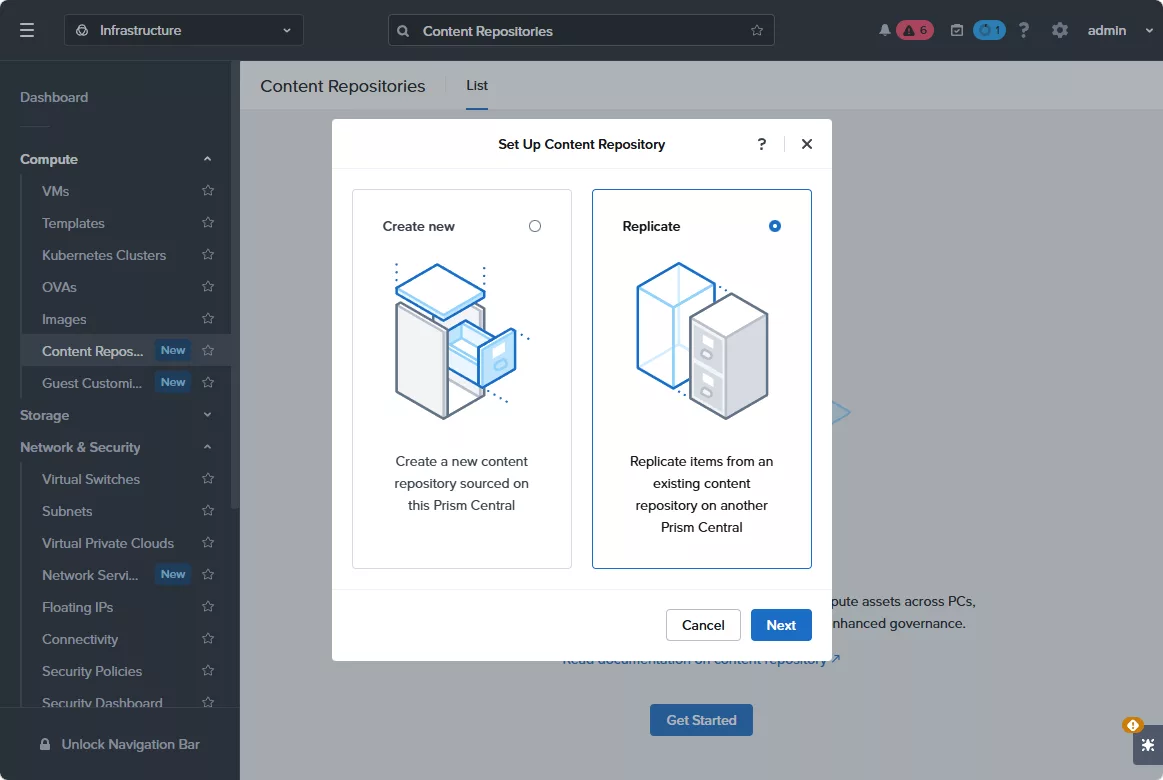
You get two options:
- Create new: Create a new content repository on this Prism Central.
- Replicate: Replicate items from an existing content repository.
This is the first repository, so I select Create new and click Next.
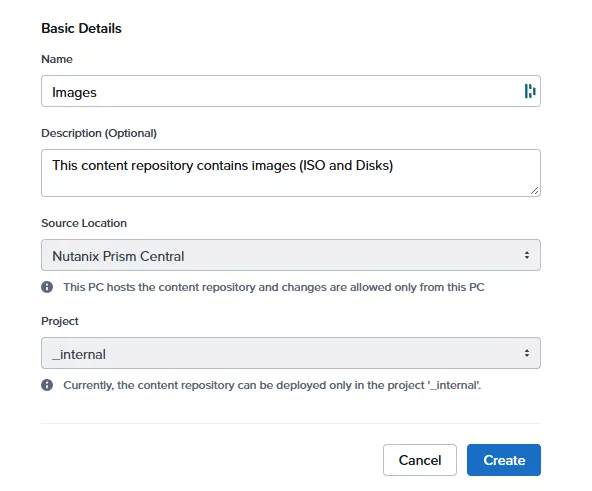
Fill in the details. I called mine Images, because it will contain my ISO’s and disk images. The source location is the Prism Central you are logged into, and only this Prism Central can make changes to the repository. Click Create.
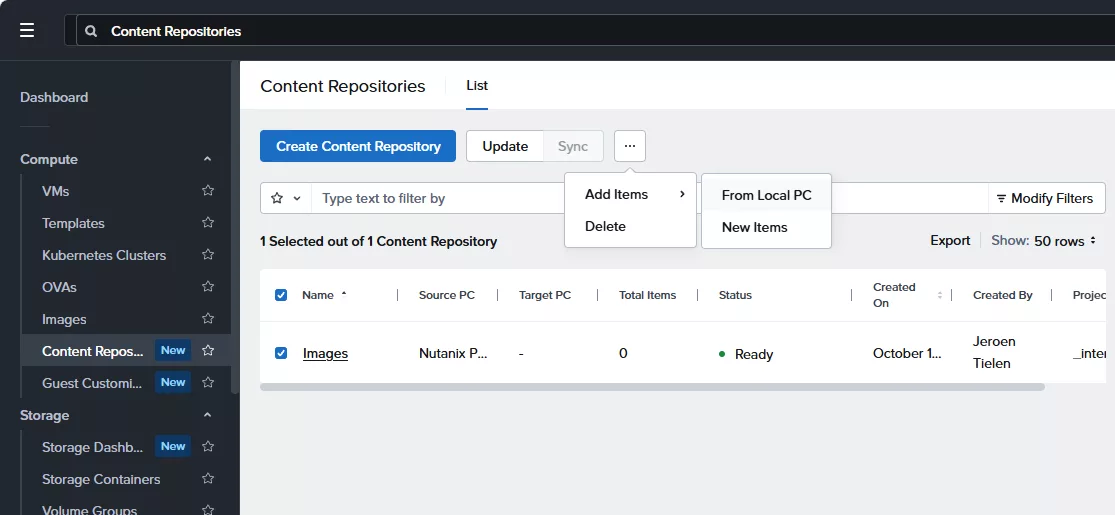
After a few seconds the repository is there with status Ready and 0 items. Time to fill it.
Add items
Select the repository and click on the three dots. Under Add Items you have two options: From Local PC and New Items. New Items adds an image from an image file or from a URL. From Local PC shows the images that are already on this Prism Central, so you don’t have to upload them again. That is the one I’m using here.
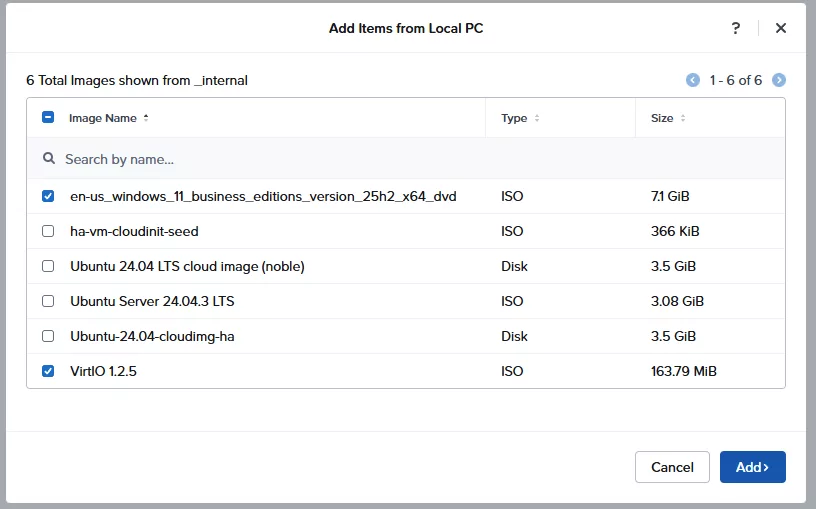
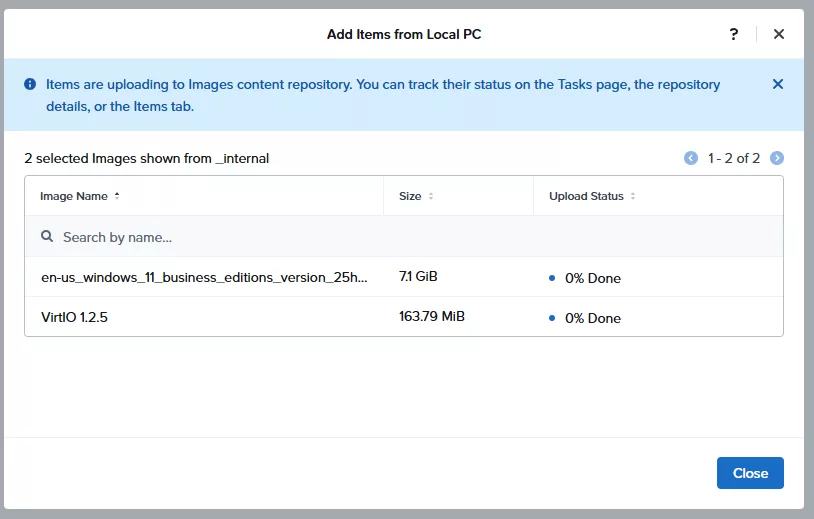
You get a list of all the images. In my lab these are six images. I selected the Windows 11 25H2 ISO and the VirtIO 1.2.5 ISO, because I need those two for almost every Windows VM I’m building. Click Add. The selected images are moved from the normal image list into the content repository.
The items are now uploading to the content repository. You can follow the progress on the Tasks page, in the details of the repository or on the Items tab. The Windows ISO is 7.1 GiB, so this will take a while. Grab a coffee.
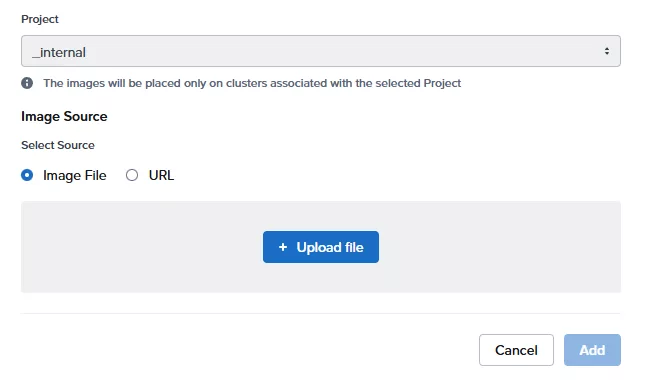
A new image that is not on Prism Central yet you add with New Items. This works the same as uploading a normal image. You choose Image File to upload a file from your own computer, or URL to let Prism Central download it.
Use an image from the content repository
When the upload is finished you can use the images like you always did, for example when you create a new VM. Click Attach Disk and select CD-ROM with the operation “Clone from Image”. In the image list you now see the name of the content repository behind the images that come from it. The other images in the list are the normal images on the cluster.
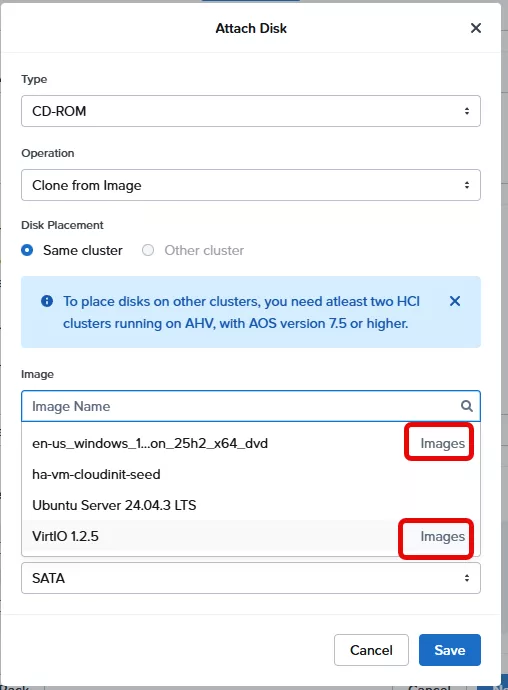
Placing the disk on another cluster is also possible, but then you need at least two Nutanix clusters running AHV.
Replicate to a second Prism Central
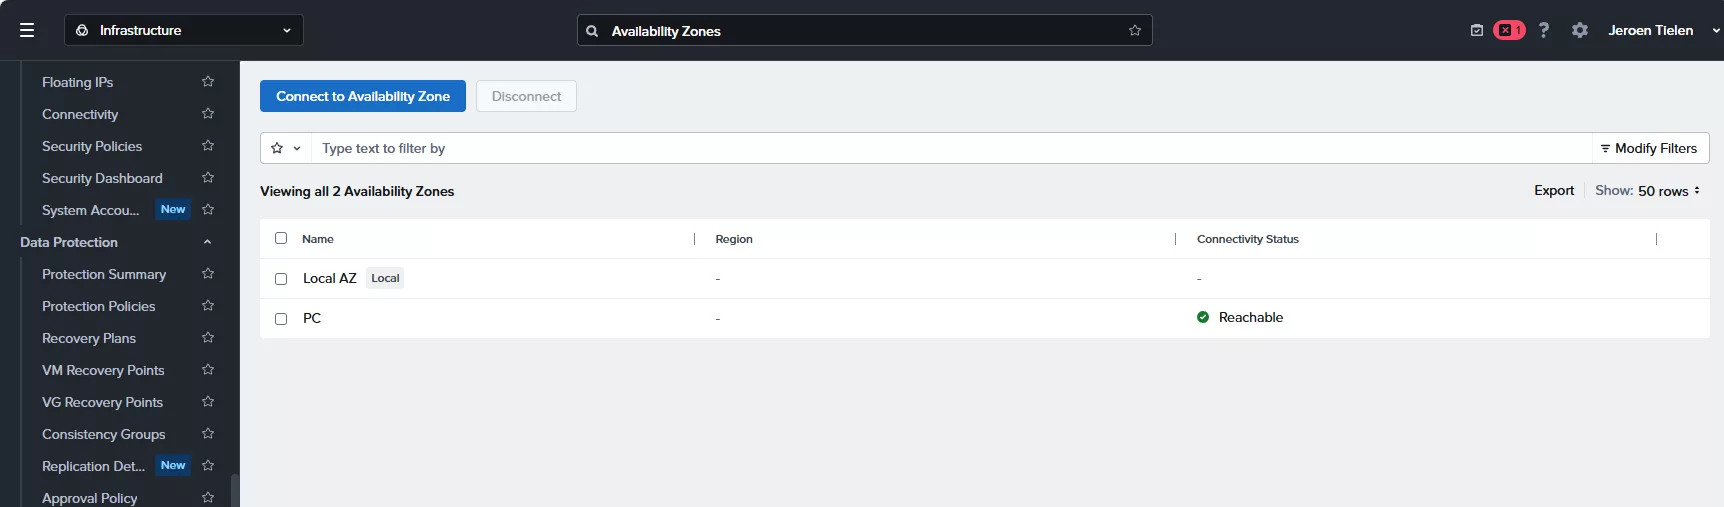
Now the fun part, sharing the repository with another Prism Central. For this I deployed a second Prism Central in my lab. First the two Prism Centrals need to know each other, and that is done with Availability Zones. Go to Administration –> Availability Zones and click Connect to Availability Zone.
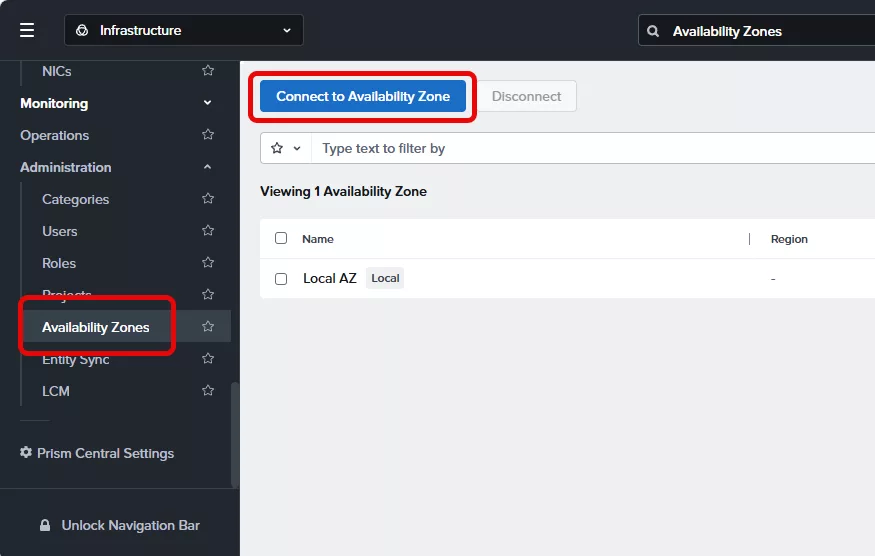
Connect it to the other Prism Central. When it is done you see the second Prism Central in the list, in my case PC, with the connectivity status Reachable. (I should have use better names for this 😉)
When the Prism Centrals are connected, log in on the second Prism Central and go to Compute –> Content Repositories. Click Get Started, but this time select Replicate and click Next.
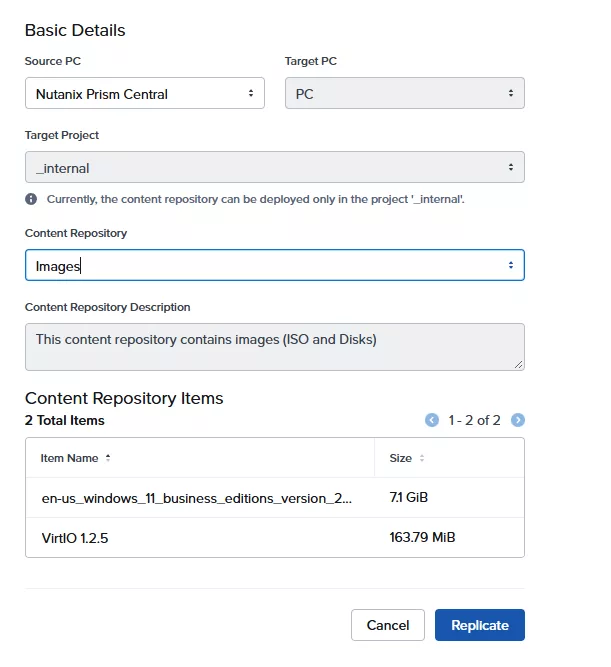
Now configure the replication. The Source PC is the Prism Central where the repository lives. In my lab that one is called “Nutanix Prism Central”. The Target PC is the Prism Central you are logged into, in my case “PC”, the temporary Prism Central I deployed for this blogpost (again, I should have used better names). Select the content repository, “Images”. You see the description and all the items in the repository, so you know what you get. Click Replicate.
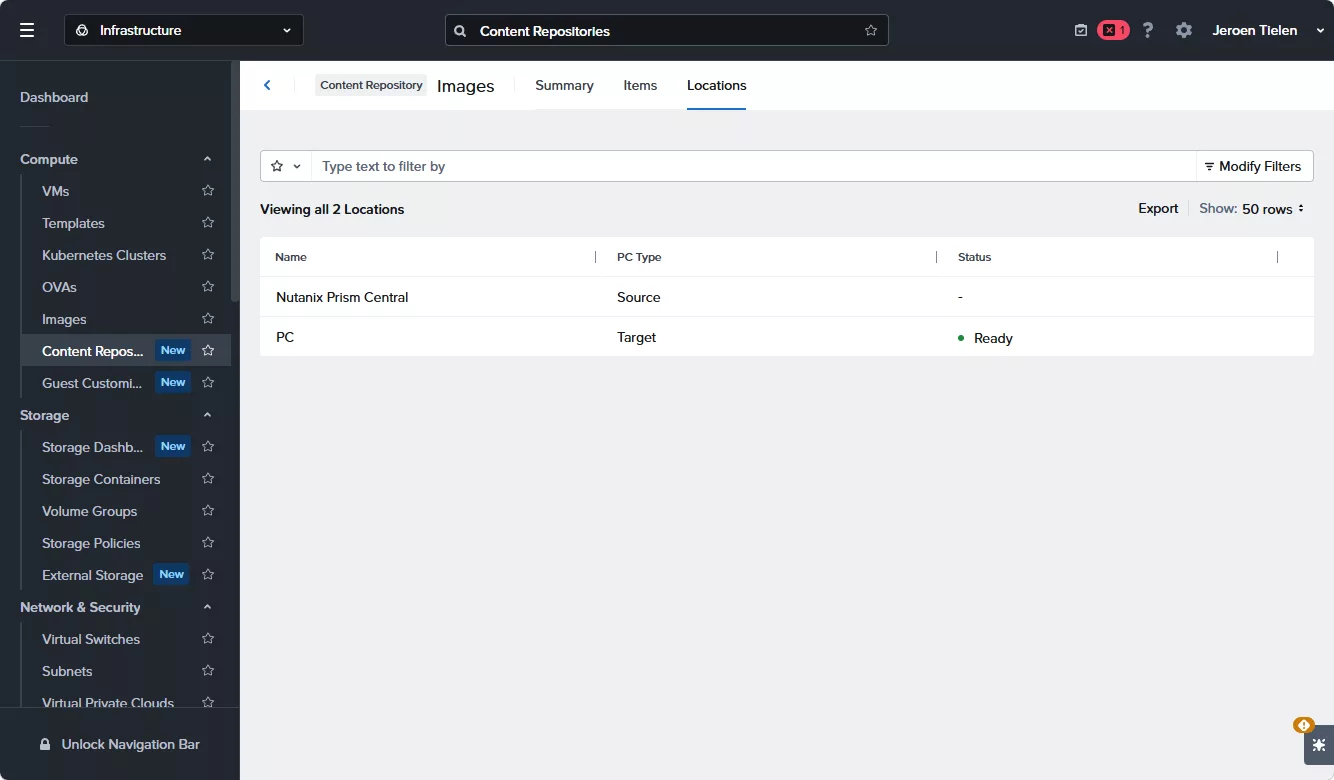
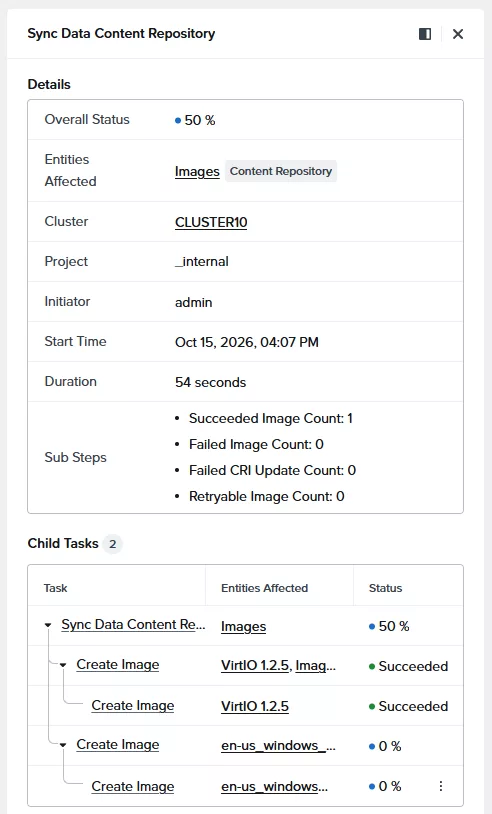
Back on the source Prism Central you can see the result. Open the content repository and go to the Locations tab. Here you see all the Prism Centrals that have this repository. Nutanix Prism Central is the source, and PC is now a target. The status says Ready, but don’t let that fool you: at this moment the items were still syncing to PC.
On the Tasks page you can follow the synchronization.
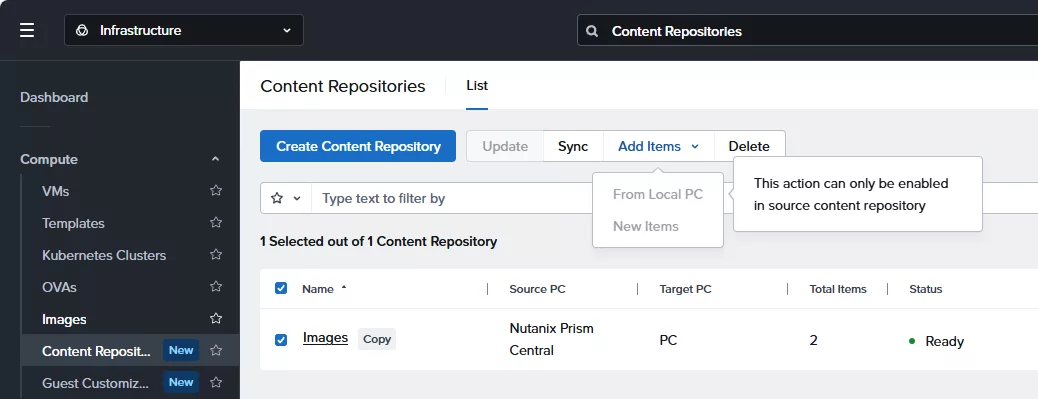
On “PC” the repository is now in the list with the label Copy. You see the source and target Prism Central, the 2 items and the status Ready. Remember the target is read-only. Sync and Delete you can use here, but “Update” and “Add Items” not. So new images you always add on the source, and the target gets them with the next sync.
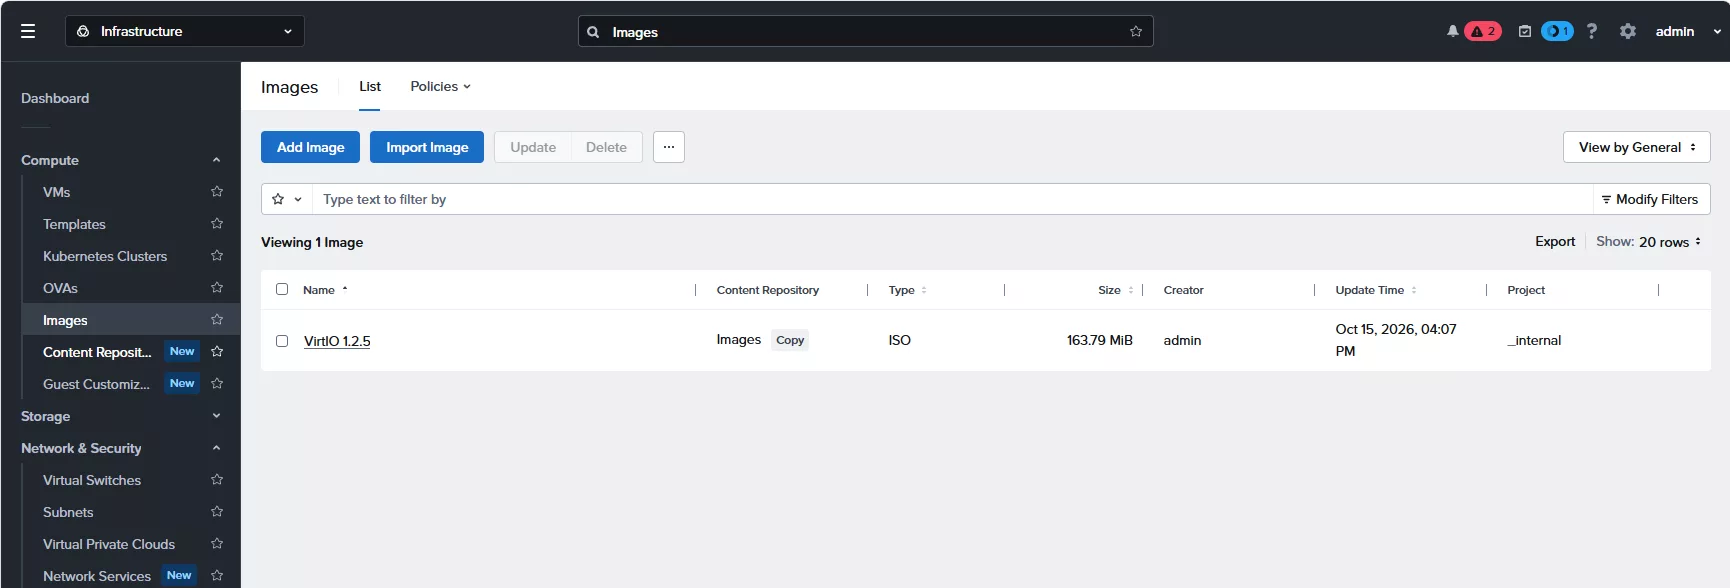
The images also show up in the normal image list on PC. VirtIO was already there, with Images and the label Copy in the Content Repository column. The Windows ISO was still syncing, so that one was not in the list yet. From here you can use them like any other image.
More information can be found in the Nutanix documentation: Content Repository in the Prism Central Infrastructure Guide.
Discover more from Jeroen Tielen
Subscribe to get the latest posts sent to your email.