In this blogpost I will show you how-to stretch a VLAN from a Nutanix cluster to a datacenter that is running a non-Nutanix environment (well actually it is my VLAN at home ;)). VMs and physical devices on both sides keep their IP address and default gateway so you can move workloads without re-IP’ing anything. Nutanix calls this a Subnet Extension “To a Third Party Data Center”.
How does it work? Nutanix deploys a small gateway VM on the cluster. That VM is a VTEP (VXLAN Tunnel End Point) and builds a VXLAN tunnel to a VTEP on the other side. On the other side you can use any device that speaks VXLAN and in my lab I used VyOS because it is free and easy to configure.
Hereby the building blocks:
- Local gateway: the gateway VM on the Nutanix cluster (the VTEP on the Nutanix side)
- Remote gateway: just a pointer in Prism Central to the VTEP on the other side
- Subnet extension: binds the VLAN subnet to the tunnel with a VNI
- Remote VTEP: the router or switch on the other side which bridges the VLAN into the tunnel
- Underlay: the routed network between both VTEPs, UDP 4789
Keep in mind that the gateway VM runs on one host and all traffic between both sites flows through that single VM.
I built this with Prism Central 7.6 so the labels can be a bit different in other versions.
Before you start
I ran into a couple of things in my lab so let me save you some time. Check these before you click anything.
!!! NTP must work !!! Make sure the NTP server configured in Prism Central actually answers. When it doesn’t the local gateway will stay DOWN with “Service ntp is down” and Prism Central refuses to create the extension with “Network gateway is not operational”. When you use a hostname for NTP then DNS must work too.
!!! Do not put the remote VTEP address in the stretched subnet !!! The gateway VM gets an interface in the stretched subnet. When the remote VTEP address is in that same subnet the gateway VM sends its VXLAN packets into the stretched subnet and nothing comes back. Give the remote VTEP an address in a separate transport network. Took me a while to figure this one out 😉
!!! Mind the MTU !!! VXLAN adds 50 bytes so for VMs on MTU 1500 the whole path between the VTEPs must handle at least 1550. In real life just set the underlay to 9000 everywhere: physical switches on both sides, the virtual switch on Nutanix, the underlay interface of the gateway VM, every routed hop and the remote VTEP. Dark fiber, an L2 line or MPLS with jumbo support will do. Over the internet or through an IPsec/WireGuard tunnel it won’t (see the end of this post).
!!! Put the VLAN on all uplinks !!! The stretched VLAN must be tagged on the switch ports of every node in the cluster. Otherwise only VMs on the same host as the gateway VM are reachable.
And the usual stuff:
- Flow Virtual Networking is enabled in Prism Central
- Both VTEP addresses can ping each other
- UDP 4789 is open in both directions between the VTEPs, no NAT
- The VLAN is not already connected to the other site (hello loop)
- No duplicate IP addresses on both sides
- One DHCP server, or pools that don’t overlap
- A free IP address in the stretched subnet for the gateway VM, outside the DHCP pool
In this blogpost I use these values:
| Parameter | Value |
|---|---|
| Stretched subnet | VLAN 192, 192.168.2.0/24 |
| Default gateway of the subnet | 192.168.2.254/24 |
| Gateway VM IP in the subnet | 192.168.2.252 |
| Nutanix underlay | VLAN 0, 10.0.0.0/24 |
| Local VTEP IP | 10.0.0.248 |
| Remote VTEP IP | 172.16.10.2 |
| VNI | 50192 |
| Underlay / overlay MTU | 9000 / 1500 |
The VNI can be anything as long as it is the same on both sides. I use 50000 + VLAN ID so I always know which tunnel belongs to which VLAN.
The screenshots are from my lab so the addresses there are a bit different from the table above.
Create the Local Gateway
Login into Prism Central and navigate to Network & Security –> Connectivity –> Gateways –> Create Gateway –> Local.
Now fill in all required informations:
- Name, for example
<Customer>-VTEP-Local. Make sure the name tells you what it is used for. - Cluster
- Gateway attachment: VLAN, and select the underlay subnet
- Static IP address (the local VTEP IP) and the default gateway of the underlay
- Gateway service: VTEP, VXLAN port 4789
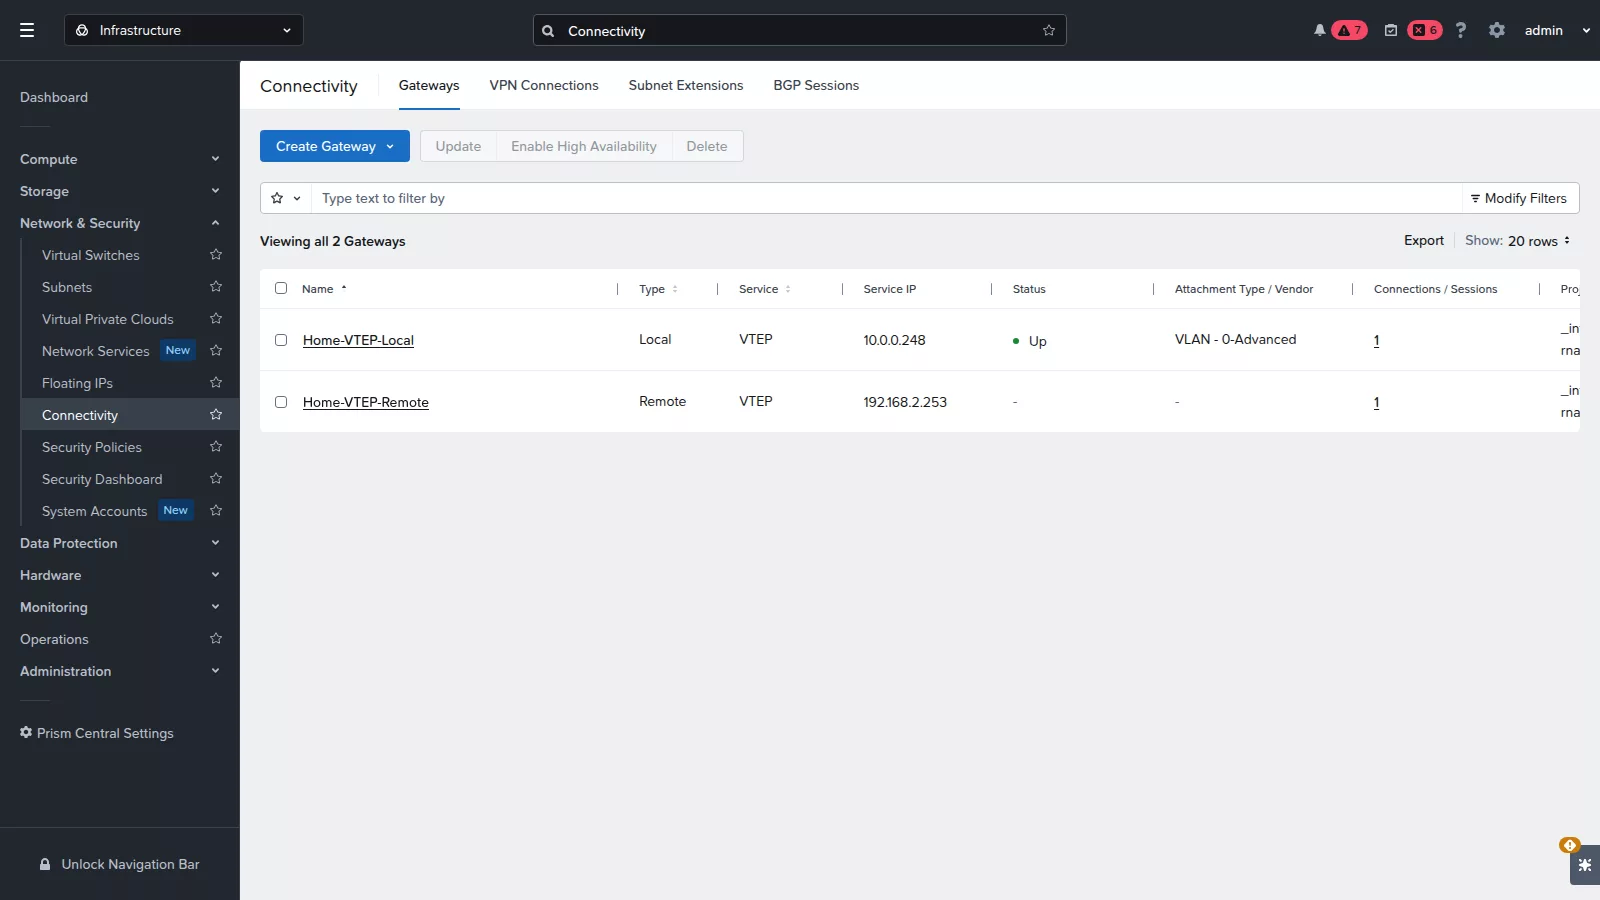
Click Save and grab a coffee. Prism Central now deploys the gateway VM and this takes a couple of minutes. When it is done the status is Up:
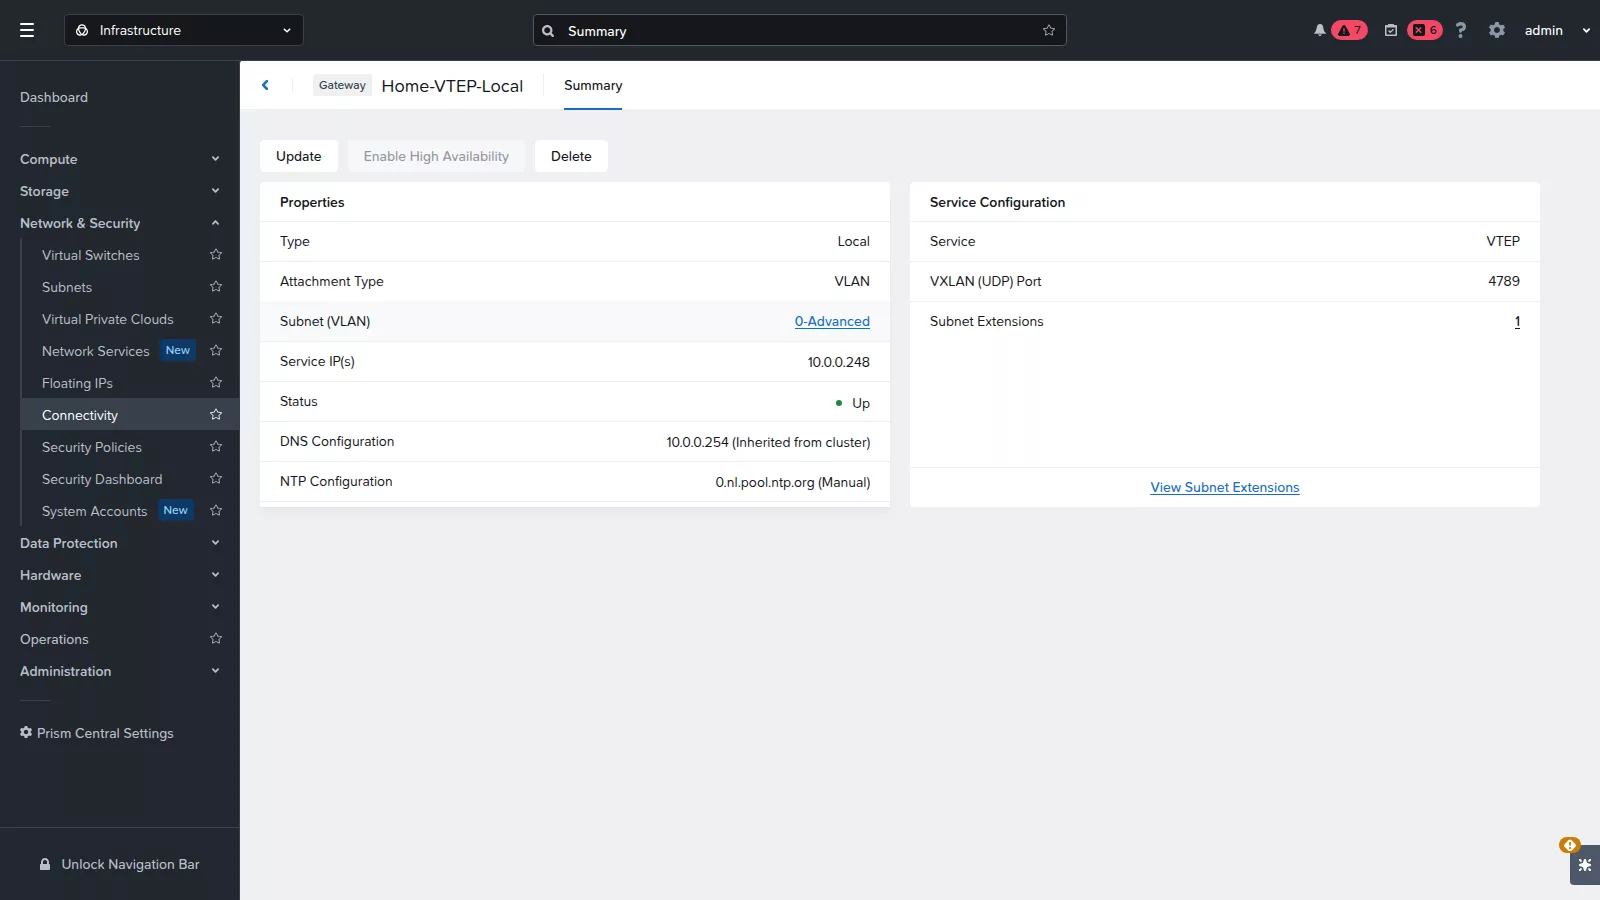
Click on the gateway to see the details, like the underlay subnet, the service IP, DNS and NTP:
Is the status DOWN with “Service ntp is down”? Fix NTP first as you can’t create the extension until the gateway is Up.
Also check the MTU: set the virtual switch and the physical uplinks to the underlay MTU and make sure the underlay interface of the gateway VM has the same MTU. Default this is 1500.
Create the Remote Gateway
Navigate to Gateways –> Create Gateway –> Remote and fill in:
- Name, for example
<Customer>-VTEP-Remote - Gateway service: VTEP
- The IP address of the remote VTEP and VXLAN port 4789
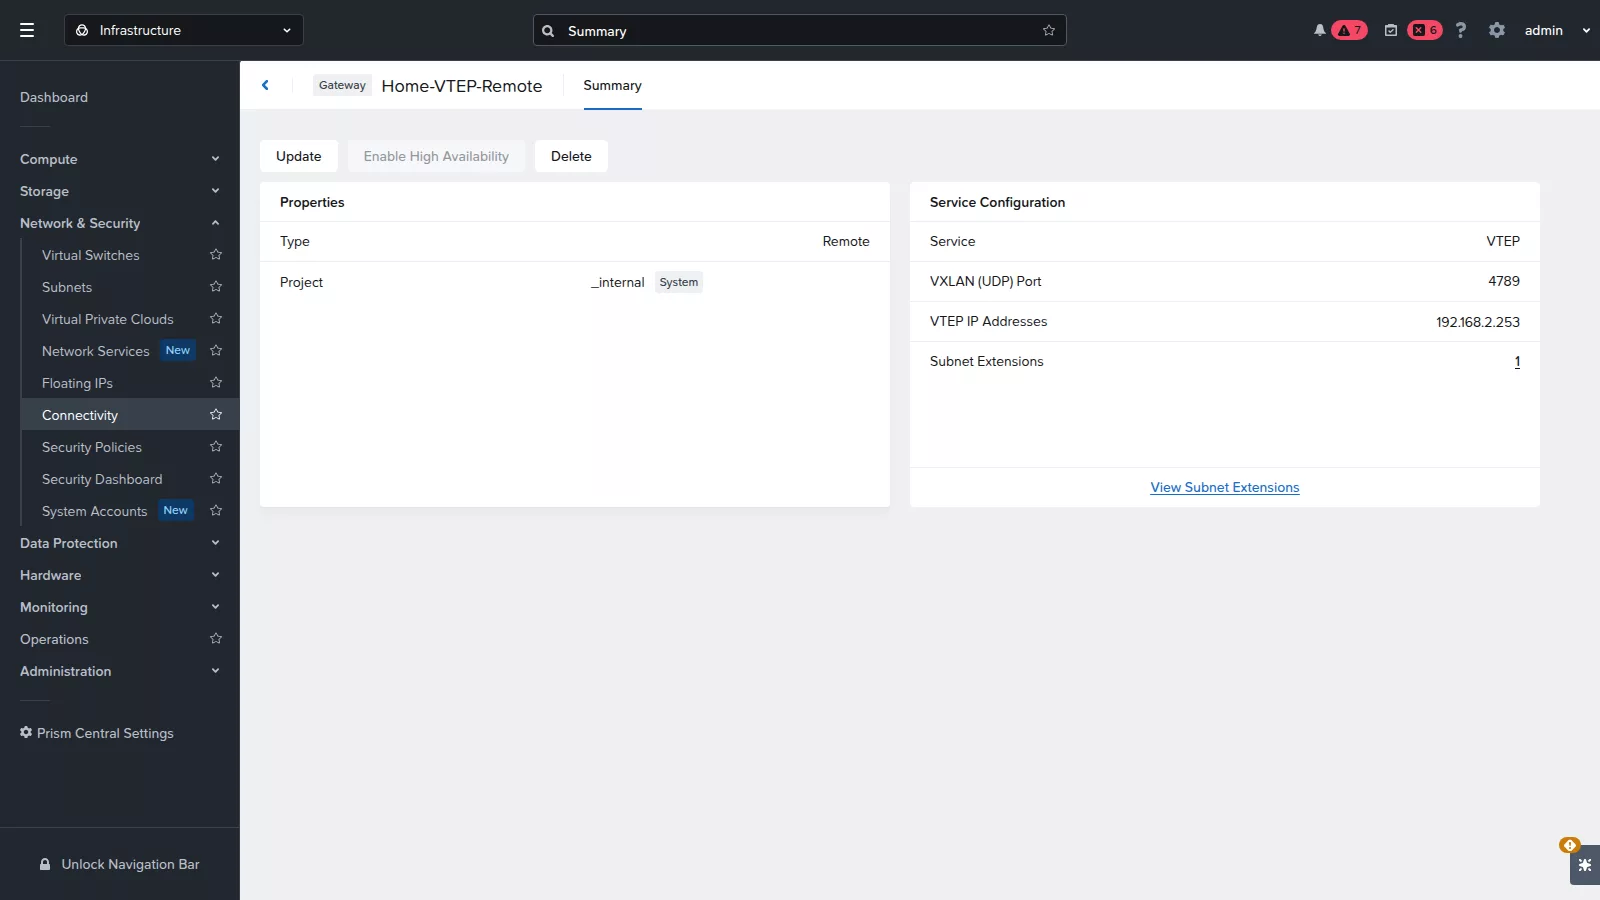
This is only a pointer so no VM will be deployed this time:
Create the Subnet Extension
Now the fun part. Navigate to Subnets, select the VLAN subnet you want to stretch and click Extend –> To a Third Party Data Center. Fill in:
- Local gateway: the one you just created
- Remote gateway: the one you just created
- Subnet type: VLAN
- Subnet: the VLAN subnet to stretch
- Gateway IP / prefix: the default gateway of the subnet, with prefix (192.168.2.254/24)
- Local IP: the free IP address for the gateway VM (192.168.2.252)
- VNI: 50192
- MTU: the overlay MTU (1500 with a jumbo underlay)
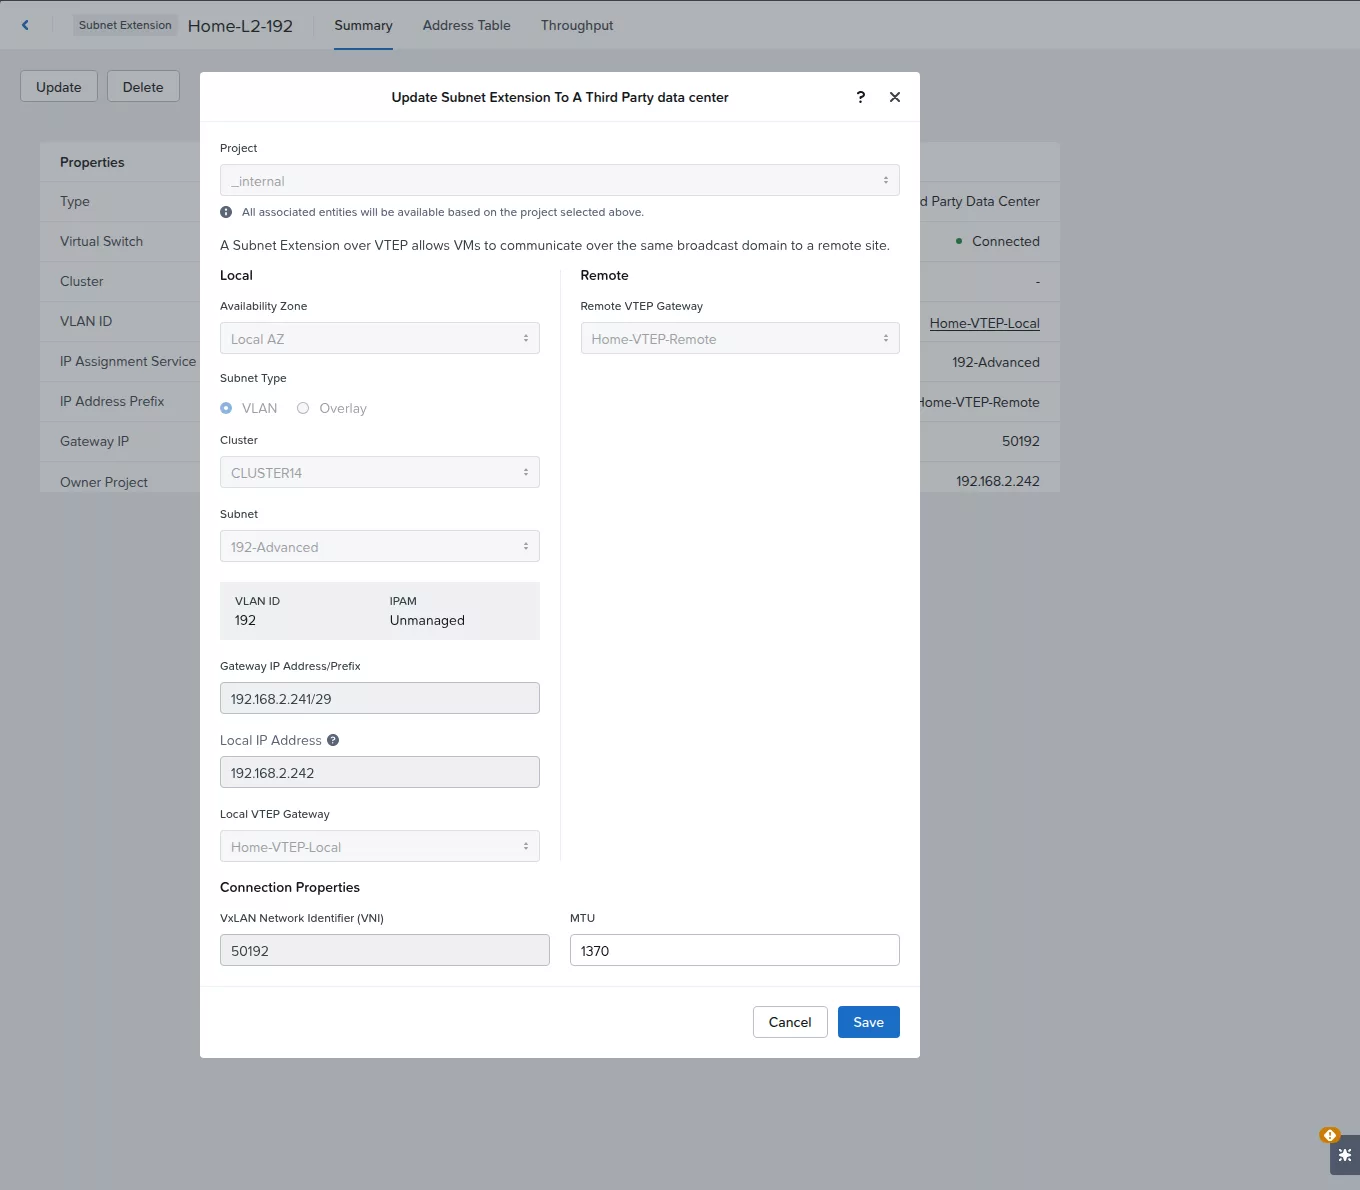
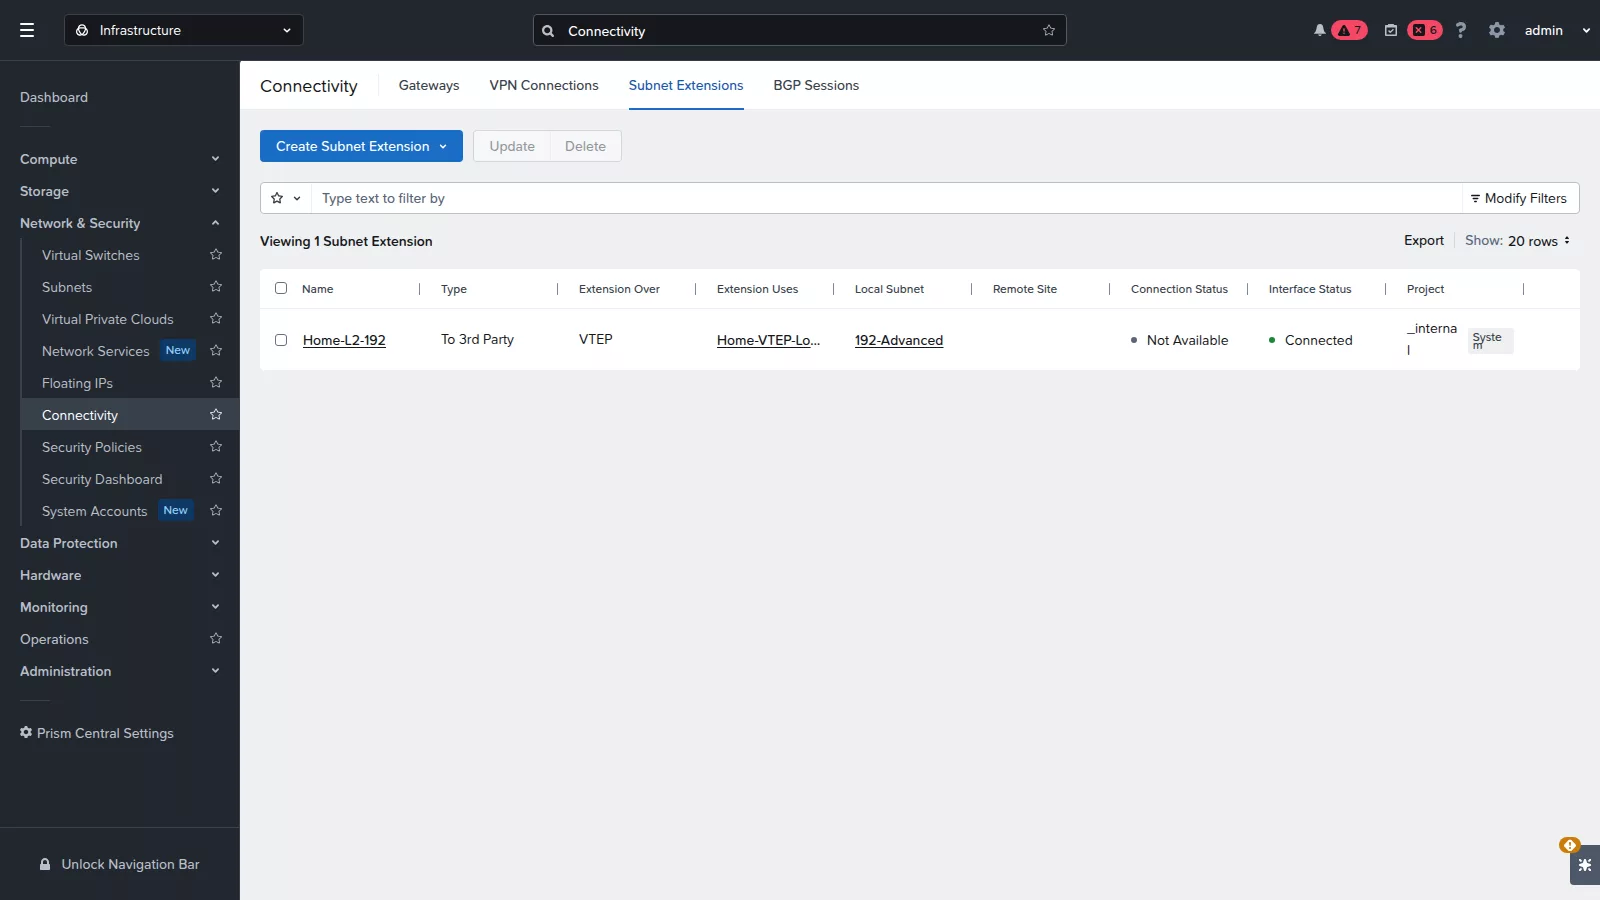
Click Save. Under Connectivity –> Subnet Extensions you will see the extension with Interface Status Connected:
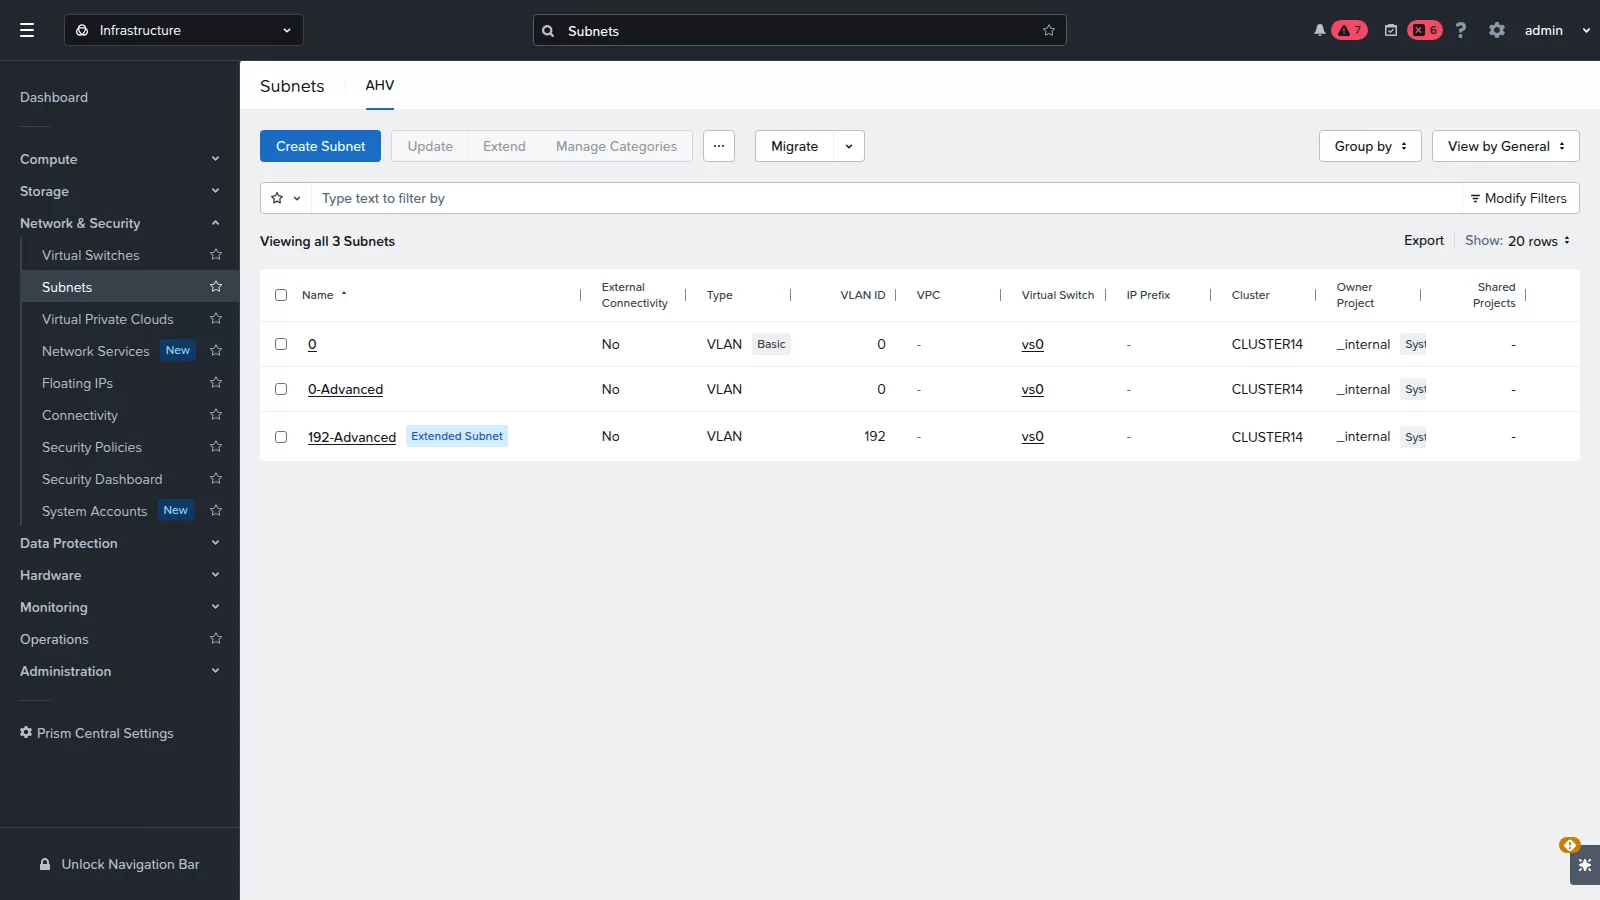
And in the list of subnets your VLAN now has the label Extended Subnet:
That’s it for the Nutanix side. On to the other side!
Configure the Remote VTEP (VyOS)
On the other side VyOS bridges the VLAN interface with a VXLAN interface. I use eth0 for the underlay and eth1 for the stretched VLAN. Use two separate interfaces: only the VLAN interface goes into the bridge so the underlay keeps its own MTU. Other vendors work exactly the same way: static VXLAN with one remote, same VNI and same port.
Below is the complete config for a fresh VyOS install. Run it the first time from the console (logged in with the default vyos user) and replace the values with your own:
configure

# Basics: hostname and change the default password
set system host-name <customer>-vtep01
set system login user vyos authentication plaintext-password '<new password>'

# Underlay, also used for management
set interfaces ethernet eth0 description 'UNDERLAY'
set interfaces ethernet eth0 address 172.16.10.2/30
set interfaces ethernet eth0 mtu 9000
set protocols static route 0.0.0.0/0 next-hop 172.16.10.1

# Enable SSH, only on the underlay address
set service ssh port 22
set service ssh listen-address 172.16.10.2

# DNS and NTP
set system name-server <DNS server>
delete service ntp server
set service ntp server <NTP server>

# VXLAN tunnel to the Nutanix local gateway
set interfaces vxlan vxlan50192 description 'L2 stretch VLAN 192'
set interfaces vxlan vxlan50192 vni 50192
set interfaces vxlan vxlan50192 source-address 172.16.10.2
set interfaces vxlan vxlan50192 remote 10.0.0.248
set interfaces vxlan vxlan50192 port 4789
set interfaces vxlan vxlan50192 mtu 1500

# Bridge between the local VLAN and the tunnel
set interfaces ethernet eth1 description 'STRETCHED_VLAN'
set interfaces bridge br0 description 'VLAN 192 + VXLAN 50192'
set interfaces bridge br0 member interface eth1
set interfaces bridge br0 member interface vxlan50192

commit-confirm 5
Now type confirm and save. If you don’t confirm then VyOS rolls back the change after 5 minutes. Very handy when you lock yourself out 😉
Some notes:
- The bridge does not need an IP address.
- Always set the port to 4789. Older Linux implementations use 8472 by default.
- Is the VLAN coming in tagged? Use a subinterface (
eth1.192) as bridge member. - Allow UDP 4789 from the local VTEP IP on the underlay interface.
Test it
Do the tests in this order as every test builds on the previous one:
- Underlay. Ping the local VTEP IP from the remote VTEP. Did this work before you created the extension and now it doesn’t? Then the remote VTEP address is in the stretched subnet (see above).
- Tunnel traffic. Run
sudo tcpdump -ni eth0 udp port 4789on VyOS. You should see packets to and from the local VTEP IP. - L2 over the tunnel. Run
sudo arping -I br0 <VM-IP>on VyOS. You should get the MAC address of the VM itself. - Every host. Repeat the arping for a VM on every node in the cluster. Only the VM on the same host as the gateway VM answers? Then the VLAN is missing on the switch uplinks.
- MTU.
ping -M do -s 1472 <VM-IP>from a device on the other side must work with an overlay of 1500. - Real traffic. Ping and copy a big file between a device on the other side and a VM, in both directions.
- Gateway. A VM on Nutanix can reach the default gateway of the subnet and an address outside the subnet.
Troubleshooting
| Symptom | Cause | Fix |
|---|---|---|
| Local gateway DOWN, “Service ntp is down” | NTP server doesn’t answer or can’t be resolved | Configure a working NTP server and wait a few minutes |
| “Network gateway is not operational” when creating the extension | Local gateway is not Up | Fix the gateway status first |
| Underlay ping to the local VTEP stops when the extension is created | Remote VTEP address is in the stretched subnet | Give the remote VTEP an address in a separate transport network |
| Only outgoing VXLAN traffic, nothing comes back | Same cause, or a firewall blocking UDP 4789 | Check addressing and firewall |
| Only VMs on one host are reachable | VLAN missing on the uplinks of some nodes | Add the VLAN tagged on all node uplinks |
| Small pings work, big transfers hang | Underlay MTU smaller than overlay MTU + 50 | Raise the underlay MTU or lower the overlay MTU |
| Bridge on VyOS gets a lower MTU | A bridge takes the lowest MTU of its members | Keep the underlay out of the bridge (separate interface) |
| Duplicate IPs or changing DHCP leases | Two DHCP servers or overlapping pools | One DHCP server or separate pools |
No jumbo frames on the WAN?
Can the connection between the sites not handle 1550 bytes? Then the overlay has to go below 1500. Set the overlay MTU to the measured path MTU minus 50 and use the same value on both sides. The default of 1392 that Nutanix suggests assumes a connection over the internet with a tunnel. After that you have two options:
- Lower the MTU on the VMs and devices in the subnet to the overlay MTU. Works for all traffic, but you have to change every machine, also on the other side.
- MSS clamping on the remote VTEP. Easier, but only works for TCP. Big UDP packets and big pings will still be dropped.
Final words
I tested all of this in my lab with Prism Central 7.6 and VyOS (with one interface on VyOS and an overlay MTU of 1370). That is where I ran into the NTP issue, the VTEP address in the stretched subnet, the missing VLAN on the uplinks and the MTU behaviour of the bridge.
The production setup from this blogpost (with a separate transport network, two interfaces and an overlay of 1500 over a jumbo underlay) I didn’t test yet. Same goes for MSS clamping. So test it in your own lab first before you roll this out at a customer 😉
You can use this in a VPC as well. 😉
Have fun stretching!
Discover more from Jeroen Tielen
Subscribe to get the latest posts sent to your email.